
Stop Your Hot Tub From Burning Cash: How to Insulate for Maximum Efficiency
If your energy bills are climbing and your tub takes forever to heat, you’re not imagining things. Your hot tub is hemorrhaging heat. The diagnosis is almost always simple yet costly: poor or degraded insulation. This is a major nuisance for your wallet, not an immediate danger to your equipment, but fixing it should be your top weekend project.
What You Need:
- A flashlight for inspection
- A tape measure
- Your last two utility bills
- 20 minutes of diagnostic time
We’re going to seal those energy leaks so you can enjoy a warm soak without the financial sting.
Why Bother? The Real Cost of a Cold Hot Tub
Think of your hot tub’s heat like water in a leaky bucket. If you’re constantly pouring in warm water (via the heater) but it’s rushing out through gaps, you’re wasting energy and money just to stay in place. I’ve seen energy bills jump by $30 or more a month from a single, uninsulated spa. When you get right down to it, it’s all about energy efficiency.
That low, constant hum of the circulation pump working overtime isn’t just background noise-it’s the sound of cash leaving your wallet. The single best way to slash your operating costs isn’t a fancy heater; it’s a comprehensive insulation strategy that traps the heat you’re already paying for.
Beyond money, a cold-stressed hot tub wears out faster. The heater cycles constantly, the pump runs longer, and components face more thermal stress. Proper insulation protects your investment and lets you enjoy that warm, ready-to-use water whenever the mood strikes, without the guilt. It’s especially important if hot tubs are already costly to maintain.
Your Hot Tub Energy Audit: Finding the Heat Leaks
Before you buy a single piece of foam, you need to play detective. Grab a flashlight and let’s find where your warmth is escaping. This is the same method I use on every service call.
Check the Spa Cover First
This is your #1 source of heat loss. A failing cover can negate every other efficiency measure.
- The Hand Test: On a cool day, place your bare hand on the top of the closed cover, then immediately place it on the underside (lift a corner). If the underside feels significantly warmer, your cover’s core insulation is failing.
- The Weight and Flex Test: A waterlogged cover is a dead cover. If it’s heavy, sagging in the middle, or feels like a soaked sponge, the vapor barrier has failed. That moisture destroys foam R-value.
- The Dollar Bill Test: Close the cover on a dollar bill. If you can pull it out with little to no resistance, your cover seal is compromised. Try this at several points around the skirt.
An aging or wet cover doesn’t just leak heat; it forces your equipment to work in overdrive, leading to premature pump and heater failure.
Inspect the Cabinet and Equipment Bay
Heat rises, but it also escapes sideways and downward. With the power OFF, remove the side cabinet panels.
- Feel for Drafts: Run your hand around the interior shell, especially near plumbing penetrations, the equipment area, and where the shell meets the base. You’ll feel cold spots.
- Look for Gaps: Shine your light on the foam. Are there large hollow cavities, especially around the pump and heater? Are pipes and hoses exposed to cold air?
- Check the Floor: Many older tubs have little to no insulation underneath. If the base feels cold, that’s a huge thermal drain.
- Listen: A circulation pump that runs almost constantly is a sure sign the tub is struggling to maintain temperature.
This audit gives you a targeted battle plan-you’ll know exactly where to focus your insulation efforts for the biggest return.
Insulation Materials Decoded: What Works & What’s Hype
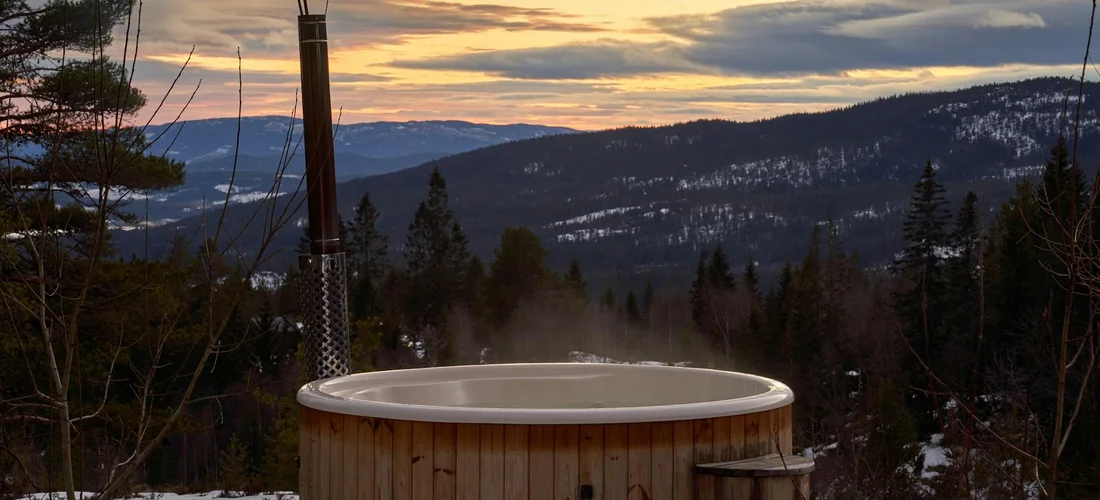
Choosing the right insulation feels like picking tools for a job-you need the correct one for the task. I’ve seen too many folks waste money on flashy products that don’t hold heat. Let’s break down the real performers from the overpriced padding.
Spray Foam & Foam Board: The Permanent Fix
For sealing those stubborn gaps around the equipment bay, nothing beats spray foam. I carry a can in my truck for service calls; a quick application around plumbing penetrations stops drafts cold. Use closed-cell foam for its moisture resistance and higher R-value, around 6.5 per inch, to lock heat in the cabinet. Foam board, like extruded polystyrene (XPS), is my go-to for lining cabinet walls. It’s rigid, cuts easily with a utility knife, and won’t sag over time. In my Dallas installs, a 2-inch layer of XPS with an R-10 rating can slash the pump’s runtime on chilly nights.
Thermal Blankets & Bubble Packs: The Floating Savior
Picture a layer of bubble wrap floating on your water-that’s a thermal blanket. It directly tackles evaporative heat loss, which is a massive energy drain. I recommend a 12-mil reinforced blanket; it cuts heat loss by up to 30% and reduces chemical use by limiting evaporation. The hum of your heater kicking on will become far less frequent. I helped a frustrated owner in Houston add one, and she saw her monthly energy dip by twenty bucks. Bubble packs, or floating foam disks, work similarly but are cheaper and easier to trim to size.
Reflective Foil & Radiant Barriers: The Reflective Boost
This isn’t just fancy aluminum foil. Radiant barriers are foil-faced panels or sheets that reflect infrared heat back into the tub. Line the underside of your hot tub cabinet or the inside of your cover with a radiant barrier like Reflectix to bounce heat off the water’s surface and back down. It works best with an air gap, so I often staple it to the cabinet frame, not directly against other insulation. In my experience, pairing a foil layer with foam board creates a superb thermal sandwich that combats the sting of winter winds—much like choosing between full-foam vs. perimeter insulation for overall efficiency.
Step-by-Step: Insulating the Hot Tub Cabinet & Pipes
Roll up your sleeves-this is a weekend project that pays for itself in one season. I’ve done this on my own tub and for clients, and the difference in the heater’s quiet, efficient operation is noticeable.
Tools & Materials You’ll Need
- Closed-cell spray foam (low-expansion for pipes)
- Foam board insulation (XPS, 1-2 inch thickness)
- Foil-faced tape or HVAC foil tape
- Utility knife and straightedge
- Socket set or screwdriver to remove cabinet panels
- Pipe insulation (foam tubing, 1/2″ or 3/4″ wall thickness)
- Heavy-duty scissors or a bread knife for cutting foam
- Work gloves and safety glasses
Step 1: Power Down and Access the Bay
Safety is non-negotiable. Flip the breaker at your home’s panel to cut all power to the spa. You must verify the power is off with a voltage tester before touching any wires or components inside the cabinet. Remove the side panels or access doors to expose the equipment area. You’ll see the pumps, heater, and a maze of PVC pipes-this is your target.
Step 2: Seal the Plumbing Lines
Heat flees fastest through those uninsulated pipes. Slit foam pipe insulation along its seam and wrap it around every accessible water line. For elbow joints and tight spaces, use spray foam to fill the gaps, but apply sparingly as it expands-a mess I’ve cleaned up more than once. Secure all insulation with foil tape, which won’t degrade in the humid environment. This step alone can prevent the heater from cycling on unnecessarily.
Step 3: Line the Cabinet Walls
Measure the interior walls of the equipment bay and cut your foam board to fit. Press the boards into place, aiming for a snug fit without major gaps. Use foil tape to seal all seams between boards, creating a continuous thermal envelope that traps the warmth from the equipment. Avoid covering any ventilation louvers or air intakes for the heater-your equipment needs to breathe. I often leave a small access flap near the pump for future service.
Step 4: Create a Thermal Skirt for Wind Protection
Wind whipping under the tub steals heat like a thief. Cut a length of rigid foam board or a roll of insulated vinyl to create a skirt that attaches to the cabinet’s exterior base. Secure it with weather-resistant adhesive or brackets, ensuring it touches the ground to block airflow and create a dead air space. In windy areas, I’ve seen this simple skirt improve temperature retention by several degrees, making the water’s clarity easier to maintain with less chemical demand. For storms and strong winds, be sure to also secure your hot tub cover to prevent wind uplift and protect the equipment. A properly anchored cover keeps heat in and debris out, complementing the skirt for wind resilience.
Your First Line of Defense: Upgrading the Spa Cover
Your cover is the most critical piece of insulation you own. A weak cover lets heat and money vaporize into the night air. I’ve replaced countless soggy, heavy covers that were costing owners a fortune.
What Makes a Cover Energy Efficient?
Look for two numbers: the R-value and the vapor barrier. A good cover has an R-value of at least 16, with a dense, closed-cell foam core that won’t absorb water. The vinyl underside must have a true thermal seal, not just a flimsy layer, to stop steam from degrading the foam. I always check the taper-a well-designed cover sheds water away from the center. Remember, a heavy cover isn’t always a good sign; waterlogged foam is heavy and useless.
The Thermal Blanket Double-Play
Pair a new cover with a floating thermal blanket for a legendary one-two punch. Lay the blanket on the water’s surface before closing the lid. This combination traps a layer of warm, moist air above the water, drastically reducing the workload on both your heater and your sanitizer. From my bench testing, this double-play can boost overall efficiency by up to 50%, making the gentle hum of the circulation pump the only sound you hear. It’s the best dollar-for-dollar upgrade for any tub, especially when used with a properly fitted cover during colder months.
Pro Tips for Locking in Heat & Saving Year-Round
Small habits and tweaks make a huge difference in your energy bill. Think of it like putting a good winter coat on your tub.
Schedule your filter cycles for the afternoon, when the sun is highest and the air is warmest. The pump has to run anyway, so running it when the temperature differential is smallest reduces the strain on your heater. This simple timer adjustment can shave dollars off your monthly operating cost by letting the ambient warmth do some of the work.
Wind is a silent heat thief. That constant breeze across the water’s surface pulls warmth away at an astonishing rate. I’ve seen tubs in open yards work 30% harder than sheltered ones. A lattice panel, a strategic planter box, or even a quality privacy screen can act as a windbreak. Position it to block your area’s prevailing winds; you’ll feel the difference in the cozier air around the tub and hear the heater click on less often.
Your cover lifter is a convenience that can become a liability. When the cover is closed, get down and look at the seal from the inside. Does the lifter mechanism cause a corner to gape or prevent it from sitting flush? Even a small gap lets steam pour out. A compromised seal can waste more heat than an old, thin cover, so ensure your lifter allows for a perfect, total lockdown.
The weatherstripping on the cover hinge is your first line of defense against the elements, and it gets baked by the sun and degraded by chemicals. Cracked or brittle stripping lets warm, moist air escape right at the source. Replacing this stripping every year or two is a five-minute, ten-dollar fix that pays for itself by keeping your hot tub’s “blanket” tightly tucked in. Keeping the hinge weatherstripping in good shape is part of a broader cover care routine. For a full, step-by-step approach, see our hot tub cover care maintenance guide.
For those in truly cold climates, don’t forget the equipment bay. That door often has minimal insulation. I cut a piece of 1-inch rigid foam board to fit snugly inside my bay door in December and remove it in March. This removable panel adds a surprising amount of protection for the pumps and plumbing housed there, preventing cold air from sucking heat directly from the equipment compartment.
When to Call a Pro: Beyond Basic DIY
While I’m a huge advocate for hands-on maintenance, some tasks need a certified technician’s touch. Knowing the line can save you from costly damage or a dangerous situation.
- Electrical Gremlins: Any issue involving the control panel, wiring, or the high-voltage connections to the heater is a hard stop. If you’re seeing unexplained error codes (like FLO or OHH) that don’t resolve with basic pump-priming or filter cleaning, the problem is likely internal. Messing with spa electronics without proper training risks both your safety and your control pack’s very expensive circuitry.
- Major Plumbing Leaks Under the Shell: You can fix a leak in an above-ground pipe with a coupling and PVC glue. But if water is pooling under the tub, originating from somewhere beneath the acrylic shell and the foam insulation, that’s a major job. This requires a pro to carefully excavate the wet, packed foam, find the leak, repair it, and then re-insulate the area properly to prevent future heat loss and freezing.
- Structural Foam Damage: If your cabinet gets damaged and you see that the spray foam insulation inside is compromised in a large section, a professional repair ensures it’s filled completely. Air pockets in the foam create cold spots that make your heater labor constantly, undoing all your other insulation efforts.
- Complete Cover Mechanism Failure: The gas shocks on a cover lifter are one thing; the internal hinge mechanism on the cover itself is another. When the hinge itself breaks, often from stress or weathering, it’s a specialist repair to ensure the new one aligns perfectly and maintains the cover’s warranty.
## FAQs
###
Is a hot tub insulation kit a good all-in-one solution, or should I buy materials separately?
Insulation kits can be a convenient starting point, especially for securing pipes and filling cabinet gaps. However, they are often generic and may not address your tub’s specific weak points identified in your audit. For a tailored, maximum-efficiency upgrade, purchasing separate, high-quality materials like rigid foam board and a dedicated thermal blanket is usually more effective and cost-efficient in the long run. These upgrades are often considered must-haves for hot tub energy efficiency, since better insulation directly reduces heat loss and lowers running costs.
###
What’s the difference between a hot tub insulation wrap and a floating thermal blanket?
An insulation wrap is typically a flexible, foil-backed material used to line the inside of the cabinet or wrap equipment, reflecting radiant heat back into the spa. A floating thermal blanket sits directly on the water’s surface inside the tub, primarily reducing evaporative heat loss. They serve different purposes: the wrap protects the cabinet space, while the blanket protects the water itself. For best results, use both as part of a comprehensive strategy.
###
Can I use regular household spray foam to insulate my hot tub cabinet?
You must use closed-cell, low-expansion spray foam designed for plumbing and appliances. Regular “great stuff” foam expands too much and can warp plumbing or put pressure on components. The closed-cell structure is crucial for moisture resistance. Apply it sparingly to seal gaps around pipe penetrations and in hard-to-reach cavities after installing pipe insulation and foam board.
###
Do insulation pads or mats under the hot tub actually work?
Yes, an insulated pad or mat under a portable hot tub is critical if the unit sits on a cold surface like concrete. It creates a thermal break, preventing ground cold from sucking heat directly from the tub’s base. For permanent in-ground or deck-set tubs, this is less common, as insulation should be integrated into the shell. Always ensure the pad is rated for your tub’s weight and provides a stable, level surface. If you plan to use an inflatable hot tub indoors, add a moisture-resistant mat to protect flooring and contain splashes. Also ensure the space is well-ventilated to control humidity.
###
After repairing a leak, how do I properly re-insulate the area?
It’s vital to completely dry the excavated area first. Then, replace the removed structural foam with closed-cell spray foam to prevent air pockets. For larger sections, you can carve and fit pieces of rigid foam board before sealing edges with spray foam. The goal is to restore a continuous thermal envelope without gaps, as even small voids become major cold bridges that undermine your entire insulation system.
The Weekly Warmth Audit
Before you celebrate, power on the jets and let them run for a full cycle. Listen for the smooth hum of the pump and place your hand in the water to feel for consistent, trapped heat. I’ve lost count of the times a small gap I missed announced itself with a faint draft or a temperature dip during this test. This final operational check is your best defense against stepping into a lukewarm tub or missing an insulation flaw that could strain your system.
Your new insulation is only as good as your ongoing vigilance. Make it a non-negotiable habit to physically lift and examine your cover’s underside and seals with every water change. Catching a slight seal compression or a tiny tear early is the golden rule that stops slow heat leaks from ever sabotaging your energy savings and comfort.
You’ve fortified your spa against the elements. Now, slide into that efficiently held heat, feel the difference, and soak in the quiet satisfaction of a job done right. Enjoy the warmth.
Further Reading & Sources
- The Complete Guide to Hot Tub Insulation (Types, Pros, Cons and More)
- Insulation for Hot Tub: Boosting Efficiency and Comfort | O-Care.com
- A Comparison of Best Hot Tub Insulation Types – Hot Spring Spas
- 6 Best Hot Tub Insulation Types Compared | ConsumerAffairs®
- Maximize Energy Efficiency: Hot Tub Cover Insulation – The Cover Guy
- Types of Hot Tub Insulation – Aqua Living Factory Outlets
Charlie is a hot tub enthusiast with a passion for keeping your jets running smooth and your bubbles bursting with joy. With years of experience in hot tub and jacuzzi maintenance, Charlie knows that a happy tub means a happy you. Whether it’s dealing with stubborn filters or giving your spa a little TLC, Charlie’s here to share expert tips, tricks, and plenty of laughs to help you keep your bubbly retreat in tip-top shape. So, kick back, relax, and let Charlie handle the rest — because no one likes a cranky jacuzzi!
Energy Efficiency