Stop the Slip: How to Build a Safe Hot Tub Deck in a Weekend
That slick, greasy film under your feet when you step out isn’t just annoying-it’s a hazard waiting to happen. If your deck feels like an ice rink after a soak, you’re dealing with a combination of water, algae, and chemical residue, and ignoring it is an invitation for a serious fall. This isn’t just a nuisance; it’s a dangerous situation that needs your immediate attention.
What You Need:
- A stiff brush and a bucket
- A powerful deck cleaner (not just soap!)
- A garden hose with a spray nozzle
- 30 Minutes of elbow grease
- Your choice of permanent traction solution
We’re going to banish that slick surface for good, and you won’t need to hire a single contractor to do it.
The Real Risk: Why a Slippery Deck is Your Worst Enemy
I was balancing alkalinity on a customer’s tub one rainy afternoon, my boots wet from the puddled deck. As I turned to grab my test kit, my heel skidded straight out on a slick patch of algae I’d missed. I stumbled hard against the siding, my toolbox clattering. That jarring slam was my wake-up call; a slip happens not in slow motion, but in a terrifying, split-second loss of control you can’t take back.
The numbers back up the fear. The National Safety Council reports that slips and falls are a leading cause of emergency room visits, and wet outdoor surfaces like pool and hot tub decks significantly increase those odds. Ignoring your deck’s grip is like ignoring a high sanitizer level-both pose a real, immediate threat to everyone who steps near the water. To keep everyone safe, consider safer surfacing and solid footing around your spa. Our spa-safe surfacing guide offers practical tips to prevent slips and falls.
Hot tubs create a uniquely hazardous mix. You combine warm, swirling water that regularly splashes out, residual sanitizer chemicals that can leave a barely-there film, and the universal reality of bare, vulnerable feet. This trio transforms even a beautiful deck into a potential accident zone, where a single misstep can lead to a serious injury, especially if one is not following general health and safety guidelines for hot tub use.
In my years servicing tubs, I’ve seen more close calls from decks than from faulty heaters. Preventing slips is as crucial as balancing your water chemistry, and it deserves a permanent spot in your regular maintenance routine. Many of the most common hot tub problems are avoidable with regular checks. Keeping an eye on those issues now saves headaches later.
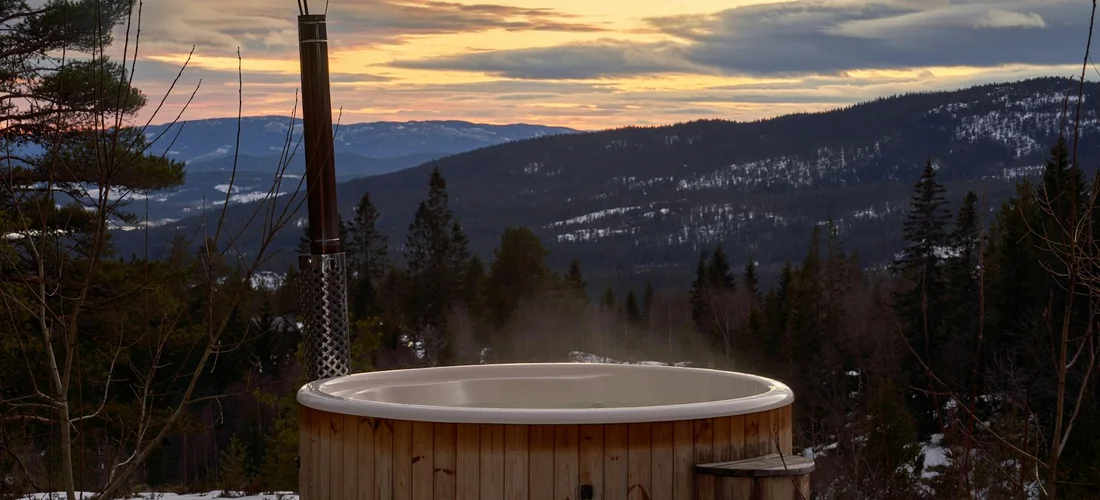
Material Matters: Picking Decking That Grips
Your deck’s material is the foundation of safety. This isn’t about choosing the prettiest color; it’s about how the surface performs when wet from chlorinated splash-off and rain. Prioritize texture and water drainage over a perfectly smooth, aesthetic finish every single time.
Here’s a quick comparison of common options to guide your choice:
| Material | Cost | Durability | Slip Resistance |
|---|---|---|---|
| Pressure-Treated Wood | Low to Medium | Good (10-15 yrs with sealant) | Variable (depends on surface texture) |
| Composite Decking | Medium to High | Excellent (25+ yrs) | Good to Excellent (look for textured finishes) |
| Vinyl Decking | Medium | Excellent (20+ yrs) | Good (non-porous, but choose embossed surfaces) |
| Rubber Mats/Tiles | Low (add-on) | Good (5-10 yrs) | Excellent (inherently grippy, drains well) |
That brushed, grooved, or pebbled feel under your palm is what you want under your feet. Deep grain patterns and manufactured textures disrupt water sheets, providing tiny edges for your feet to catch onto, drastically reducing your slip risk.
Wood Options: Treatment and Texture
If you love the natural look, pressure-treated lumber can work, but you must be selective. Choose boards marketed as having a “brushed” or “grooved” surface-these are mechanically textured to enhance grip. Sealing that wood with a high-quality, water-repellent sealant is non-negotiable to prevent moisture absorption, warping, and the green slime of algae that turns planks into ice rinks.
Synthetic Surfaces: Composite and Vinyl
These materials often have slip-resistance ratings. Look for composite planks with integrated grip strips or a uniformly textured face, and avoid smooth vinyl. Install synthetic decking over joists spaced for proper drainage to prevent water pooling, and clean them quarterly with a soft brush and mild cleaner to maintain their traction and color.
Add-On Traction: Mats and Coatings
For an existing deck, instant traction solutions are your best friend. Your main choices are interlocking rubber grid mats, anti-slip adhesive tapes, and epoxy coatings with silica sand or grit additives. Selecting the right add-on depends entirely on your base deck material and how much foot traffic the area gets.
Follow these steps to choose:
- Identify your existing deck material (e.g., poured concrete, wood, composite).
- Evaluate the zone: Is it the primary pathway or a less-used corner?
- Match the solution: Use rubber mats for versatile, removable coverage on most surfaces. Apply anti-slip tape for targeted spots like step edges. Opt for a two-part epoxy coating for a permanent, textured seal on concrete or wood.
Smart Design for Accident Prevention

Think of your hot tub deck not just as a platform, but as a guide for safe, confident movement. A well-designed space intuitively directs flow and eliminates hidden dangers before they cause a fall. Here are the non-negotiable features to build into your plan from the start, including safe steps and handrails for your hot tub.
- Prioritize All-Weather Lighting: Install waterproof, low-voltage LED fixtures to illuminate every step, stair, and the tub’s perimeter. I always add motion sensors to save energy and provide light exactly when you need it.
- Select Surfaces for Grip, Not Just Looks: Choose decking with a textured, non-slip finish. That beautiful polished slate might shimmer, but it turns into an ice rink with just a splash of water.
- Maintain a Clear, Wide Pathway: Design a direct route from the house that’s at least 36 inches wide and free of potted plants, hoses, or toys that could trip someone in the dark.
- Incorporate Strategic Support Points: Plan for a sturdy bench or a built-in planter box near the steps. These give you a solid place to steady yourself while drying your feet.
- Integrate Drainage from the Ground Up: Your entire deck design should work to channel water away, preventing the slick, standing puddles that cause most slips.
Drainage: Keeping Water Away from Feet
Water belongs in the tub, not under your feet on the deck. The single most effective design move you can make is to slope your deck surface correctly. Aim for a pitch of 1/4 inch per foot, leading away from the hot tub shell. This gentle grade is enough to shepherd water toward a drain or off the edge without being noticeable underfoot. For solutions for managing water, I’m a fan of permeable pavers-they let rainfall vanish between the joints. For a solid surface like concrete, installing linear channel drains along the tub’s edge catches splash-out efficiently.
Rails and Barriers: Your Safety Net
A good handrail is like a trusted friend, offering support exactly when you need it. Install rails at a height between 34 and 38 inches, using materials like powder-coated aluminum or stainless steel that won’t rot or rust. Secure them into the deck framing, not just the surface boards, for real stability. Barriers become a must for decks over 30 inches high to meet code, but I recommend a locking gate or fence even for ground-level tubs if young children or pets have access-it’s a simple barrier that prevents tragedy. If you’re evaluating rail options with safety and accessibility in mind, a concise guide on choosing the best hot tub handrail can help you compare features and compliance.
DIY Installation: Laying Down a Safe Surface
Ready to get your hands dirty? Transforming a slippery deck is a satisfying weekend project. Gathering the right tools first makes the whole job smoother and safer. You’ll likely need: a pressure washer, a stiff-bristle scrub brush, a notched trowel for adhesive, a paint roller with an extension pole, and outdoor-rated construction adhesive. Don’t forget your safety gear: goggles, gloves, and a respirator for fumes. From my own missteps, I can tell you that rushing the surface prep is the number one reason DIY coatings fail.
Applying Anti-Slip Coatings: A Brush-On Solution
A quality anti-slip coating is like adding a layer of sandpaper to your deck. Always work in a well-ventilated area and suit up with chemical-resistant gloves and eye protection-these products are potent and you don’t want them on your skin. Here’s the process:
- Clean the deck aggressively with a pressure washer and a mildew cleaner. Let it dry for 24 hours.
- If the surface is glossy sealed concrete, you must etch it with a mild acid solution to create a profile for the coating to grip.
- Mix the two-part epoxy or acrylic coating strictly as the label directs.
- Apply it evenly with a roller, using a brush for edges. Work in manageable sections so it doesn’t start to set before you’re done.
- Resist the urge to use the area. Give it a full 48 hours to cure completely before exposing it to water or foot traffic.
Securing Mats and Tiles: No Trip Hazards
Interlocking tiles or rubber mats are a quick fix, but they must be installed flat and secure. A curled corner or a loose tile is a perfect toe-catcher that can send someone sprawling. Start by unrolling mats in the sun to relax their memory and lie flat. For both mats and tiles, apply a bead of outdoor adhesive to the deck and the back of the material, then press firmly. Use a heavy roller to eliminate air pockets and ensure full contact. Before the adhesive sets, use a 4-foot level to check the entire surface for any high or low spots that could cause a stumble.
Light the Way: Visibility for Safe Night Soaks
That post-soak stumble in the dark is a classic way to ruin a perfect evening. I’ve learned that proper lighting isn’t just about ambiance; it’s your first line of defense against slips and trips. Strategic lighting transforms your deck from a hazard zone into a secure, inviting retreat you can enjoy any time of day or night. Let’s compare your main options.
You’ve got three solid choices, each with its own best-use case:
- Low-Voltage LED Strip Lights: My personal favorite for deck steps and railings. They provide a continuous, gentle glow that perfectly outlines edges. They’re energy-sippers, safe to touch, and you can often install them yourself with a transformer kit.
- Solar Post Caps or Stake Lights: The champion of easy installation-no wiring needed. They’re fantastic for marking the perimeter of your deck or lining a garden path to the tub. Just know their brightness depends on the day’s sun, and winter performance can be spotty.
- Hardwired Waterproof Fixtures: For permanent, powerful light, these are unbeatable. Think recessed deck lights or wall-mounted sconces. Always hire a licensed electrician for this work; mixing water, electricity, and DIY is a recipe for disaster.
Placement is everything. Focus your light where feet go. Highlight every step edge, especially the top and bottom ones. Illuminate the main pathway from your door to the tub. Run lighting along the deck perimeter to define its boundaries clearly. The goal is to cast light across walking surfaces, not create blinding glare in your eyes. Proper lighting complements the overall deck design and materials, enhancing both safety and aesthetics.
Ongoing Care: Maintenance to Preserve Slip Resistance
A safe deck isn’t a “set it and forget it” project. That textured surface you worked so hard for needs regular love to stay effective. Neglect leads to a slick film of dirt, body oils, and algae that no texture can overcome. A simple five-minute weekly sweep is the single most effective habit for preserving your deck’s grip and appearance.
Here’s a seasonal checklist I follow with my own tub:
- Weekly: Sweep or blow off leaves and dirt. Rinse the deck with a garden hose.
- Monthly: Wash with a deck brush and a mild cleaner (I use a gallon of water with a squirt of dish soap and a cup of white vinegar). This cuts the greasy film without damaging sealants.
- Seasonally (Spring & Fall): Inspect for cracked boards, loose fasteners, or areas where the texture seems worn smooth.
That anti-slip coating is tough, but not immortal. Foot traffic and weather wear it down. Plan to re-apply a fresh coat of anti-slip paint or sealer every one to two years, or the moment you notice it’s becoming smoother underfoot. Always clean and dry the deck thoroughly before reapplication, and follow the product’s cure time before getting it wet.
Algae is the enemy of a safe deck. It loves damp, shaded areas. Prevent it by keeping the deck dry and sunny when possible. If you see green, tackle it immediately with a gentle, oxygen-based deck cleaner or a diluted bleach solution (1 part bleach to 4 parts water). Never use a high-pressure washer setting on your deck; the brutal force can shred wood fibers, etch composite materials, and literally blast away the textured surface you rely on for safety. Use a low-pressure rinse setting only.
Common Mistakes and How to Fix Them
I’ve lost count of the wet footprints and nervous laughs I’ve seen from folks gingerly stepping around their tubs. Most deck hazards creep up from simple oversights, but each one has a DIY solution that won’t break the bank or your weekend—except when it comes to the weight of your hot tub, which requires a proper structural assessment.
Poor Drainage Leading to Puddles
That shallow puddle by the steps isn’t just a nuisance; it’s a slick invitation for a fall. Water lingers when decks are perfectly flat or when gutters overflow. You can correct minor pooling in an afternoon by creating a subtle slope using a long level and some exterior-grade shims under your deck boards.
For a more permanent fix, I often install a simple drain channel. Here’s how:
- Measure and mark a line where water collects, usually along the deck’s edge.
- Use a circular saw to cut a narrow channel (about 1.5 inches wide).
- Insert a pre-formed plastic or metal drainage grate, securing it with concrete adhesive.
- Ensure the channel slopes slightly away from the tub toward your yard or a drain.
Using Glossy Sealants and Finishes
That shiny, glossy coat might make your wood look magazine-ready, but it becomes a skating rink with just a splash. I learned this the hard way on my own first deck. Swapping a glossy sealant for a textured, non-slip product is the single biggest improvement you can make for foot traction.
You don’t need to sand everything down to bare wood. A textured overlay works wonders:
- Choose a water-based, non-slip deck paint or epoxy with added grit (like silica sand).
- Thoroughly clean the area with a deck cleaner and let it dry completely.
- Apply the product with a roller, focusing on high-traffic zones around the tub steps.
- For spot treatment, anti-slip adhesive strips are a quick and durable band-aid solution.
Inadequate Nighttime Lighting
Fumbling for the steps in the dark turns a relaxing soak into a tense obstacle course. Shadows hide wet spots and deck edges. Proper lighting isn’t just for ambiance; it’s a critical safety feature that prevents missteps and spills.
Installing low-voltage LED lights is a safe, energy-efficient project:
- Opt for fixtures rated for wet locations and install them on stair risers or along deck posts.
- Use a motion-sensor switch for convenience and to save electricity-the soft glow activates only when you need it.
- Always hire a licensed electrician for any wiring that connects to your home’s main power, but plug-in solar path lights are a terrific, code-friendly DIY start.
A Story From the Field: Solving a Chronic Slip
I was called to a home where the owner had taken two minor tumbles in a month. The deck was beautiful-recently stained with a high-gloss sealant-and it drained toward the house, creating a perpetual damp patch. We fixed it in a day by adding a discrete drain channel along the perimeter and applying a gritty, matte-finish anti-slip coating over the old stain. The hum of the circulation pump was all you could hear after that, not the scuff of unsure footsteps. It was a vivid reminder that safety isn’t about major overhauls, but smart, targeted corrections.
## FAQs
What materials are best for a slip-resistant hot tub deck?
Composite decking with a textured finish and vinyl decking with an embossed surface are excellent synthetic choices for inherent slip resistance. For a natural look, choose pressure-treated wood with a mechanically “brushed” or “grooved” surface. Rubber grid mats or tiles offer outstanding grip as a versatile add-on solution for any existing deck material.
What are the best practices for drainage around a hot tub deck to prevent water accumulation?
The deck surface should have a gentle slope of 1/4 inch per foot away from the hot tub to channel water. Integrating linear channel drains along the tub’s edge or using permeable pavers can effectively manage splash-out and rainfall. Proper drainage prevents standing water, which is a primary cause of slippery surfaces and long-term material damage. Considering hot tub drainage requirements helps ensure runoff is directed away from the deck and surrounding landscape, aligning with best practices for managing water runoff.
How can you create clear and safe pathways to and from the hot tub?
Design a direct, unobstructed route at least 36 inches wide. Keep this pathway free of toys, hoses, or potted plants that could become tripping hazards. Ensure the pathway is made of the same slip-resistant material as the main deck and is well-lit for nighttime use.
How do you choose and apply slip-resistant coatings or treatments to a deck?
Select a coating based on your deck material; use epoxy with grit additives for concrete or wood, and anti-slip sealers for treated timber. Proper application is critical: the surface must be deeply cleaned, etched if glossy, and completely dry. Apply the product as directed, working in sections, and allow a full 48 hours to cure before use.
What are the common hazards to avoid when building or using a hot tub deck?
Avoid using glossy sealants, creating perfectly flat surfaces that cause puddles, and having inadequate nighttime lighting. Ensure all mats are securely fastened to prevent trip hazards and that railings are firmly anchored into the deck framing, not just the surface boards. Regularly inspect for and immediately address algae growth or worn-down textured surfaces.
Your Final Walk-Through
Before you celebrate with a soak, give your new deck area a proper shakedown. Turn on all the jets to create some splash and spray. Then, with clean, wet bare feet, slowly walk the entire perimeter. Feel for any unexpected slickness or water pooling you might have missed. This two-minute “wet test” is the final, non-negotiable step to ensure your project is truly guest-ready and safe for everyone, including yourself.
The battle against a slippery deck is won with consistency, not a one-time effort. Dirt, body oils, and pollen will constantly land on your non-slip surface, slowly filling those gritty textures and creating a new film. Your golden rule for lasting traction is a quick, weekly broom sweep followed by a rinse with a mix of white vinegar and water; this simple habit strips away the invisible greasy film that a plain water rinse leaves behind.
You’ve done the hard work. The mats are down, the sealant is dry, and the path is clear. Now, go turn on those bubbles, step with confidence, and lower yourself into a well-earned, worry-free soak. You built that.
Further Reading & Sources
- 10 Things to Consider Before Putting a Hot Tub on a Deck
- How to Determine If a Deck Can Support a Hot Tub
- Can You Put a Hot Tub on a Deck? What Experts Say
- The Ultimate Guide to a Deck With a Hot Tub
- How to Build a Hot Tub Deck | Decks.com
- Hot Tub on a Deck: Pro Tips and 20 Ideas – Trex RainEscape
Charlie is a hot tub enthusiast with a passion for keeping your jets running smooth and your bubbles bursting with joy. With years of experience in hot tub and jacuzzi maintenance, Charlie knows that a happy tub means a happy you. Whether it’s dealing with stubborn filters or giving your spa a little TLC, Charlie’s here to share expert tips, tricks, and plenty of laughs to help you keep your bubbly retreat in tip-top shape. So, kick back, relax, and let Charlie handle the rest — because no one likes a cranky jacuzzi!
Safety Tips