Stop the Sticker Shock: Your 2024 Guide to Real Hot Tub Installation Costs
Published on: January 29, 2026 | Last Updated: December 8, 2025
Written By: Charlie Bubbles
If you just got a quote for a new hot tub and the number made your eyes water more than a chlorine cloud, you’ve hit the first universal symptom of hot tub ownership: the brutal reality check of installation fees. This isn’t a pump failure-it’s a budget blowout, and ignoring it is a fast track to draining your wallet.
What You Need:
- A Detailed Site Checklist
- A Clear Budget Ceiling
- Three Itemized Quotes
- 45 Minutes of Planning
I’ve watched too many excited owners turn panicked when the “delivery fee” spirals into a four-figure excavation project, and this guide will arm you with the line-item knowledge to negotiate like a pro and lock in a fair price.
Understanding Average Hot Tub Installation Costs in 2024
Let’s talk real numbers. For a standard 240V, 3-4 person hot tub with straightforward access, you can expect professional installation to run between $1,200 and $3,500 for the complete job. The national average hovers around $2,500. I’ve seen bills as low as $800 for a simple replacement where the pad and wiring already existed, and invoices over $8,000 for complex jobs requiring a crane and a full electrical sub-panel. Your final cost hinges entirely on your site’s specific conditions.
Think of installation as three pillars: the foundation, the delivery, and the power. Neglecting any one of these pillars will lead to costly problems, from a cracked shell to a tripping breaker that leaves you with a cold tub. We’ll break each one down.
Breakdown of Installation Labor and Timeline
A professional install is a coordinated dance, not a single task. A skilled crew can often complete everything in one day if the site is ready. Here’s what you’re paying for in labor:
| Task | Typical Labor Time | What It Involves |
|---|---|---|
| Site Prep & Foundation | 2-4 hours | Leveling ground, assembling a pre-fab pad or pouring a concrete base. |
| Delivery & Placement | 1-3 hours | Moving the tub from truck to pad, using a cart, sled, or crane. |
| Electrical Hookup | 3-6 hours | Running conduit, pulling wire, installing the GFCI breaker, and making final connections at the tub. |
| Startup & Orientation | 1 hour | Filling the tub, powering on systems, checking for leaks, and teaching you basic controls. |
Always get a detailed, line-item estimate that separates labor from materials like wire, conduit, and the concrete pad. This transparency prevents surprises when the final invoice arrives.
Delivery and Setup: Crane Fees and Access
This is where budgets can derail quickly. If the delivery crew can’t wheel your tub on a cart from the street to your backyard, you’ll need a crane. I’ve coordinated dozens of crane lifts over fences and second-story decks.
A crane service typically adds $500 to $1,500 to your total, depending on the crane size needed and your location. The crew will assess access for power lines, tree limbs, and roof overhangs. You are responsible for clearing the path-moving patio furniture, grills, and ensuring gates are open.
- Measure Twice: Before delivery, measure every gate, walkway, and corner. You need at least 2 inches more width than the spa’s widest point.
- Protect Your Property: A professional crew will use moving blankets and specialized carts, but remind them about sprinkler heads and delicate landscaping.
- The Pad Must Be Ready: The foundation must be perfectly level and in place before the tub arrives. There’s no “we’ll set it here for now.”
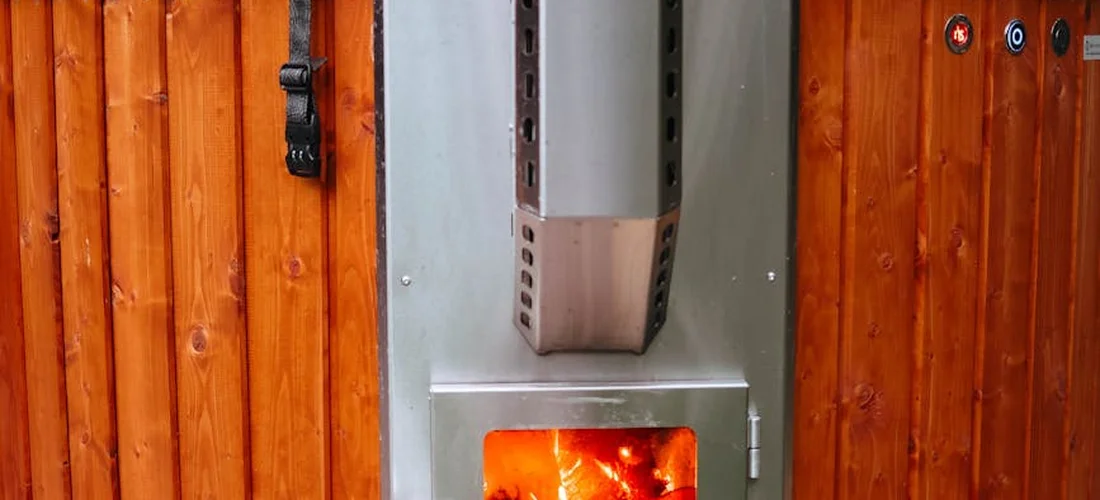
Electrical Work: Voltage, Amperage, and GFCI Breakers
This is non-negotiable: hire a licensed electrician. The hum of your circulation pump and the reliable heat from your heater depend on correct, safe wiring. Most quality hot tubs require a dedicated 240-volt, 50-amp circuit. For context, hot tubs can be wired for 110V or 220V, and the 110v vs 220v choice affects heater power and installation needs. A quick 110v vs 220v explained overview can help you understand what that means for your setup and safety.
A faulty DIY electrical job won’t just ruin your tub’s circuit board; it can create a lethal hazard in the combination of water and electricity. Your electrician isn’t just plugging something in—they’re building a protected, dedicated power lifeline. Do hot tubs need a GFCI breaker? Electrical safety explained: GFCI protection is essential in wet environments to reduce shock risk.
Wiring and Circuit Requirements
Your electrician will handle the specifics, but understanding the components helps you vet their quote. The run from your main panel to the tub dictates cost. If you’re wondering how many amps a hot tub uses, a hot tub amperage guide can help you understand the requirements. It breaks down amperage, recommended breaker size, and wire gauge to keep the install safe and compliant.
- Conduit & Wire: They’ll run liquid-tight conduit outdoors, pulling three insulated wires (two hot, one neutral) and one ground wire. #6 AWG copper wire is common for 50-amp runs.
- The GFCI Breaker: This $100-$150 device is your tub’s guardian angel. It monitors current flow and will cut power in a fraction of a second if it senses a fault, preventing electrocution.
- The Disconnect: A mandatory outdoor shutoff, usually within 5-20 feet of the tub but out of direct reach, allows for safe servicing.
Longer wire runs, the need for a new sub-panel, or upgrading your main service to handle the added load will significantly increase your electrical costs. I’ve seen simple 15-foot runs cost $800 and complex 100-foot runs with a trench exceed $3,000. Get multiple quotes.
Site Preparation: Foundation, Drainage, and Placement
Before the delivery truck even arrives, the real work begins on your property. Proper site prep is non-negotiable; a skipped step here can lead to a cracked shell, voided warranty, or a miserable repair job later. I’ve seen too many beautiful spas installed on a hope and a prayer, only to develop a lean or leak within a year.
Indoor vs. Outdoor Installation Considerations
Where you place your tub dramatically changes the prep work and long-term experience. Let’s break it down.
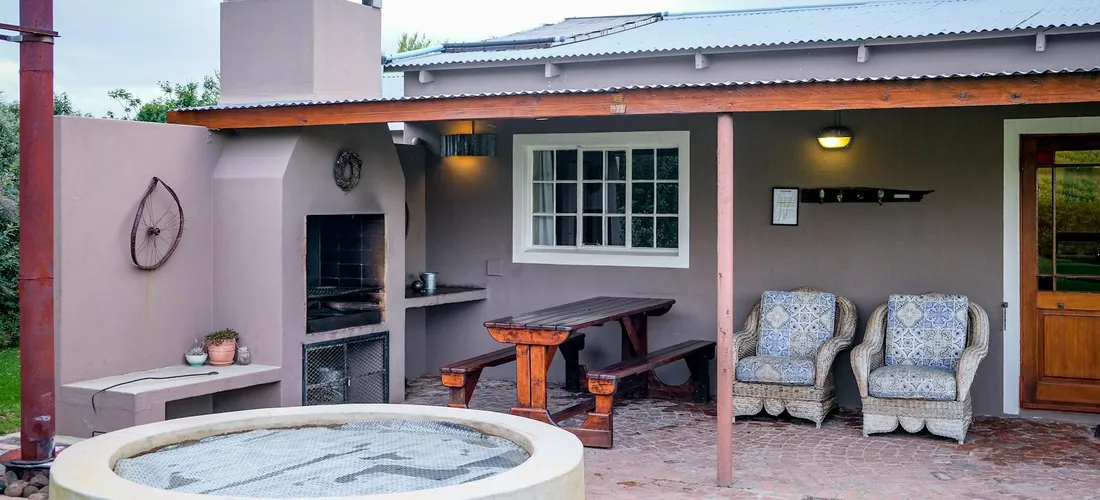
Outdoor Installation: The Classic Choice
This is what most folks picture. The key is creating a permanent, level base.
- Concrete Pad (4-6 inches thick): The gold standard. It’s permanent, perfectly level, and can handle any tub’s weight. Expect costs from $800 to $2,500, depending on size and site access.
- Reinforced Pavers or Interlocking Deck Blocks: A great DIY-friendly option if you’re handy. You must compact the gravel base until it’s rock-solid. Total cost for materials: $300-$800.
- Gravel Base with Crushed Stone: A budget option I only recommend for very light, plug-and-play models. It must be expertly leveled and compacted. It can shift and settle, causing alignment issues.
You must also plan for drainage-not just from the tub, but away from it. Splash-out and rain should flow away from the equipment compartment. A slight slope on your pad of 1/4 inch per foot is a smart move.
Indoor Installation: The Luxury Caveat
An indoor spa is a dream of convenience, but it introduces complex variables.
- Ventilation is Everything: Chlorine or bromine vapors and immense humidity will destroy drywall, insulation, and electronics. You need a dedicated, powerful exhaust fan, not just a window. I once helped retrofit a sunroom where the ceiling paint was peeling in sheets.
- Structural Support is Critical: A filled hot tub weighs over 5,000 lbs. An engineer must verify your floor can hold that load, not just statically, but with the dynamic force of people moving. This assessment alone can cost $500-$1,000.
- Waterproof Flooring and Drains: Tile with a dedicated floor drain is the only sane choice. Carpet or hardwood will be ruined. Factor in the cost of a professional tile installer and a plumber for the drain.
- Access for Service: Can a technician with tools reach the equipment side? Is there a clear path to remove and replace a 50-pound pump? Measure your doorways.
Permits, HOA Rules, and Hidden Fees
This is where budgets get blown. The price on the spa sticker is just the beginning. Ignoring permits and rules isn’t bravery; it’s an invitation for fines or being forced to dismantle your expensive new retreat.
The Permit Puzzle
Most municipalities require an electrical permit for the dedicated 240V line. Some also require a building or zoning permit for the slab itself.
- Electrical Permit: Usually $50-$200. Your electrician will typically pull this. It ensures the work is to code, which is a critical safety check for anything involving water and high voltage.
- Building Permit: Often $100-$300. This may require a site plan showing the tub’s placement relative to property lines. It verifies your foundation plan is sound.
- The Hidden Time Cost: Permit approval can add 2-6 weeks to your project timeline. Start this process before you buy the tub.
HOA & Neighborhood Covenants
Your Homeowners Association holds major power here. You must get written approval from your HOA architectural review committee before any site work begins. Their rules can dictate:
- Fencing or screening requirements.
- Approved placement (e.g., “not visible from the street”).
- Specific foundation types.
- Even the style of the cover you must use.
Common Hidden Fees That Surprise Owners
These are the line items that sneak up on you. Ask your dealer and contractor about each one.
- Delivery Fee Beyond “Curbside”: Standard delivery often means “to your driveway.” Getting it to your backyard ($150-$500) may require a special cart, extra manpower, or even a crane ($1,000+) for tight access.
- Electrical Upgrade from Main Panel: If your main electrical panel is full or outdated, upgrading it to add a 50-amp breaker can cost $1,500 to $3,000. This is a frequent discovery.
- Long Wiring Run: The electrician’s quote assumes a short run from the panel. If your tub site is 50+ feet away, adding conduit and long copper wire runs can add $300-$800.
- Landscaping Repair: Moving that delivery cart across your lawn or digging a trench for conduit will tear up grass and sprinkler lines. Budget $200-$600 for sod and repair.
- Extended Warranty: While optional, dealers will push extended labor warranties. These can add $500-$1,500 to your upfront cost. Read the fine print carefully on what’s covered.
My pro tip: Get everything in writing-the dealer’s delivery terms, the electrician’s flat-rate quote including permit fees, and your HOA’s approval letter. This paperwork is your shield against “sorry, that’s extra” conversations later.
Regional Price Differences: Getting Accurate Quotes
That flat rate you see online? It’s a starting point, but your final bill sings a different tune based on your zip code. Labor rates, permit fees, even the type of dirt in your yard can swing the price by thousands. Always get three local quotes to see the real picture, because a price from Phoenix won’t reflect the cost of digging in rocky New England soil. I’ve hauled pumps across the country, and the sticker shock from local electricians’ hourly rates is a real thing.
Hot Tub Installation Cost in San Diego
In San Diego, expect to pay a premium for skilled labor, often $75 to $150 per hour. The sunny climate is forgiving, but hard water is your hidden enemy. Many installers here will factor in a pre-plumbed water softener loop or an acid wash for the shell to combat scale from day one, adding $200-$500 to your base cost. Permit fees can be steep, and if your backyard is on a slope, concrete pad leveling becomes a major line item. From my time working on coastal homes, a full install here often lands between $1,500 and $3,500.
Hot Tub Installation Cost in Portland, Oregon
Portland’s damp climate and softer water change the game. Labor runs $65 to $120 hourly, but drainage is the critical cost driver. You’re not just installing a tub; you’re engineering a runoff solution to prevent a muddy pit, which can mean adding French drains or gravel beds for an extra $800 to $2,000. The permit process is thorough, focusing on electrical grounding in wet environments. I’ve seen many DIY attempts here ruined by winter pooling water that froze and cracked the base.
DIY vs. Professional Installation: Budget and Risk Analysis
Staring at a $2,000 installation quote can make your toolbox look very tempting. Let’s break down the real trade-off between your Saturday and your sanity. This decision boils down to your comfort with 240-volt wiring, leveling a one-ton object perfectly, and knowing local plumbing code-get one wrong and your budget fix becomes a financial disaster.
When DIY Installation Might Work
DIY is a narrow path for the prepared handyman. It only fits if your setup checks every box on this list:
- You own a “plug-and-play” 110V model that only needs a standard outdoor outlet.
- A perfectly level, reinforced concrete slab already exists within 10 feet of your door.
- You have proven experience installing GFCI breakers and running outdoor conduit.
- Your local building department allows homeowner electrical permits for spa hookups.
If your situation matches all these points, you might save $1,000 on labor, but you assume all liability for leaks and shorts. I once helped a neighbor who attempted his own pad; he was off by half a bubble on his level, and the uneven stress caused a jet pump to fail in under a year.
The Value of Professional Labor and Warranties
Hiring a pro isn’t just paying for muscle; it’s buying insurance and time. Their labor includes hidden safeguards you won’t find in a DIY guide:
- Code Compliance: They navigate permits and inspections so your installation is legal and insurable.
- System Integration: A pro ensures your pump hums efficiently with your filter and heater, maximizing energy savings.
- Long-Term Warranties: Most manufacturer warranties require professional installation for the shell and equipment to be valid.
That professional quote includes their guarantee that if a leak springs from a plumbing glue joint or an error code flashes day one, they’ll fix it at no cost to you. I’ve been the guy called to repair botched DIY jobs where the “savings” were wiped out by a single service call for water damage and electrical rework.
Post-Installation Setup for Easy Maintenance
Your new tub is full, the jets are humming, and the water looks inviting. But the real work starts now. I’ve seen too many owners enjoy that first soak, only to face a cloudy, smelly mess a week later because they skipped the setup for easy care. Let’s get your routine locked in, so maintenance feels simple, not like a chore.
Dialing in Your Water Chemistry From Day One
Think of water balance like a recipe—get the base ingredients right, and the rest follows. I always test fresh fill water immediately; its pH and hardness set the stage. Beyond the basics, the advanced water-balancing relationship matters: pH is buffered by alkalinity, and calcium hardness helps prevent scaling and corrosion, so adjusting one factor shifts the others. Understanding how pH, alkalinity, and calcium hardness interact lets you fine-tune for a stable, long-term balance. Forget guesswork: aim for 7.4 to 7.6 pH, 80-120 ppm alkalinity, and 150-250 ppm calcium hardness to protect your pipes and shell from etching or scaling. Use a drop test kit, not strips, for accuracy that saves you money on corrective chemicals later.
Sanitizer is your water’s immune system. Whether you choose chlorine (2-4 ppm) or bromine (3-5 ppm), add it after balancing the big three. The sharp, clean scent of properly balanced chlorine should be faint, not overwhelming-a strong chemical smell often means dirty water, not “clean.” Shock weekly with a non-chlorine oxidizer to burn off oils and keep the water sparkling.
Filter Care That Actually Works
Your filter is the tub’s kidney, and neglecting it is the fastest route to pump problems. I recommend a two-filter rotation system. Soak a spare filter in a dedicated trash can with a filter cleaner solution for 24 hours, rinse it thoroughly, and let it dry completely before swapping it with the one in your tub every two weeks. This prevents biofilm buildup that no quick rinse can fix.
- Clean Frequency: Rinse with a hose every week. Deep clean with a filter cleaner every month.
- Replacement Schedule: Even with great care, replace pleated filters annually. Cartridge filters with a 30-micron rating catch the finest debris.
- Pro Move: Note the filter’s square footage on your calendar. A larger filter area means longer between cleanings and less strain on your circulation pump.
Energy-Saving Habits That Pay Off
That steady hum of the circulation pump is your biggest energy user. Program your filtration cycles to run for two 4-hour blocks during the coolest parts of the day (like early morning and late evening) instead of continuously, which can cut your bill by a third. A high-quality, snug-fitting cover is non-negotiable; feel its weight. A heavy, dense cover with solid foam cores traps heat way better than a lightweight one.
Consider a thermal blanket floating on the water’s surface beneath the main cover. This simple layer cuts heat loss through evaporation, making your heater work less and extending its life-I’ve seen heaters last 5 years longer with this one trick. Check for heat leaks by feeling the cabinet panels when the tub is heating; unexpected warmth means it’s time to check the insulation.
Safety First: Chemicals and Electricity
Mishandling chemicals can ruin your tub’s finish and your lungs. Always add chemicals to water, never water to chemicals. Wear gloves and safety glasses when handling dry acid or granular chlorine, and store all chemicals in a cool, dry, locked box away from the tub’s electrical panel. I keep a dedicated plastic measuring cup for each type of chemical to avoid dangerous cross-contamination. For hot tub owners, these are among the most critical chemical safety practices. Following them helps protect you and your family from chemical injuries and keeps the spa functioning properly.
For electrical safety, ensure your GFCI breaker trips correctly by testing it monthly. A faint buzzing from the control box or a breaker that trips repeatedly isn’t a nuisance-it’s a critical warning to shut down power and call a pro. Never let water pool around the equipment access panel; moisture here invites corrosion and short circuits.
Your Weekly 10-Minute Checklist
- Test and Adjust: Check pH and sanitizer levels. Add adjusters as needed.
- Skim and Visual Inspection: Remove debris with a net. Look for any unusual foam or cloudiness.
- Feel and Listen: Place your hand on the pump-it should be warm, not hot. Listen for smooth operation, not grinding.
- Wipe Down: Use a soft cloth on the shell’s waterline to prevent scum buildup.
- Cover Check: Ensure the cover is sealed tightly, with no sagging or tears.
| Parameter | Ideal Range | Why It Matters |
|---|---|---|
| pH | 7.4 – 7.6 | Protects equipment, maximizes sanitizer effectiveness. |
| Total Alkalinity | 80 – 120 ppm | Stabilizes pH, prevents wild swings. |
| Calcium Hardness | 150 – 250 ppm | Prevents corrosion (too low) and scale (too high). |
| Free Chlorine | 2 – 4 ppm | Keeps water sanitary without skin irritation. |
| Bromine | 3 – 5 ppm | Alternative sanitizer, more stable in heat. |
Common Questions
What is typically included in a professional hot tub installation service?
A full-service professional installation generally includes site assessment and preparation, delivery and placement of the tub, all electrical hookup by a licensed electrician, and system startup and orientation. For a new hot tub jacuzzi, professional installation is typically required to meet electrical and warranty requirements. Manufacturers often specify that installation be performed by a qualified professional to ensure proper function and code compliance. The goal is a turnkey result, leaving you with a fully operational, code-compliant, and warrantied spa. It is crucial to confirm the specific services in your written quote, as “curbside delivery” and “full installation” are very different.
How do I find a reliable “hot tub installation near me”?
Start with recommendations from your local hot tub dealer and read verified online reviews. Ensure any electrician you hire separately is licensed, bonded, and specifically experienced with 240V GFCI spa panels. A reliable installer will always offer a detailed, line-item quote and willingly pull the necessary local permits, which is a key sign of professionalism and adherence to safety codes. In our complete guide on whether you need an electrician to install a hot tub, we detail when electrical work is required and what to look for from a pro. It also covers permits, 240V service, and how to verify a qualified installer.
What are the specific electrical requirements for installing a hot tub?
Most full-size hot tubs require a dedicated 240-volt, 50-amp circuit run from your main electrical panel by a licensed electrician. This involves installing a weatherproof GFCI breaker, running the correct gauge wire (like #6 AWG copper) in conduit, and placing an emergency disconnect within sight of the tub. This setup is non-negotiable for safety, performance, and to keep your manufacturer’s warranty valid. It’s crucial to meet both the electrical and placement requirements for installing a hot tub.
What are the universal hot tub installation requirements I need to plan for?
Beyond the tub itself, universal requirements include a perfectly level and structurally sound foundation (like a concrete pad), clear and accessible delivery path, proper drainage away from the spa, and compliance with local building codes and HOA rules. You must also ensure your main electrical service has the capacity to support the new dedicated circuit, which may require an upgrade. Plan how your home’s electrical panel for hot tub circuit will accommodate the new hot tub circuit. This usually means adding a dedicated breaker with GFCI protection and, if needed, upgrading the panel to handle the load.
Why does installation cost vary so much between cities like San Diego and Portland?
Regional variation stems from differences in local labor rates, permit fees, climate challenges, and common site conditions. For example, San Diego installs may need extra water treatment for hard water, while Portland jobs often require more extensive drainage solutions for wet climates. Always get multiple local quotes to understand pricing factors specific to your area’s market and terrain.
Your First Soak: The Final Safety Lap
Before you step into that pristine, warm water, treat this like a pilot’s pre-flight check. Walk through one last verification. Turn on the jets and feel for consistent, powerful flow from every single port-a weak one can signal a loose connection or a closed valve. Listen for the smooth hum of the circulation pump without any grinding or whistling sounds. This final operational test is your best defense against discovering a hidden plumbing or electrical issue when you’re trying to relax.
With the mechanics confirmed, your last duty is to the water itself. Use a reliable test strip or liquid test kit. Check that the sanitizer level is present, the pH is between 7.4 and 7.6, and the alkalinity is holding steady. The difference between a perfect soak and a skin-irritating experience is just a few drops of reagent. Never trust the initial fill; always test and balance your water chemically before the first soak to avoid the sting of unbalanced chemicals or the cloudiness of neglect.
The Non-Negotiable Golden Rule
You’ve invested in a professional install. Protect that investment with a simple, non-negotiable habit. I’ve learned from years of service calls that most problems are traced back to water chemistry, not broken parts.
Test and balance your water at least three times a week, without fail-this single habit prevents 80% of the common issues that lead to costly repair calls. It takes two minutes. Skipping it leads to scale that cooks onto your heater, corrosive water that eats at seals and jets, and a breeding ground for bacteria that no amount of shock can easily fix.
That’s it. The cover is on, the system is purring, and the water is balanced. The hard work is done. Now go enjoy that soak-you’ve earned it.
Further Reading & Sources
- 2025 Hot Tub Installation Cost | Electrical, Concrete Pad & Delivery
- How Much are Hot Tub Installation Costs? – Leisure Works
- r/homeowners on Reddit: Real cost of adding a hot tub to the yard
- How Much Does a Hot Tub Cost? [2025 Data] | Angi
- Thinking About Getting a Hot Tub? Here’s What It’s Really Going to Cost You
- Hot Tub Installation by Pro Referral at …
Charlie is a hot tub enthusiast with a passion for keeping your jets running smooth and your bubbles bursting with joy. With years of experience in hot tub and jacuzzi maintenance, Charlie knows that a happy tub means a happy you. Whether it’s dealing with stubborn filters or giving your spa a little TLC, Charlie’s here to share expert tips, tricks, and plenty of laughs to help you keep your bubbly retreat in tip-top shape. So, kick back, relax, and let Charlie handle the rest — because no one likes a cranky jacuzzi!
Outdoor Setup