
Stop Costly Water Damage: The Real Materials Used in Jacuzzi Shower Walls and Bath Remodels
If your bath remodel has mysterious leaks, persistent mold spots, or walls that feel soft to the touch, the core issue is almost always the wrong building materials failing in a wet environment. This is more than a nuisance; hidden moisture can rot framing and cause serious structural damage.
What You Need:
- Understanding of waterproof vs. water-resistant
- List of trusted material brands
- 30 minutes to plan correctly
I’ve fixed enough botched jobs to show you exactly what pros use, so you can source and install the right stuff yourself, avoiding a full-blown bathroom disaster.
Understanding Your Core Options: Acrylic, Tile, and Solid Surfaces
Choosing your wall material isn’t just about looks; it’s about picking a partner for years of steam, splashes, and chemical vapors. I’ve balanced water in hundreds of tubs, and the wrong surface can turn routine cleaning into a constant battle. Your material choice directly impacts how much time and money you’ll spend on maintenance down the line. Let’s break down the three heavy hitters.
Acrylic: The Familiar Workhorse
Acrylic is that trusty, molded shell you know from your hot tub. It’s a single, non-porous sheet, often reinforced with fiberglass. The feel is smooth and warm to the touch, with no seams for grime to hide in. From a maintenance perspective, its non-porous nature means it won’t harbor bacteria or absorb moisture, making it a cinch to wipe down with a spa-safe cleaner. I’ve seen acrylic surrounds that look new after a decade because the owners simply avoided abrasive pads. The hum of the circulation pump is less worrisome when you know the walls around it won’t develop hidden mildew. It’s important to distinguish whether your hot tub shell is acrylic or rotomolded, especially when assessing potential repairs.
- Pros: Seamless, easy to clean, relatively affordable, and warm underfoot. It’s the low-drama choice.
- Cons: Can be susceptible to scratching and may not offer the high-end visual depth of other materials. It’s also typically a prefabricated unit, limiting custom shapes.
- My Take: If you love the easy-care nature of your hot tub shell, you’ll appreciate acrylic in your shower. It’s the set-it-and-forget-it option, letting you focus on balancing the water chemistry, not scrubbing grout.
Tile: The Classic Custom Canvas
Tile, whether ceramic, porcelain, or natural stone, offers limitless design potential. But listen to a spa tech: tile is a high-commitment relationship. Every grout line is a potential breach in your defenses. The sting of chlorine or bromine in the air can accelerate wear on some grouts, and improper sealing invites moisture and mold behind the walls-a silent disaster. I once traced a persistent musty smell to a failed shower waterproofing job adjacent to a hot tub room; the moisture had migrated and created a perfect breeding ground.
- Pros: Unbeatable aesthetic customization, durable surface material, and excellent heat retention.
- Cons: High installation cost, requires meticulous, professional waterproofing (more on that below), and grout demands annual sealing with a quality sealant to prevent water ingress and staining.
- Pro Tip: Opt for large-format tiles to minimize grout lines, and choose a dark, epoxy-based grout for wet areas to combat discoloration from minerals and sanitizers.
Solid Surfaces: The Seamless Upgrade
Think of materials like quartz or engineered stone slabs. They offer a monolithic look with incredible durability. These surfaces are inert, meaning they won’t react with your spa chemicals or household cleaners. A solid surface shower wall has no pores for calcium or biofilm to grab onto, which is a game-changer for anyone who’s fought waterline scum in hot tubs or showers. The clarity of the water in your tub is mirrored by the clarity of a well-maintained solid surface-both are results of smart, proactive care.
- Pros: Luxurious, seamless appearance, highly resistant to scratches, stains, and chemicals. Hygienic and easy to clean.
- Cons: Highest upfront cost, requires professional fabrication and installation, and can feel cool to the touch initially.
- Energy Angle: Like a well-insulated hot tub cover, the mass and quality installation of a solid surface can help retain ambient heat in your bath area, a small boost for overall energy efficiency.
Why Waterproofing is Your Non-Negotiable First Step
Before you even think about which beautiful material to install, you must fortress the space behind it. Waterproofing isn’t a suggestion; it’s the foundation. I’ve repaired more than one circulation pump silenced by slow, hidden leaks from a shower pan failure, and the repair bills are never pretty. In a bath remodel, especially near a humid hot tub environment, skipping this step is an invitation for structural rot, mold, and catastrophic damage. Beyond the finished surface, where you place it matters just as much. In the next steps, you’ll read about the five hot tub placement mistakes that will cost time and money.
The Invisible Shield: Membranes and Barriers
Modern waterproofing relies on liquid-applied membranes or sheet membranes (like chlorinated polyethylene or PVC) that create a continuous, flexible barrier behind your walls and under your floor. This barrier must be installed with the same meticulous care you’d use when gluing a PVC pipe joint on your spa-any pinhole or missed spot is a failure point. I treat waterproofing like balancing total alkalinity: if the foundation isn’t right, everything else becomes unstable and corrosive.
Critical Steps You Can’t Miss:
- Substrate Preparation: The wall (usually cement board) must be clean, flat, and free of debris. Any imperfection can puncture the membrane.
- Seam and Corner Reinforcement: All changes of plane (wall-to-wall, wall-to-floor) require fabric mesh tape embedded in the waterproofing material. This is where 90% of leaks start.
- Flood Test: Once the shower pan membrane is installed, you must plug the drain and fill the base with water for at least 24 hours. Mark the water level and check for drops. This simple test can save you tens of thousands in repairs, and it’s a standard I wish more hot tub shell manufacturers performed.
Your choice of wall material dictates the specific waterproofing details. For example, tile requires a perfectly flat, rigid substrate, while acrylic units often have integrated flanges that tie into the membrane. Investing in a professional-grade waterproofing system is the ultimate cost-saving DIY mindset, even if you hire out the installation. It ensures the steam from your shower and the mist from your Jacuzzi coexist with your home’s structure, not destroy it.
The Tile Route: Endless Design vs. Grout Headaches
Choosing tile for your surround feels like opening a design catalog with infinite pages. You can mix ceramic, porcelain, or glass to create a look that’s uniquely yours, from sleek modern to rustic spa. That beautiful grout line, however, is where your maintenance journey truly begins, acting like a tiny sponge for moisture and soap scum in the humid bathroom environment. I’ve seen stunning installations where the tile still looked perfect years later, but only because the owner treated grout sealing as seriously as balancing their hot tub’s alkalinity.
Natural Stone Beauty: A High-Maintenance Commitment
Materials like marble, travertine, and slate bring an authentic, luxurious spa feel that’s hard to replicate. Each slab is uniquely beautiful. But just like a hot tub with perfectly balanced water, natural stone demands a specific and consistent care routine to prevent lasting damage. These stones are porous and react to acidic cleaners and even unbalanced bath water the same way your hot tub shell reacts to low pH-by etching and staining.
You must be prepared for a regular sealing schedule, often every 6-12 months, and use only pH-neutral cleaners. I compare it to owning a classic car; the beauty is unparalleled, but you don’t just take it through any old car wash.
| Tile Type | Best For | Maintenance Reality |
|---|---|---|
| Ceramic/Porcelain | Durability, Cost, DIY-Friendly | Grout requires vigilant cleaning and sealing to prevent mildew. |
| Natural Stone (Marble, Slate) | Luxury, Unique Aesthetics | High susceptibility to etching from acids; requires specialized sealants. |
| Glass Mosaic | Modern Looks, Reflectivity | Grout lines are numerous; water spots show easily on the glass. |
Acrylic and Fiberglass: The Practical, Budget-Friendly Champions
If you want the fewest headaches and more time actually enjoying your bath, these materials are your allies. Acrylic sheets and fiberglass surrounds are the workhorses of the bath remodel world, and for good reason. Their non-porous, seamless surfaces resist mildew growth and wipe clean with ease, mirroring the low-maintenance appeal of a quality hot tub shell. I often recommend them to clients who, like me, want efficiency without sacrificing a clean, finished look.
- Acrylic: Often used in premium one-piece tub/shower units. It’s warm to the touch, highly durable, and repairs for minor scratches are straightforward with a gelcoat repair kit.
- Fiberglass Reinforced Acrylic: Adds a layer of strength for larger wall panels. It’s lightweight, which makes DIY installation feasible.
- Gelcoat Finish: This is the colored, glossy surface layer. A high-quality, thick gelcoat (like a 25-mil finish) resists fading and cracking far better than a thin one.
The initial cost savings on both material and installation can be significant, freeing up budget for a better pump or a more efficient heater for the actual Jacuzzi. The only real design limitation is that you’re often choosing from pre-formed kits, though the variety available now is vast. Additionally, energy-saving settings and efficiency features can further cut running costs. We’ll delve into jacuzzi energy-saving settings and efficiency features explained in the next steps.
Solid Surface and Composite Materials: A Seamless Look
For those seeking a truly custom, integrated aesthetic, solid surface materials like engineered quartz or composite panels are the gold standard. These options provide a continuous, monolithic appearance with virtually invisible seams, creating a sanctuary that feels professionally designed and built to last. Think of it as the equivalent of upgrading from a standard hot tub cover to a custom-fit, locking hardcover-it’s an investment in seamless performance and style.
- Engineered Quartz: Made from crushed stone bound with resin. It’s utterly non-porous, stain-proof, and never needs sealing. The feel is substantial and cool, like natural stone, but without the finicky care.
- Cultured Marble/Granite: A polyester resin mixed with stone dust. It’s less expensive than natural stone or solid surface, offers a seamless look, and is non-porous. It can be prone to scratching and may yellow over decades.
- High-Pressure Laminates: These are durable, moisture-resistant sheets bonded to a substrate. They offer incredible design flexibility with woodgrain or stone patterns at a lower cost, but the seams are more visible than with true solid surface.
Professional fabrication and installation are critical here, as the precision needed for a flawless, waterproof fit is akin to the craftsmanship required for complex hot tub plumbing repairs. The result is a stunning, easy-to-clean surface where water and chemicals bead up and wipe away without a second thought.
Specialty Panels and Modern Shortcuts: PVC and Laminate
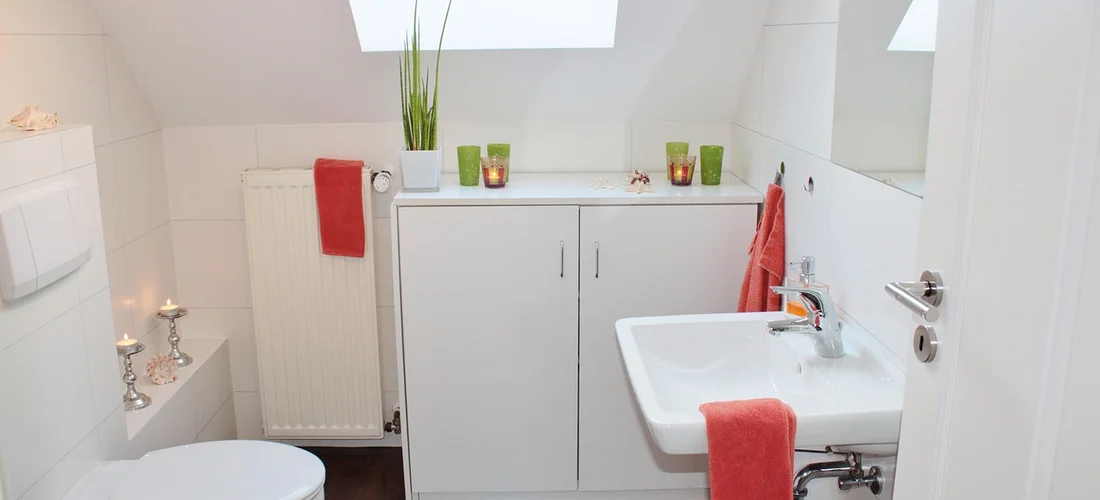
When you’re tired of grout lines and the constant battle against mold, modern panel systems feel like a gift. I’ve swapped out many a mildewed shower wall, and the instant improvement in cleanliness and morale is something every DIYer should experience. PVC sheets, often called solid wall panels, are my go-to for a bulletproof, water-tight install. They’re typically ⅛ to ¼ inch thick, come in 4×8 foot sheets, and lock together with tongue-and-groove joints sealed with a silicone-free adhesive. The best part is their complete resistance to the chlorine and bromine vapors that can haze and damage lesser materials, a lesson I learned the hard way with a frosted glass door near my hot tub.
Laminate panels offer a different kind of shortcut, with photorealistic prints of stone or tile fused to a moisture-resistant core. You must check the core material; a solid polymer core is king for wet areas, while particleboard cores are a ticking time bomb no matter the pretty surface. I compare it to choosing a hot tub filter-a 50-square-foot cartridge might look fine, but the 100-square-foot, 10-micron pleats do the real cleaning work without choking every week. For a surround that handles splashes and steam without warping, insist on a fully waterproof substrate, not just a water-resistant face.
Installation is where these materials save your sanity. Using a high-solids, low-VOC PVC cement (I prefer the clear Weld-On 705 for its strong bond and neat finish) is as critical as using the right plumbing glue on your tub’s suction line. The panels click together over your old walls, meaning no demo dust and a finished shower in a weekend. Just like balancing your tub’s alkalinity before adjusting pH, always start with a perfectly plumb and flat substrate, or every seam will haunt you. It’s just one of those [crucial steps in ensuring your spa works efficiently](https://thehappytub.com/how-do-hot-tubs-work-a-complete-guide-to-components).
Planning Your Install: A Handyman’s Tool List and Steps
Good planning turns a potential disaster into a satisfying project. Gather your tools the night before, just like you’d test your water chemistry before a long soak—it’s one of those essential tools every DIYer should have. My kit for a panel install always includes tools that pull double duty from my hot tub repairs, saving money and space in my shed.
Your Non-Negotiable Tool List
- A 4-foot level and a quality laser level for marking perfectly horizontal lines.
- A fine-tooth carbide blade for your circular saw or table saw (cut panels face-up to prevent chipping).
- A notched trowel for adhesive-the notch size is specified by your panel manufacturer.
- A rubber mallet and tapping block to snug joints without damaging edges.
- 100% silicone sealant (look for mildew resistance) and a premium caulking gun.
- Safety glasses, gloves, and a respirator mask for cutting and adhesive fumes.
Step-by-Step: Setting Your Panels Right
- Prep the Wall: Remove all fixtures and clean the surface to bare, stable material. This is the time to fix any hidden plumbing leaks, a chore I’ve faced more than once when a simple panel swap revealed a slow drip behind the wall.
- Establish Your Baseline: Use the laser level to draw a true horizontal line around the entire shower area. Every panel will reference this line, so its accuracy is as vital as getting your tub’s water level right before turning on the pumps.
- Dry Fit and Cut: Measure, mark, and cut all panels for outlets and pipes before any adhesive touches the wall. I always cut test pieces from scrap to dial in my saw settings, much like testing a water sample before dumping in chemicals.
- Apply Adhesive and Mount: Spread adhesive on the wall with your notched trowel, press the first panel into place, and use your level to check it. Work quickly but methodically, locking each subsequent panel into the previous one’s groove.
- Seal and Finish: Run a smooth bead of silicone along all internal corners and where the panels meet fixtures. Proper sealing here is what makes the system waterproof, not just water-resistant-skip it, and you’ll invite moisture behind the panels for sure.
Remember, the hum of your circulation pump depends on a dry, safe environment. Taking these careful steps ensures your remodel stands up to daily use and protects the structure of your home, just like routine maintenance protects your hot tub’s heater and jets.
FAQs
What is the difference between a one-piece and a three-piece shower wall?
A one-piece shower wall is a single, molded unit usually made from acrylic or fiberglass, providing a seamless surface that’s easy to install and clean. A three-piece system involves separate panels that lock together, offering more adaptability for custom sizes but with additional seams that require careful sealing. One-piece units are ideal for standard enclosures, while three-piece kits suit remodels with space constraints.
What are the best waterproof materials for a shower enclosure?
The best materials include tempered glass, solid acrylic sheets, and PVC panels, as they are inherently non-porous and resist water penetration. For framing, opt for corrosion-resistant metals like aluminum with integrated seals. Remember, even with these materials, proper waterproofing membranes behind the walls are essential to prevent hidden leaks.
What materials are used for custom shower designs?
Custom designs often feature engineered quartz or solid surface slabs for a monolithic look, along with large-format porcelain tiles to minimize grout lines. Glass mosaics or acrylic panels with custom finishes can add personal flair, but always prioritize materials that offer durability and easy maintenance in wet environments.
Can you use laminate panels in a shower?
Yes, but only if they are specifically rated for wet areas with a waterproof core, such as solid polymer or moisture-resistant MDF. Avoid laminates with particleboard bases, as they can warp. Ensure installation includes full-coverage adhesive and sealed seams to maintain a watertight barrier.
What are the most durable materials for a high-traffic bathroom?
Porcelain tile, engineered quartz, and solid surface panels are top choices for durability, thanks to their scratch and stain resistance. Acrylic with a reinforced gelcoat finish also holds up well to frequent use, offering a balance of toughness and low upkeep for busy spaces.
The Final Seal
Before you declare victory and call it a day, give every surface one last inspection with the shower running. Look for any stray drips behind the panels or at the seams you sealed. This final test with flowing water is your best defense against discovering a hidden leak weeks later, when water damage has already begun its quiet work.
Your single most important habit for keeping those walls looking new isn’t a fancy cleaner-it’s your weekly wipe-down. A quick, gentle wipe with a soft cloth and pH-neutral cleaner after every few showers prevents soap scum and minerals from bonding to the surface, making deep cleans easy and avoiding harsh scrubbing that can dull acrylic or scratch laminate.
You’ve done the hard work. Now, step back, turn on the steam, and soak in the satisfaction of a job done right. Enjoy your renewed space!
Further Reading & Sources
- Jacuzzi Signature Shower Collection | Jacuzzi Bath Remodel
- Types of Shower Wall Materials | Jacuzzi Bath Remodel
- What Materials Are Jacuzzi® Showers Made From? | Jacuzzi Bath Remodel
- Jacuzzi® Showers | Jacuzzi®
- Jacuzzi® Bathroom Showers | Jacuzzi.com | Jacuzzi®
- SHOWER SYSTEMS THE JACUZZI® BRAND HISTORY
Charlie is a hot tub enthusiast with a passion for keeping your jets running smooth and your bubbles bursting with joy. With years of experience in hot tub and jacuzzi maintenance, Charlie knows that a happy tub means a happy you. Whether it’s dealing with stubborn filters or giving your spa a little TLC, Charlie’s here to share expert tips, tricks, and plenty of laughs to help you keep your bubbly retreat in tip-top shape. So, kick back, relax, and let Charlie handle the rest — because no one likes a cranky jacuzzi!
Replacement Parts