Stop UV Damage Now: How to Protect Your Hot Tub Shell and Cover for Good
Is your once-deep acrylic shell now a faded, chalky white, or does your cover crackle with a brittle stiffness when you lift it? That bleached look and dry feel are the undeniable signs of sun damage, a slow-motion attack that weakens materials and drains heat efficiency. This isn’t an immediate safety hazard like faulty wiring, but it’s a costly nuisance that steals both beauty and function from your spa.
- What You Need: A premium acrylic UV protectant spray, a vinyl cleaner and conditioner, several soft microfiber cloths, and one hour of your time.
Using the same methods I’ve relied on for years under the Texas sun, you’ll seal out UV rays and prevent damage without ever picking up the phone to call a pro.
What Sun Damage Really Does to Your Spa
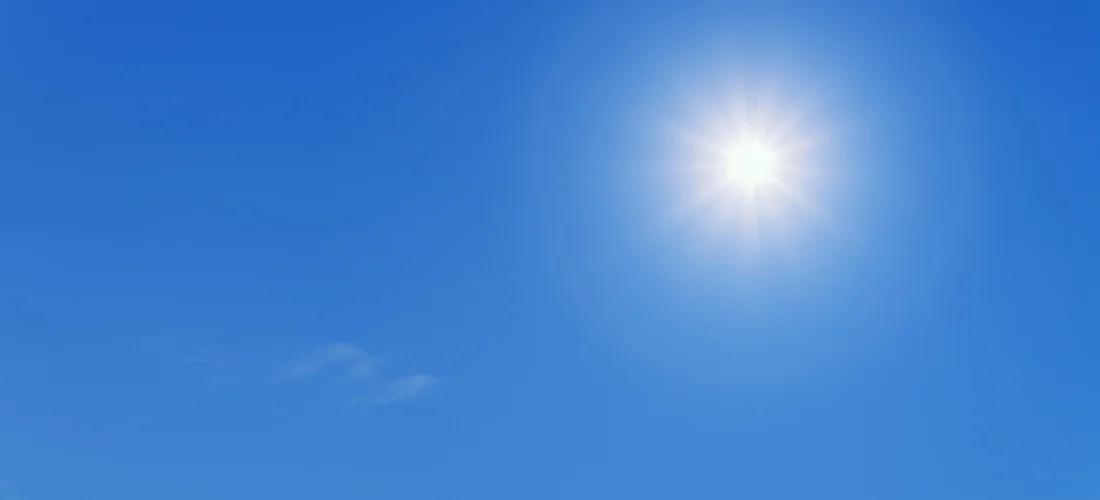
Sunlight feels great on your skin, but its UV rays are brutal on your hot tub. Think of UV radiation as a million tiny knives, constantly slicing at the molecular chains in your spa’s acrylic, fiberglass, and vinyl covers. This process, called photodegradation, weakens the material from the inside out. I’ve seen it firsthand after years of balancing water and fixing pumps in sunny backyards; a neglected shell can look ten years older in just two.
The damage isn’t just cosmetic-it compromises your tub’s integrity. You’ll notice these clear signs:
- Fading color: Your rich, vibrant shell slowly bleaches to a dull, lifeless hue.
- Chalky shell surface: The smooth finish erodes into a rough, powdery texture you can feel.
- Brittle cover vinyl: The cover loses flexibility, becoming stiff and prone to cracking when you lift it.
- Cracked seams: UV stress causes seals and joints to dry out and split, opening the door to leaks.
Different materials show distress in specific ways. This table helps you spot the warning signs early.
| Shell Type | Common UV Damage Symptoms |
|---|---|
| Acrylic | Pronounced color fading, surface crazing (fine web-like cracks), permanent loss of glossy shine |
| Fiberglass | Severe chalking (a white, dusty film), gel coat blistering or ‘ossoming’, fading that looks blotchy |
| Polymer/Vinyl | Rapid embrittlement, seams that pull apart, accelerated cracking especially on cover skirts |
Your Action Plan for Hot Tub Shell UV Protection
Fighting sun damage is a simple, proactive process that saves you from costly shell repairs. A protected shell also means more stable water chemistry and less strain on your heating system, boosting energy efficiency. Here is your straightforward, three-step defense plan.
-
Start with a Deep, Gentle Clean Any protective coating needs a perfectly clean surface to bond correctly. Use a non-abrasive, spa-specific cleaner or a DIY mix of distilled white vinegar and water. I always avoid harsh scrubbers or household cleaners; they can micro-scratch the surface, creating tiny footholds for UV damage to accelerate. Rinse thoroughly and let the shell dry completely-any moisture will trap dirt and ruin the next step.
-
Choose and Apply a UV-Blocking Shield This is your main line of defense. Select a UV-resistant protectant formulated for hot tubs. From my experience, a quality acrylic UV inhibitor or polymer sealant applied annually makes a dramatic difference in preserving that like-new look and feel. Apply it in the shade, following the product’s directions for thin, even coats. Proper ventilation is key for your safety and the product’s performance. For beginners, this step fits into a safe, effective hot tub care routine. See our beginner’s guide to safe and effective hot tub use for more context.
-
Establish a No-Fuss Cleaning Ritual Debris like pollen, dust, and bird droppings acts like sandpaper under the sun’s magnifying glass. A quick weekly wipe-down with a soft cloth and mild cleaner removes these abrasives and helps your protective coating last longer. This simple habit also keeps your filters cleaner, which lets your circulation pump hum along efficiently without wasting electricity.
When shopping for protectants, look for these specific product types designed for spa defense:
- Acrylic UV inhibitors: Penetrating treatments that absorb and dissipate UV rays without creating a sticky film.
- Polymer sealants: Often wipe-on formulas that create a durable, flexible barrier against elements.
- Sun-reflective paints: Specialty coatings that deflect sunlight; verify they are rated for submerged, water-contact surfaces.
Guarding Your Hot Tub Cover Against UV Rays
Smart Cover Choices and Fit
Think of your hot tub cover as a sunhat for your spa. The color you pick isn’t just about looks-it’s a functional choice. A dark cover, like black or navy, acts like a sponge for solar energy, which is great for keeping heat in during winter but accelerates the breakdown of the vinyl over time. A light-colored cover reflects more UV rays, which dramatically slows the fading and drying process that leads to cracks. I’ve peeled back enough weathered covers to see that sun-bleached gray is the universal color of vinyl surrender.
Just as critical as color is the fit. A cover that sags or doesn’t snap down tightly creates tiny gaps along the skirt. These aren’t just weak spots for heat loss; they’re open invitations for UV rays and moisture to creep into the core foam. A snug, taut fit is your first and cheapest line of defense, creating a continuous weatherproof seal that keeps the destructive elements where they belong-outside. For a precise fit, consult a hot tub cover installation proper fit guide. It will walk you through exact measurements and how to secure the edges for a flawless seal.
Proactive Cover Maintenance Steps
Don’t wait for the vinyl to get chalky and stiff. A simple, routine maintenance plan adds years to your cover’s life. Here’s my three-step field-tested method:
- Clean Monthly: Use a soft brush and a solution of mild dish soap (like Dawn) and water. Gently scrub the entire surface to remove airborne contaminants, pollen, and tree sap that oxidize in the sun and eat away at the vinyl.
- Protect Quarterly: Every 60 to 90 days, apply a premium vinyl protectant. Look for formulas containing UV stabilizers (often listed as UV inhibitors). This isn’t just a shine product; it’s sunscreen that replenishes the vinyl’s plasticizers, keeping it supple. I keep a bottle next to my chemicals and do it on the same weekend I balance my alkalinity.
- Inspect the Seals: Twice a year, check the condition of the plastic or foam seals along the underside of the cover lip. Wipe them down and apply a thin layer of silicone-based lubricant (not petroleum jelly) to keep them pliable and sealing perfectly.
For an extra shield, consider a clear, UV-blocking solar film. This adhesive film acts like high-tech sunglasses for your cover, filtering out over 99% of harmful UV rays before they even touch the vinyl, and it’s a fantastic upgrade for spas in brutal, full-sun locations.
Best Products for UV Defense: Coatings, Sealants, and Films
The market is full of protectants, but they generally fall into three camps. Your choice depends on how much effort you want to invest and the level of protection you need.
- Spray-On Protectants: These are the quick and easy champions. You spray and wipe, often leaving a glossy finish. Great for regular upkeep. The best ones contain UV inhibitors and offer hydrophobic action, causing water to bead up and roll off.
- Wipe-On Sealants: Typically thicker than sprays, these products (like 303 Aerospace Protectant) are rubbed on with an applicator pad. They tend to create a more durable, longer-lasting barrier with superior gloss retention, making them my go-to for a quarterly deep conditioning treatment.
- Adhesive Solar Films: This is a permanent or semi-permanent solution. It’s a thin, clear laminate you carefully apply to the clean, dry cover. It provides the highest level of physical UV blockage. The installation is a one-time project, but the protection is unmatched.
Key features to scout for on any label: “UV inhibitors” for defense, “hydrophobic” for water sheeting, and “non-greasy” for safety. Before using any new product on your entire shell or cover, always perform a compatibility test on a small, inconspicuous area, like a corner of the skirt, and wait 24 hours to check for discoloration or texture change. This simple test saved me from a disastrous reaction between a “universal” protectant and a colored acrylic shell once.
How Often to Reapply UV Protectant for Lasting Results
Think of your hot tub’s UV protectant like sunscreen for your skin. One application won’t last all summer. For a durable acrylic shell and a vinyl cover, a solid rule of thumb is to reapply a quality protectant every three to four months, especially when you’re maintaining your hot tub cover.
Living in Texas, I learned that schedule is just a starting point. Your local climate is the real boss. In the scorching, high-UV areas of the Southwest or Southeast, you might need to apply it every two months. In more temperate northern zones, you could stretch it to four or even five.
Don’t just mark your calendar-let the tub tell you when it’s thirsty. A great field test is the water bead-up. Fresh protectant causes water to bead into tight droplets. When water starts sheeting out or lying flat, it’s time for a fresh coat. Also, watch for a loss of that deep gloss on the shell or a slight dulling of your cover’s color. If these signs persist, it might be time to replace your hot tub cover completely.
This simple bead test is your most reliable DIY indicator that the protective barrier is wearing thin and needs reinforcement.
Your Climate-Based Application Guide
| Climate Zone | Key Characteristics | Recommended Frequency |
|---|---|---|
| High Sun / Desert | Intense, year-round UV; low humidity | Every 60-90 days |
| Hot & Humid | Strong summer UV; high moisture | Every 90 days |
| Temperate | Moderate seasonal UV shifts | Every 4 months |
| Cooler / Northern | Strong summer sun, but shorter season | At season opening & mid-summer |
Spotting Early Warning Signs of UV Damage
Catching UV damage early is the difference between a simple refresh and a costly repair. Your eyes and hands are your best diagnostic tools. Start with a visual inspection in bright, natural light.
On the shell, look for a gradual loss of color intensity, especially on the sides facing the sun. A whitish, powdery “chalk” residue is a major red flag-it means the surface is breaking down. Inspect closely for a web of fine, hairline micro-cracks; they often appear near the waterline first.
That chalky film is more than dirt; it’s the outer layer of acrylic degrading, and if left unchecked, it becomes a permanent stain.
Signs Your Cover is Under Attack
The cover takes the full brunt of the sun. Tactile checks are crucial here. Run your hand across the top vinyl. Is it still supple, or has it become stiff and brittle? Bend a corner gently; healthy material will have some flex, while damaged vinyl may crackle or resist.
- Visual: Fading or a bleached appearance on the top surface. Compare the top to the protected skirt.
- Structural: Seams that are pulling apart or threads that look faded and weak.
- Functional: A cover that has become overly heavy with water because the vinyl pores have opened up.
Once a cover vinyl loses its plasticizers and becomes brittle, it cannot be restored-only replaced. Finding and fixing UV damage at the chalky or fading stage lets you repair the surface; waiting until it cracks means you’ll be shopping for a new shell or cover.
Using Location and Shade to Your Advantage
Think of your hot tub’s spot like real estate; location is everything for longevity. I learned this after watching a client’s pristine cover turn chalky and brittle in just two Texas summers. Placing your spa with intention is the single most powerful, cost-free step you can take to shield it from UV assault. It also helps you consider how long a cover lasts and what you can do to extend its life. Small, deliberate choices like placement and shade really add up over time.
Assessing Your Site’s Sun Exposure
Don’t just guess where the sun hits. You need to become a detective for a day. From my own routine, I grab a lawn chair and observe the proposed spot from morning to evening, noting the sun’s path.
- Track the high, midday sun-this is the most intense and damaging. Watch for how long that blistering direct light bakes the exact spot where your tub will sit.
- Note reflective surfaces. Water, light-colored decking, concrete patios, and even snow bounce UV rays like a mirror. This reflected radiation attacks the underside of your cover and the shell’s waterline, areas you might forget to protect.
I once used a simple garden hose to outline the tub’s footprint and watched how the shadow moved. It was an eye-opener for planning the surrounding area.
Practical Shade Solutions You Can Install
Once you know your enemy’s path, you can build your defenses. You don’t need a full-blown enclosure unless you want one.
- Pergolas & Arbors: These are my top pick for a balanced approach. They break up sunlight while allowing crucial heat and moisture to escape upwards.
- Shade Sails: Affordable and modern. Install them with a slight pitch so rain runs off and doesn’t pool. Ensure they are anchored for wind.
- Retractable Awnings: Perfect for flexibility. Roll them out during the scorching summer days and retract them for stargazing on cooler nights.
- Strategic Planting: Plant deciduous trees or tall shrubs to the west or southwest. They’ll leaf out for summer shade and lose leaves for winter sun.
If you choose a solid roof, like a gazebo, you must prioritize ventilation. A sealed, hot box above your tub will trap evaporating water and chemical vapors, creating a corrosive sauna that can rot wooden structures and strain your cover’s underside. Always include generous eaves or a vented cupola.
Remember, smart shading does double duty. It slashes your energy bill by reducing the heater’s workload and keeps water temperature stable, preventing the pump from cycling on and off all afternoon.
FAQs
How can I protect my hot tub shell from UV damage?
Begin with a gentle clean using a non-abrasive, spa-specific cleaner to ensure a smooth surface. Apply a UV-blocking protectant formulated for acrylic or fiberglass shells, and maintain a weekly wipe-down to remove debris that can accelerate damage under the sun. Particularly pay attention to removing hard water stains, as they can be stubborn and worsen over time.
What are the best ways to protect my hot tub cover from sun damage?
Opt for a light-colored cover to reflect UV rays and ensure a snug fit to prevent gaps. Regularly use a vinyl protectant with UV inhibitors, and consider adding a clear, adhesive solar film for an extra layer of defense against harsh sunlight.
Are there specific products or covers designed to shield a hot tub from UV rays?
Yes, look for products like acrylic UV inhibitors, wipe-on polymer sealants, and UV-blocking solar films. Additionally, covers made with UV-resistant materials or in light hues are engineered to minimize sun damage and extend lifespan.
How often should I apply UV protectant to my hot tub shell and cover?
Reapply protectant every three to four months as a general rule. Adjust based on your climate-for example, in high-sun regions, applications every 60-90 days may be necessary to maintain effective shielding.
What are the signs of UV damage on a hot tub shell and cover?
On the shell, watch for fading color, a chalky white film, or fine micro-cracks. For the cover, signs include stiffness, brittleness, visible fading, or seams that are pulling apart, indicating material breakdown.
Preventing a Relapse
After all that hard work, don’t dive in just yet. Give your hot tub a final systems check. Run the jets for a few minutes and listen for that smooth, confident hum. Grab your test strips and confirm your pH and sanitizer levels are spot-on. Your reward for patience is perfectly balanced, inviting water. This last-minute verification is your guarantee of safety, comfort, and that all your preventative care will pay off. For beginners, the maintain proper hot tub water chemistry beginners guide can help you stay balanced. It covers testing and balancing for safer soaks.
The single most effective habit for stopping sun damage in its tracks is astonishingly simple. Every single time you close the cover, take thirty seconds to wipe it down with a dry towel. This removes moisture, pollen, and debris that bake into the vinyl under UV rays, causing brittleness and stains. Make ‘wipe down, then close down’ your new mantra, and your cover will thank you for years.
You’ve done the work. You’ve armored your spa against the sun. Now, there’s only one thing left to do-go enjoy it. Time to soak it in.
Further Reading & Sources
- 303 UV Protectant for Vinyl – 10 oz – SpaDepot.com
- How Hot Tub & Spa UV Works | SpectraLight
- Hot Tub & Spa UV Systems | SpectraLight
- Preventing Your Cover From Sun-Damage & UV Rays | The Cover Guy
- Amazon.com : UCEDER Waterproof Hot Tub Cover 170G Polyethylene Spa Cover and UV Protection Hot Tub Sun Shield (96″x96″x35″) : Patio, Lawn & Garden
- Hot Tub Cover Protection: UV, Rain, and Storm Solutions – The Cover Guy
Charlie is a hot tub enthusiast with a passion for keeping your jets running smooth and your bubbles bursting with joy. With years of experience in hot tub and jacuzzi maintenance, Charlie knows that a happy tub means a happy you. Whether it’s dealing with stubborn filters or giving your spa a little TLC, Charlie’s here to share expert tips, tricks, and plenty of laughs to help you keep your bubbly retreat in tip-top shape. So, kick back, relax, and let Charlie handle the rest — because no one likes a cranky jacuzzi!
Spa Covers