Stop Wasting Your Hot Tub: The Ultimate Landscaping Fix for Plants, Privacy, and Pathways
Published on: December 1, 2025 | Last Updated: December 1, 2025
Written By: Charlie Bubbles
If your hot tub sits on a barren slab, feeling exposed and making every soak feel like a public display, your core issue is a failed integration between your spa and your yard, and it’s killing your relaxation. This isn’t a leak or an electrical fault, but as a technician who has balanced thousands of gallons of water, I know a hostile environment ruins the soak just as fast as bad chemistry. It’s a pervasive nuisance that cheapens your investment.
- What You Need:
- A rough sketch of your space
- Chlorine-tolerant plants (like ornamental grasses or juniper)
- Privacy screen materials (bamboo fencing or trellis panels)
- Non-slip pathway substrate (crushed granite or textured pavers)
- One focused weekend
Using the same systematic approach I apply to plumbing repairs, this guide will show you how to build a cohesive, private spa zone yourself, no landscaper required.
Start with a Smart Plan: Landscape for Access and Upkeep
I’ve rolled up to too many service calls where the tub is tucked into a gorgeous, yet completely inaccessible, garden nook. It turns a simple filter change into a 30-minute puzzle of contortion. A little planning now saves hours of frustration-and repair bills-later.
Sketch Your Zone: Service Access and Splash Radius
Grab some graph paper and a tape measure. Draw your tub’s footprint, then create three critical zones around it. This sketch is your cheat sheet for a functional spa pad.
- The Service Corridor: You need a clear, sturdy path at least 3 feet wide leading to the equipment panel. Imagine carrying a new pump or heater. This path is non-negotiable.
- The Splash Zone: Mark a 2-foot perimeter around the entire tub. This area will get wet from soaking limbs and the occasional splash-out. Plan for non-slip, water-tolerant materials here, like textured concrete or river rock.
- The Dry Storage Nook: Designate a covered, ventilated spot within arm’s reach for chemicals, test strips, and a drip-dry towel. Keeping chems outside but protected is a major safety win.
A quick sketch with these zones prevents the common headache of beautiful but obstructive planter boxes or trellises placed right where a technician needs to work.
Slope, Drainage, and the Foundation of Dry Equipment
Water seeks the lowest point, and you absolutely do not want that point to be under your spa’s equipment cabinet. I’ve seen more control boards fried by ambient moisture than by actual failure.
Your pad or deck needs a slight slope-about a 1/4-inch drop per foot-away from the tub’s location. This directs splash water and rain runoff away from the electronics. Use a simple 4-foot level on a straight board to check. If water pools next to the cabinet after a rain, you’ve got trouble.
- Gravel is Your Friend: For slab-on-grade installations, a 4-inch deep bed of 3/4-inch crushed gravel under the pad provides fantastic subsurface drainage.
- Mind the Gap: Never bury the bottom of a wooden deck skirt or lattice. Leave a 2-inch air gap above the ground to prevent moisture wicking and promote airflow around the equipment.
- Channel Water Away: Consider a discreet channel drain or a French drain system if your tub sits in a natural low spot in your yard.
The gentle hum of a dry circulation pump is a sound of success; the sputter and pop of a wet one is a $500 repair waiting to happen.
Planting for Privacy Without the Plumbing Hassle
You crave that secluded, resort-like feel. But the wrong greenery will bombard your water with debris and send roots seeking out the warm, moist plumbing. Let’s get you privacy without the perpetual cleanup.
Choosing Spa-Smart Plants: The Do’s and Don’ts
Think “low-litter and well-behaved.” You want plants that hold onto their leaves, petals, and needles. Avoid sappy, messy, or invasive rooters at all costs.
| Do Plant These (Spa-Smart) | Don’t Plant These (Troublemakers) |
|---|---|
|
|
Sticking with plants known for neat habits is the single biggest favor you can do for your water chemistry and filter cycle.
How Far to Plant? Spacing for Health and Service
Give plants-and your tub-room to breathe. Crowding leads to poor air circulation, disease, and makes servicing a nightmare.
- For Shrubs and Hedges: Maintain a minimum of 4 to 6 feet between the plant’s mature width and your tub’s cabinet. This allows space for you to walk behind for inspections.
- For Small Trees: Plant no closer than 10 feet from the spa. This respects the root zone and prevents a canopy from dumping debris directly into the water.
- The Overhead Rule: Avoid planting directly under overhead power lines or tree limbs. You don’t want branches or visiting wildlife contributing to your water.
Always plant for the mature size listed on the tag, not the cute little shrub you brought home from the nursery.
Ongoing Care: Trimming, Watering, and Debris Management
Your landscape living near a hot tub needs a specific care routine to keep both the plants and the plumbing happy. This includes following hot tub drainage requirements and planning for water runoff so drained water goes away from plant roots and foundations. Direct the discharge to approved drainage areas or use gentle grading to avoid pooling in the beds.
- Strategic Trimming: Prune plants on the spa side to maintain that crucial service gap. Use clean, sharp shears to avoid tearing limbs, which attracts pests.
- Smart Watering: Use drip irrigation or soaker hoses directed at the plant’s root zone, not sprayers that wet the tub cabinet or deck. Water in the morning so surfaces dry by evening soak time.
- The Debris Defense: Keep a soft leaf net or a handheld skimmer next to the tub for a daily 30-second sweep. It’s easier than fishing out soggy leaves later.
- Mulch Wisely: Apply a 2-3 inch layer of coarse bark mulch around plants. Avoid fine mulch or pebbles that can easily get kicked into the water, as they can damage pump seals.
Building Pathways That Stay Safe and Dry

A soggy, slippery walk to your hot tub kills the vibe before you even get in. The right path does more than look pretty; it prevents slips, protects your feet from heat and debris, and directs water away from your spa’s foundation. For safety, the best hot tub steps also include sturdy non-slip handrails to support you as you enter and exit. Let’s map out how to build a walkway you can trust, day or night.
Material Showdown: Traction, Heat, and Chemical Resistance
Not all patio stones are created equal for hot tub duty. You need a surface that laughs at splash-out, provides grip for wet feet, and won’t scorch bare soles in the sun. Here’s my field-tested breakdown.
- Textured Concrete Pavers: My top pick for most owners. They’re affordable, incredibly durable, and the textured finish offers excellent slip resistance. They shrug off chlorine splash and won’t get too hot. The interlocking design makes for a stable, DIY-friendly project.
- Flagstone or Bluestone: Beautiful and natural, with a naturally rugged surface for traction. Ensure it’s sealed properly; porous stone can absorb spa chemicals and water, leading to stains or frost damage in colder climates. It can be pricey and requires a very stable, level base.
- Composite Decking: A fantastic option for a unified deck-to-path look. Choose a brand with a high traction rating. It’s resistant to moisture and chemicals, but can get quite warm under direct summer sun-test a sample first.
- Materials to Avoid: I’ve seen the mistakes. Glossy ceramic tile becomes an ice rink when wet. Smooth river rocks or loose gravel shift underfoot and are a tripping hazard. Untreated wood rots quickly from constant moisture and chemical exposure.
Step-by-Step: Laying a Simple, Stable Base
A wobbly paver is a twisted ankle waiting to happen. The secret isn’t the top layer-it’s what’s underneath. This method creates a “floating” path that handles freeze-thaw cycles without heaving.
- Mark and Dig: Use garden hoses or spray paint to outline your path, at least 36 inches wide for comfortable walking. Excavate to a depth of about 7 inches along the entire length.
- Install Edging: Secure rigid plastic or metal landscape edging along both sides. This is non-negotiable-it keeps your base material and pavers from spreading apart over time.
- Build the Base: Fill the excavated area with 4 inches of compactable gravel (often called “road base” or “crusher run”). Rake it level, then use a hand tamper or plate compactor to create a rock-solid, flat foundation.
- Add Leveling Sand: Pour 1 inch of coarse, polymeric sand over the gravel. This special sand contains polymers that harden when wet, locking pavers in place. Screed it perfectly level using a long 2×4.
- Set and Lock: Lay your pavers onto the sand bed, leaving a consistent 1/8-inch gap between them. Sweep more polymeric sand into all the joints. Then, using a fine mist, lightly spray the entire path to activate the locking polymers. Let it cure for 24 hours.
Lighting the Way: Functional and Ambient Path Lights
When the sun sets, your path needs to become a welcoming guide, not an obstacle course. Strategic lighting eliminates shadows and spills a beautiful glow that extends your hot tub evenings. You need a blend of task and accent illumination. To fully elevate the experience, pair your lighting with gentle soundscapes that enhance relaxation. Together, lighting and sound create a cohesive hot tub atmosphere.
For safe footing, install down-facing step lights or low-level bollard lights every 6-8 feet along the path’s edge. This casts light across the walking surface without creating a blinding glare. I prefer low-voltage (12V) LED systems-they’re energy-efficient, safe to install, and the wires are easy to bury shallowly along the path.
For pure atmosphere, consider subtle solar-powered stake lights nestled behind bordering plants. While not bright enough for primary safety lighting, these create a magical, star-like effect that makes the journey part of the relaxation. Just ensure their solar panels get full daytime sun. Always aim lights away from the hot tub itself to avoid shining directly into bathers’ eyes. This subtle lighting helps create the perfect ambiance around your outdoor hot tub. Pair it with soft music for a spa-like retreat.
Selecting Low-Maintenance, Spa-Friendly Plants
Choosing the right greenery around your hot tub isn’t just about aesthetics-it’s a practical defense against maintenance headaches. You want plants that won’t drop leaves or petals into your water, demand constant watering, or tempt you with chemicals every time a gust of wind blows. The best spa-side plants are tough, tidy, and act as a natural filter for dust and pollen before they hit your waterline. I’ve learned this the hard way after spending too many evenings skimming magnolia blossoms from a freshly balanced tub.
Drought-Tolerant and Native Plant Champions
This is where your landscaping does double-duty. Plants adapted to your local climate shrug off dry spells and temperature swings, meaning they thrive with minimal fuss from you. More importantly, they’re less likely to need frequent spraying for pests or diseases, keeping those chemicals far from your soak zone.
Focus on texture and scent over showy, fragile flowers. Here are my top performers:
- Ornamental Grasses (e.g., Blue Fescue, Fountain Grass): They provide beautiful, swaying movement and a soft sound. Their clumping habit means no invasive roots, and they rarely need any care once established.
- Lavender and Rosemary: These aromatic herbs are superstars. Their scent enhances the relaxation experience, they’re highly drought-tolerant, and they actually repel many flying insects-a major perk.
- Succulents (like Sedum or Sempervivum): These are the ultimate set-it-and-forget-it plants. They store water in their leaves, handle splash from chlorinated water without complaint, and offer incredible geometric shapes.
- Boxwood or Dwarf Holly Shrubs: For structured, evergreen greenery that provides year-round privacy and form. They can be trimmed neatly and don’t create leafy litter.
Always double-check the toxicity of any plant if you have pets or small children who might be tempted to nibble on the landscaping. A quick search can prevent a world of worry.
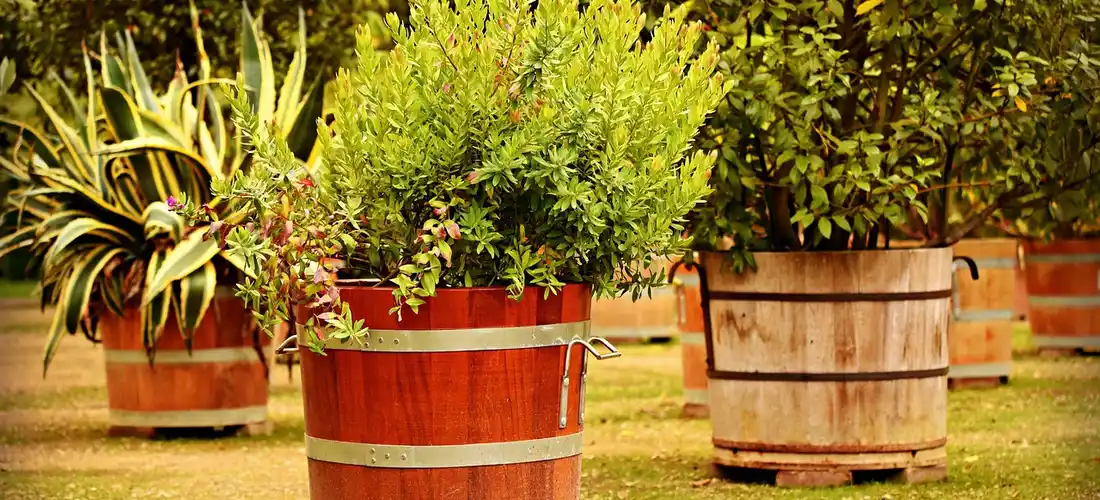
The Container Garden Advantage: Mobility and Control
This is my favorite strategy for hot tub areas. Planting in high-quality pots gives you ultimate command over your environment. Need to access the equipment panel for a pump repair? Simply roll the heavy pot out of the way. Is a plant not thriving in its spot? Move it to a sunnier or shadier location with ease.
Containers also let you control the soil mix perfectly for each plant’s needs, independent of your native ground soil. Use a high-quality potting mix with good drainage to prevent soggy roots and fungus gnats. For larger pots, invest in wheeled saucers-your back will thank you when it’s time to rearrange or winterize. Container gardening turns your landscape into a flexible, modular system that adapts to your hot tub’s needs, not the other way around.
Creating a Windbreak for Heat and Comfort
A stiff breeze does more than just give you chills when you step out of the tub; it’s a thief of heat and energy. Your heater works overtime to compensate for wind-cooled water, spiking your energy bill. A well-placed windbreak preserves warmth, boosts privacy, and muffles neighborhood noise.
For living windbreaks, think dense, columnar evergreens like Emerald Green Arborvitae or Sky Pencil Holly. Plant them in staggered rows, not a single straight line, for the most effective barrier. If you need a faster solution, combine a sturdy lattice or decorative privacy screen with a climbing vine like Clematis or Star Jasmine. Position your windbreak to block the prevailing winds in your yard, which is often the north or west side, but watch how the breeze actually flows around your tub for the best placement. The quiet hum of your circulation pump will be all you hear.
Adding Ambiance While Keeping it Simple
You don’t need a fancy backyard makeover to transform your soak session. A few thoughtful touches can build a serene retreat without the headache or huge cost. Focus on elements that serve dual purposes-beautifying your space while making routine water testing and filter cleaning easier on you. I learned this after years of wrestling with pumps in cramped, poorly planned setups; a little planning upfront saves countless hours of maintenance later.
Strategic Outdoor Lighting for Mood and Safety
The right lighting lets you enjoy your tub after sunset and prevents stubbed toes on the way back inside. It’s about balancing the warm, inviting glow with practical visibility for checking your water’s clarity and chemical levels. Always use low-voltage LED or solar-powered fixtures to cut energy costs and eliminate risky electrical runs near the water. I once repaired a circulation pump where the owner had strung improper patio lights overhead, creating a real shock hazard.
Think in layers for the best effect. Here’s my go-to setup:
- Path Lighting: Use staggered solar stakes along your walkway. They charge by day and automatically turn on at dusk, guiding your path safely.
- Uplighting: Place a single, waterproof LED spot behind a large potted plant or ornamental grass. This casts soft, dramatic shadows and avoids the harsh glare of an overhead bulb.
- Subdued Task Lighting: Install a dimmable, GFCI-protected light on a nearby post or wall. You need just enough light to read your test strips without ruining the relaxing mood.
Keep all wiring and transformers at least five feet from the tub cabinet to protect them from splash and moisture. The gentle hum of the circulation pump should be your evening soundtrack, not the buzz of a faulty wire.
Stone Edging and Mulch Beds: Defining the Space
A clear boundary around your hot tub does wonders. It contains mulch or gravel, stops grass and mud from invading your water, and gives the area a finished, intentional look. A simple stone border is a weekend DIY project that drastically reduces the dirt and leaves that clog your filter. I’ve balanced water in tubs surrounded by everything from mud pits to pristine decks, and a clean transition zone makes all the difference.
Choose materials that drain well and complement your style. Here are my top picks:
- River Rock Edging: Affordable and easy to install. Use larger, smooth stones (3-5 inches) to create a low wall. They allow water to percolate and won’t decay like wood.
- Concrete Paver Borders: These offer a crisp, modern line. Set them on a leveled sand bed for stability. Their uniform shape makes a great base for setting down a drink or your test kit.
- Mulch Beds: Fill the defined area between the edging and your tub’s skirt with cedar or pine bark mulch. It smells great, suppresses weeds, and provides a soft, dry surface for bare feet.
When building, slope the bed slightly away from the hot tub to direct rainwater runoff. This simple grade prevents puddles that can lead to slippery surfaces or water seeping under the cabinet. Always use a heavy-duty landscape fabric under your mulch to block weeds and keep the stone separate from the soil, making future refreshments a breeze.
Hot Tub Landscaping on a Budget: Smart DIY Wins
Creating a beautiful space around your spa doesn’t require a landscape architect’s fee. With some sweat equity and clever thinking, you can build a functional, private retreat that protects your wallet.
I’ve built my own cedar privacy screens and leveled more gravel pads than I can count, learning that the most satisfying projects often come from smart planning, not big spending.
Prioritize Your Projects: Privacy First, Pretty Later
When funds are limited, tackle the elements that give you the most immediate enjoyment and protection. Privacy is the foundation of relaxation.
Your goal is to block sightlines from neighbors or the street without creating a wind tunnel that steals your spa’s heat.
- Fast-Growing Greens: Bamboo (in containers to control roots) or clumping grasses like ‘Karl Foerster’ reed grass offer a quick, lush screen. Arborvitae is a classic, reliable choice that grows steadily.
- The Vertical Garden Hack: Attach inexpensive lattice panels to a simple 4×4 post frame. Let fast-climbing annuals like morning glory or sweet pea cover it in one season, or plant perennial clematis for a lasting solution.
- Strategic Placement: Before you buy a single plant, sit in your tub. Note exactly where you feel exposed. Sometimes moving just one large potted shrub is cheaper and more effective than building a whole fence.
Cost-Saving Material Hacks and Repurposing
Think like a handyman. The best materials are often durable, drain well, and can be found for a fraction of the cost if you get creative.
Gravel is your best friend for drainage and a stable base; look for “road base” or “crusher run” from local quarries-it’s far cheaper than bagged pea gravel and locks together.
- Pathway Perfection: Instead of poured concrete, use stepping stones with low-growing, fragrant thyme or moss in between. For a rustic path, use wood chips or mulch from a local tree service (often free or cheap).
- Border Genius: Repurpose materials for edging and borders. Old bricks from a demolition site, reclaimed railroad ties (ensure they are not creosote-treated), or even large, smooth river rocks collected over time create character without cost.
- Functional Mulching: Use a thick layer of bark mulch around the hot tub perimeter. It suppresses weeds, looks tidy, and provides a soft, dry surface for bare feet. Just keep it a good 6 inches away from the cabinet to prevent moisture retention and deter pests.
- The Spill Containment Pad: Instead of a pricey pre-made spa pad, create your own with pavers on a compacted gravel base. This gives you a perfectly level, solid surface for the tub and a dry place to stand.
Always call 811 before you dig anywhere to have underground utilities marked-it’s free, it’s the law, and it prevents catastrophic and expensive mistakes.
Common Questions
Where can I find good pictures for hot tub landscaping ideas?
Online platforms like Pinterest, Instagram, and home improvement sites such as Houzz are excellent sources for visual inspiration. Search using specific terms like “spa garden,” “hot tub retreat,” or “small backyard hot tub” to find ideas suited to your space. Save images that match your climate and the practical principles outlined in our guide, like good service access and low-litter plants.
How can I safely integrate a fire pit near my hot tub?
Safety and zoning are key. Maintain proper clearance around your hot tub, including a minimum of 10 feet between the fire feature and the hot tub to prevent heat damage to the spa cabinet and ensure safe movement. Use non-combustible materials like pavers or stone for the surrounding area and consider the prevailing wind direction so smoke doesn’t blow into the soaking area. This creates a cohesive entertainment zone while keeping both amenities safe and functional.
What are the best practices for hot tub landscaping with pavers?
Choose textured, non-slip pavers for safety and ensure proper installation to prevent shifting. As detailed in our pathway section, a stable base of compacted gravel and polymeric sand is crucial for longevity. Always slope the paver area slightly away from the hot tub to direct chlorinated splash water and rainfall away from the equipment cabinet, protecting the electronics from moisture. This approach helps create a safe slip-resistant hot tub deck area. When the surface stays dry and well maintained, footing remains secure as you step from the tub.
When should I hire a professional for “hot tub landscaping near me,” and how do I find one?
Consider hiring a pro for complex jobs like significant grading, installing permanent hardscaping, or wiring for outdoor lighting. To find a reliable landscaper, seek referrals from local hot tub dealers or neighbors, and look for contractors with specific experience in creating functional spa environments. Always verify they understand the critical need for service access and proper drainage around the equipment, especially when installing a hot tub on a sloped yard.
What are some foundational hot tub landscaping ideas for tricky spaces?
Start by defining the spa zone with simple edging and mulch to create a clean, low-maintenance border. For tight or sloped yards, use tiered planting with containers and built-in benches to add privacy and seating without major construction. Focus on solving your biggest issue first-whether it’s wind, lack of privacy, or a slippery path-using the zone-planning method from the guide.
Your Final Walk-Out
Before you sink into that first blissful soak with your new surroundings, do a final walk of the entire area. Check your stepping stones for wobbles and ensure all lighting is secure and functional. Turn on the hot tub jets at full power and watch how the wind moves through your new plants—this is your last chance to adjust anything before relaxation begins. For a smooth start, refer to your new hot tub first 24 hour quickstart guide for a quick setup checklist and safety tips. It’ll walk you through initial water care and the timing of your first soak so you can relax with confidence.
The single most important habit for a low-maintenance hot tub landscape is a simple two-minute weekly sweep: clear fallen leaves, blossoms, and debris from the cover, the water’s surface, and that crucial 3-foot perimeter around the cabinet. This stops organic matter from decaying in your water, which fights your chemicals and clouds your soak. It also prevents pests from setting up camp and keeps your pathways clear for safe, barefoot trips to the tub. Guidelines for hot tub use emphasize clean, balanced water and avoiding use when you are unwell or have skin infections. Keeping the area debris-free helps support these recommendations by minimizing contaminants and irritation risks.
You’ve blended nature, privacy, and function into a perfect personal retreat. The hard work is officially done. Go turn on the bubbles, step carefully down your new path, and enjoy the soak you’ve earned.
Further Reading & Sources
- Discover 36 Jacuzzi Above Ground Spa Area and Hot Tub …
- 11 Smart Backyard Hot Tub Ideas
- Hot Tub & Spa Ideas For Your Yard
- What landscaping ideas are suitable around a hot tub?
- Backyard Hot Tub Ideas You’ll Love – November 2025 | Houzz
- Hot Tub Landscaping On A Budget | Garden Ideas 2025
Charlie is a hot tub enthusiast with a passion for keeping your jets running smooth and your bubbles bursting with joy. With years of experience in hot tub and jacuzzi maintenance, Charlie knows that a happy tub means a happy you. Whether it’s dealing with stubborn filters or giving your spa a little TLC, Charlie’s here to share expert tips, tricks, and plenty of laughs to help you keep your bubbly retreat in tip-top shape. So, kick back, relax, and let Charlie handle the rest — because no one likes a cranky jacuzzi!
Outdoor Setup