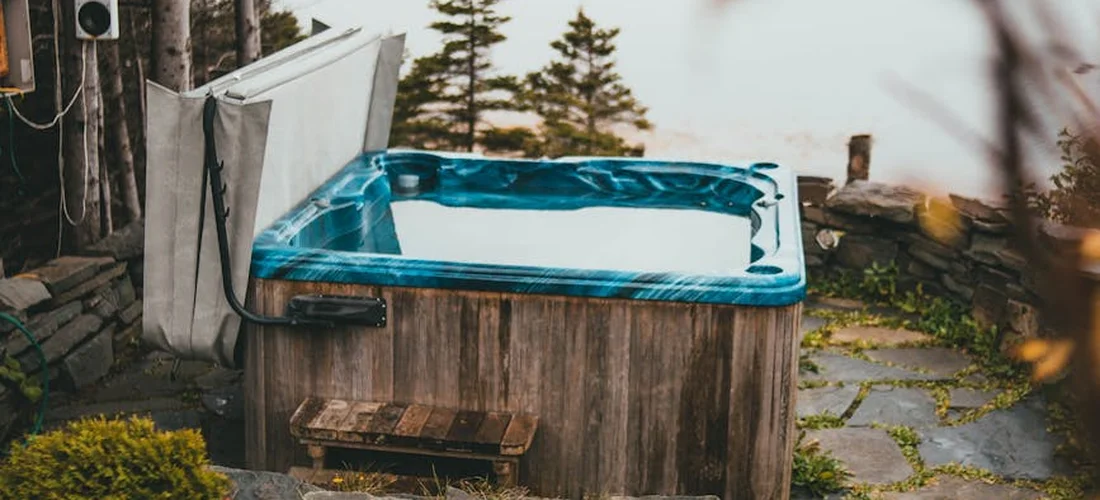
How to Measure Your Hot Tub for a Replacement Cover Accurately and Save $200
Published on: February 16, 2026 | Last Updated: February 16, 2026
Written By: Charlie Bubbles
Is your hot tub cover cracked, soaking wet, or so warped that it won’t seal? Your cover is failing because it was built from incorrect measurements. This isn’t a chemical or electrical emergency, but a costly drain on heat and your wallet every time the pump runs.
- What You Need:
- A 25-foot metal tape measure for accuracy
- A helper to keep the tape straight
- A pen and paper to avoid guessing later
- Seven minutes of undivided attention
I’ve measured dozens of tubs in my career, and with this method, you’ll get factory-perfect specs and order a replacement cover with confidence.
Why Precise Spa Cover Measurements Save You Money and Hassle
An ill-fitting spa cover is a constant drain on your wallet and your patience. I have hauled away too many warped, sagging covers that never sealed right from day one. A gap of just half an inch lets precious heat slip out, forcing your heater and pump to run constantly, which can spike your energy bill by 30% or more. That steady hum of the circulation pump working overtime is the sound of money burning.
Beyond energy waste, a poor seal wrecks your water balance. Increased evaporation concentrates your chemicals, leading to that harsh chlorine sting and making pH a nightmare to control. I’ve rebalanced more tubs where the root cause was a cheap, floppy cover than from any chemical mistake, proving that a good seal is your first line of defense for water clarity. You’ll use less sanitizer and fewer balancing agents, saving you a bundle on monthly supplies.
Returning a custom-sized cover is a costly headache. Most companies charge hefty restocking and shipping fees. Spending ten extra minutes with your tape measure now avoids weeks of back-and-forth with customer service and over a hundred dollars in non-refundable fees later. Think of it like tailoring a suit; guesswork leads to a garment you can’t wear.
Gathering Your Tools for Foolproof Measurements
You don’t need a pro’s truck full of gear, but the right few tools make all the difference. Rushing this step is the most common error I see. Grab these items before you even step outside, and you’ll set yourself up for a perfect fit on the first try.
- A Metal Tape Measure: Use a 25-foot steel tape, not a cloth or vinyl one. Cloth tapes stretch and give you false numbers. The rigid blade of a steel tape hooks onto the spa lip perfectly for a true length.
- Notepad and Pencil: Pen smudges if your hands are wet. Sketch a simple top-down shape of your tub and write each measurement clearly. I note the date and tub model right on the page.
- A 4-Foot Level: Place it across the top of the spa shell. If the tub isn’t level, your cover won’t sit flat, and water can pool on top, shortening its life. Check for dips or rises.
- A Second Pair of Hands: Enlist a helper. One person can hold the tape measure steady while the other ensures it’s straight and reads the number. It eliminates guesswork on diagonal measurements.
- Your Smartphone Camera: Snap clear photos of the spa from above, all four corners, and the locking mechanism. These photos are invaluable reference points if you need to confirm a corner radius or the style of skirt you have with the cover manufacturer.
I keep a dedicated “measuring kit” in my toolbox: a tape measure, a carpenter’s pencil, and a small notepad. This simple habit has saved me from ordering the wrong part more times than I can count, and it will save you from the frustration of a cover that just won’t sit right. Now, with your tools in hand, you’re ready to measure with confidence.
The Step-by-Step Measurement Process for Any Hot Tub
Grabbing your tape measure and diving in might seem straightforward, but I’ve seen too many owners guess and end up with a floppy, inefficient cover. Taking twenty minutes to measure correctly saves you hundreds on a cover that doesn’t fit and protects your water chemistry from the start. Let’s walk through it like we’re on a service call together.
Step 1: Clear and Prepare Your Spa Deck
Before you measure an inch, you need a clean stage. I can’t tell you how many times I’ve found a cover sitting on a pile of wet leaves or a forgotten pool toy, throwing off every measurement. A cluttered deck is the number one reason for measurement errors, leading to covers that wear out fast and leak precious heat.
- Remove the old cover completely and set it aside.
- Sweep away all debris, leaves, and dirt from the spa’s top rim and the surrounding deck.
- Wipe down the spa’s lip with a towel so your tape measure can grip securely.
- Check for any obstructions like permanent gazebo posts or railings that a new cover must clear when opening.
Step 2: Measure the Core Outside Dimensions
This is where your tape measure becomes your best friend. You’re measuring the spa shell itself, not the wooden cabinet or skirting. Always measure from the very outer edge of the acrylic shell to the opposite outer edge, going over the top-this gives you the true “footprint” the cover must seal.
- Length: Stretch your tape across the longest part of the spa. Do this in three places: near the front, middle, and back. Note the largest number.
- Width: Measure the shortest dimension, again in three different spots. Jot down the biggest figure.
- Write these down as Length x Width, always in inches. For example, 84″ x 84″.
I keep a notebook in my truck for this; a photo of your written dimensions next to the spa is a lifesaver.
Step 3: Document the Height and Critical Clearances
A cover that’s too tall or can’t flip back properly is just a bulky lid. We need to account for the spa’s profile and your space. Ignoring height and clearance is a sure way to order a cover that binds against a railing or won’t work with your lifter system.
- Spa Height: Measure vertically from the ground up to the top of the spa’s acrylic lip (where the cover sits).
- Critical Clearance: If you have a cover lifter, measure how much empty space is behind the spa for the cover to arc into when open. A simple tip: hold a broomstick where the open cover would go to check for fence or wall interference.
- Skirt Depth: Note how far the wooden cabinet extends below the acrylic lip if you want a “wrap-around” style cover.
Step 4: Map the Corner Radius and Spa Shape
This step catches most DIYers off guard. Modern spas rarely have perfectly square corners; they’re rounded for safety and style. An incorrect radius means the cover’s corners will hang over or pull away, creating gaps where cold air and dirt wage war on your warm, clean water.
Here’s my field trick: take a standard sheet of printer paper. Place one corner into the spa’s rounded corner. If the paper’s square corner touches both sides, you have a true radius. Mark where the spa curve meets the paper, then measure that distance back to the paper’s corner-that’s your radius. Most are 2″, 4″, or 6″. For complex curves, a flexible contour gauge is a ten-dollar tool that earns its keep.
Navigating Odd Shapes: Round, Oval, and Custom Spa Corners
Square tubs are simple, but what about the elegant oval or cozy round spa? The principles are the same, but your approach shifts. With curved shapes, a single mismeasurement amplifies the error all the way around, so precision is non-negotiable for energy efficiency.
For a round hot tub, find the center point—you can often use the cover hinge anchors as a guide—and measure straight across to the opposite side for the diameter. Do this in two perpendicular directions to ensure it’s truly round and not slightly oval. When planning placement, consider how a round versus a square hot tub will fit your space, since the shape can affect sightlines and clearance. A quick round-vs-square comparison can guide your layout decisions and point you toward the best choice for your space.
An oval spa requires two key numbers: the longest diameter (major axis) and the shortest diameter (minor axis). Measure these at their absolute fullest points, and don’t forget to note the corner radii at each end; they’re often larger than on rectangular models.
Custom shapes with odd corners demand a template. Use a roll of butcher paper or a large cardboard sheet. Carefully trace the entire top rim of the empty spa shell. Label the front. This template is gold when ordering a cover. I once helped a client with a keyhole-shaped spa; this method saved them from a $900 mistake.
Always double-check your odd-shape measurements by calculating the perimeter with a string, then comparing it to your tape measure’s total-it’s a classic handyman cross-verification that works.
Filling Out Your Hot Tub Cover Measurement Worksheet
Now that you have your tape measure and numbers, let’s get them on paper. I keep a simple spreadsheet for jobs like this, but a napkin works if it’s all you have. The goal is to create a single, error-free reference sheet you can hand to any cover supplier without second-guessing. Transfer each measurement carefully, writing legibly and noting which dimension is length, width, and skirt length.
I learned this the hard way early in my career. I swapped the length and width for a client’s oval tub, resulting in a cover that fit like a glove-if the glove was for the wrong hand. We had to eat the cost. Always label your numbers with “Front to Back” and “Side to Side” to avoid my expensive mistake. This is especially crucial for rectangular tubs where the sides look similar. Getting the right dimensions is key for any hot tub installation.
Your worksheet should include these core items in a clear list:
- Overall Length and Width: The top dimensions you measured across the acrylic lip.
- Corner Radius: Note if corners are square, rounded, or a specific radius. Trace a quarter onto paper if needed.
- Skirt Length: The vertical drop from the lip to where you want the cover to end.
- Taper Measurements: If your tub is narrower at one end, record both the wide and narrow widths.
- Control Box Location: Mark on your sketch which side has the equipment bay, as this affects skirt cut-outs.
Double-check every entry against your initial notes. A five-minute review here prevents a month-long headache waiting for a corrected cover. I always have someone else glance at my worksheet; a fresh pair of eyes catches transposed numbers I’ve stared at too long.
Choosing Your Replacement Cover Based on the Numbers
Your measurements are the blueprint, but now we translate them into a physical product. This isn’t just about size; it’s about matching the geometry of your tub to the right cover style and construction. Think of it like buying shoes—the right size is pointless if the arch support or width is wrong for your foot. Your numbers dictate what will actually fit and function, ensuring that all components, from the tub itself to its cover, work seamlessly together. And while we’re on the topic of components, understanding how hot tubs work can give you a better appreciation for why the right fit matters.
Matching Measurements to Cover Types and Materials
Your tape measure tells you what shape of cover you need. Square corners mean a standard rectangular cover. Rounded corners demand a custom-cut radius. A tapered tub requires a tapered cover. Ordering a standard square cover for a tub with 4-inch radius corners leaves gaps that drain heat and invite debris. This is why choosing the right hot tub cover style matters for efficiency. A properly matched cover minimizes heat loss and keeps your soak comfortable. I’ve seen it ruin a perfectly good soak on a cold night.
The materials are where your climate and usage shout the loudest. Your measurements determine how much material is needed, which impacts cost and performance.
- Vinyl Top & Bottom: The standard. Go for a minimum 25-ounce, UV-resistant marine-grade vinyl. Thinner material cracks under the Texas sun I deal with, fading in a single season.
- Core Insulation: Measured thickness (like 4″ or 5″) ties directly to the R-value. A higher R-value (aim for R-15 or above) traps the hum of your heater and saves energy. For colder climates, a 5-inch tapered core is my go-to.
- Skirt Material: The skirt length from your worksheet determines how much weatherproof barrier you have. A longer skirt (over 4 inches) better blocks wind and light.
Consider this: a 90-inch by 90-inch square tub with a 5-inch radius might accept a “standard” 90×90 cover, but the radius will be wrong. Pay for the custom radius cut; it’s the difference between a seal that snaps shut and one that sags open.
Key Specs to Confirm Before You Order
With your worksheet in hand, use it to verify these critical specifications with the manufacturer. Don’t just assume they’ll get it right.
First, lock in the dimensions. Verbally confirm the exact length, width, corner radius, and taper from your worksheet. Get a confirmation email with these specs listed. I’ve had suppliers misread a ‘7’ as a ‘1’, and that email was my only proof for a remake.
Next, drill into the build details. Your numbers inform these choices:
- Total Weight & Lift Assist: A larger cover (over 85 square feet) with a 5-inch foam core can weigh 50+ pounds. Confirm it includes a sturdy, metal hinge with gas struts for easy, one-person lifting.
- Vapor Barrier: Ensure the core is fully wrapped in a plastic film. An unwrapped foam core absorbs moisture from humid air, gaining weight and losing R-value fast. I’ve cut open failed covers to find soggy, disintegrating foam.
- Strap and Lock System: Based on your skirt length, verify the lock mechanism is robust. Flimsy plastic latches break in high winds. Look for metal-reinforced locks.
Finally, cross-reference the warranty with the material specs. A 5-year prorated warranty on a cover with 25-ounce vinyl and a 4-inch, wrapped core is a good benchmark. If the specs are lower but the warranty is longer, ask questions. The math rarely works out in your favor long-term.
Top Measurement Blunders and How to Sidestep Them
After helping dozens of folks measure for covers, I’ve seen the same simple mistakes crop up time and again. Getting your measurements wrong isn’t just frustrating-it wastes money and lets precious heat escape, making your pump work harder and spiking your energy bill. Let’s walk through the most common pitfalls so you can nail it on the first try.
Guessing on an Unlevel Base
Hot tub pads can settle or shift over time, especially if you’ve had any plumbing work done. Measuring across a dip or hump will give you a false length or width. I always lay a long, straight board across the area I’m measuring to bridge any gaps and find the true, level span. If your tub feels wobbly, that’s a sign the base needs attention before you even think about a new cover. Choosing the right size hot tub starts with a level, prepared foundation pad. Plan the pad dimensions early so the unit fits securely and evenly.
Measuring Over the Skirt or Lip
This is the big one! Your old cover likely sits *inside* the tub’s acrylic lip, not on top of it. If you measure the outer skirt, your new cover will be too big and won’t seal. Always measure the inside dimensions of the tub shell where the cover actually rests, which is usually a few inches smaller than the total outside footprint. Run your hand along the edge to feel for that inner ledge.
Trusting a Floppy Tape Measure
A flimsy, old tape measure will sag and give you inaccurate readings. I keep a sturdy, metal-retracting tape in my toolbag just for this job. For long spans, have a helper hold one end taut, or use a series of smaller, precise measurements that you add up afterward. The quiet hum of your circulation pump is a reminder that energy efficiency starts with details like this.
Forgetting the Corner Radius
Not all corners are sharp 90-degree angles. Many tubs have rounded corners, and ordering a square cover for a rounded tub leaves gaps. Use a flexible contour gauge or even a bendable piece of cardboard to trace the curve, then measure the radius on that template. Note if all four corners are the same-I’ve found mismatched corners on older models more than once.
Assuming Perfect Symmetry
You can’t assume opposite sides are equal. Sun exposure, ground settling, or shell warping can make a tub slightly trapezoidal over the years. Measure each side independently-length left-to-right, width front-to-back-and write down every number, even if they differ. This five-minute step saves you from a cover that binds on one side and flaps on the other.
Skipping the “Measure Twice” Rule
Excitement to order a new cover can lead to rushing. I’ve done it myself! Always take all measurements a second time, from a different starting point, to confirm your numbers before you place the order. This is the same diligence you’d use balancing your water; a little extra time upfront prevents a cloudy, costly mess later.
Common Questions
Why is a specific measurement worksheet better than just writing numbers on paper?
A dedicated worksheet guides you to measure every critical dimension, like corner radius and skirt depth, that you might otherwise forget. Using a structured template prevents costly omissions and ensures you collect all the data a manufacturer needs in one organized place. This method turns a guesswork task into a foolproof system.
What is a hot tub cover measurement electronic worksheet, and how does it help?
An electronic worksheet is often a fillable PDF or online form that prompts you for each specific measurement. It helps by providing a clear, digital record that can be saved, emailed directly to a supplier, and easily referenced later. This format reduces transcription errors and ensures no field is left blank, streamlining the ordering process for a perfect fit.
Where can I find a reliable hot tub cover measurement worksheet PDF?
Most reputable hot tub cover manufacturers and specialty retailers offer a free, downloadable PDF worksheet on their websites. You can also find standardized versions from spa industry associations. Always use the worksheet provided by the company you plan to order from, as it will be tailored to their specific manufacturing requirements. If you’re also shopping for hot tub supplies, reputable hot tub supplies retailers and online marketplaces can offer compatible covers, parts, and accessories. These sources often provide product specs aligned with the worksheets, making your next purchase easier.
Can I use a printable worksheet for an irregularly shaped spa?
Yes, a printable worksheet is an excellent starting point for any shape, as it reminds you to document key metrics like length, width, and radii. For highly irregular shapes, use the worksheet to record your measurements and then supplement it with a physical cardboard template of the spa’s top profile. This combination gives the manufacturer the most precise information possible.
Should I complete a measurement worksheet even if my old cover seems fine to measure?
Absolutely. Your old cover may be warped, waterlogged, or have shrunk over time, making it an unreliable template. A fresh worksheet based on the actual spa shell dimensions accounts for the tub’s true shape and any settling that may have occurred. This guarantees your new cover will fit the spa itself perfectly, not just the old, failing cover. For a precise, step-by-step fit, see our hot tub cover installation proper fit guide. It walks you through measuring, trimming, and securing the cover to ensure a snug, long-lasting seal.
The 7-Day Check
Before you click that order button, do one last thing. Place your new measurements against the tub one more time, with your tape and level. Run your hand along the lip where the cover will sit. I’ve seen folks measure perfectly, only to realize a planter or fence post will block the cover from fully opening. A final, calm verification is cheaper than return shipping. When you’re confident in your measurements, be sure to follow a hot tub cover care and maintenance guide to ensure longevity.
Your Golden Rule of Cover Care
A cover is a shield, but it’s not invincible. The single biggest favor you can do for your new cover is to keep it dry and supported underneath. Moisture trapped in the foam cores is what leads to rot, odor, and crushing weight.
Make it a weekly ritual: after your soak, lift the cover completely open for just five minutes to let the steam evaporate off the underside before closing it up for the night. This one simple habit will double the functional life of your cover by preventing internal moisture rot.
You’ve done the meticulous work. You’ve wrestled with the tape and decoded the angles. Now, go order that cover with confidence. Your hot tub cover – and your next perfect, steam-filled soak – is waiting.
Further Reading & Sources
- Hot Tub Covers: How to Measure for a Replacement Cover – In The Swim Pool Blog
- How to Measure Hot Tub & Spa Covers | The Cover Guy
- Measuring & Ordering your Replacement Hot Tub Spa Cover
- Measuring a Hot Tub Cover Correctly | Get Spa Cover Measurements
- Guide: Spa Cover Measurement – SpaDepot.com
- How To Measure A Hot Tub Cover – MySpaCover.com
Charlie is a hot tub enthusiast with a passion for keeping your jets running smooth and your bubbles bursting with joy. With years of experience in hot tub and jacuzzi maintenance, Charlie knows that a happy tub means a happy you. Whether it’s dealing with stubborn filters or giving your spa a little TLC, Charlie’s here to share expert tips, tricks, and plenty of laughs to help you keep your bubbly retreat in tip-top shape. So, kick back, relax, and let Charlie handle the rest — because no one likes a cranky jacuzzi!
Spa Covers