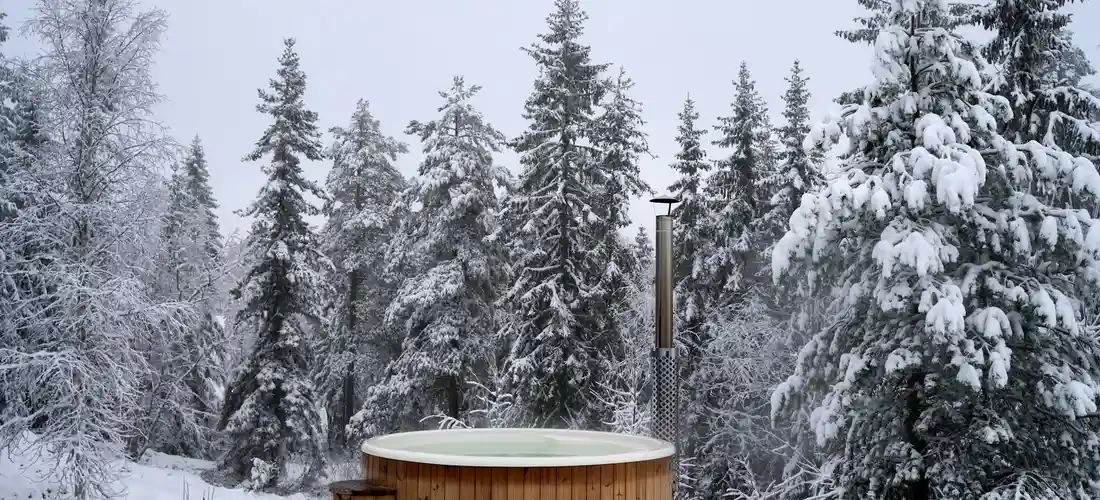
Stop Your Hot Tub from Sinking: The Hard Truth About Grass and Dirt Foundations
Published on: January 1, 2026 | Last Updated: January 1, 2026
Written By: Charlie Bubbles
If your hot tub is tilting, sinking into the lawn, or feels wobbly when you climb in, you have a critical foundation failure. This is not a minor annoyance; it’s a serious hazard that can crack your acrylic shell, rupture plumbing lines, and compromise electrical safety, demanding immediate action.
- What You Need:
- A 4-foot carpenter’s level
- Shovel or a small excavator rental
- Compactable gravel (3/4-inch minus)
- Concrete pavers or a pre-formed spa pad
- Hand tamper or plate compactor
- One focused weekend
I will show you how to permanently solve this with a DIY-grade concrete pad or gravel base that handles the weight, so you never pay for a structural repair.
The Real Deal on Hot Tubs and Natural Ground
Can you plop a hot tub directly onto grass or dirt? My direct answer is yes, but only if you’re willing to put in serious preparation work first. I’ve seen too many folks skip this step and pay the price later.
Think about the ground beneath your feet. Grass might feel soft and inviting, but it hides a spongy, moisture-trapping layer that compresses unevenly under weight. Bare dirt seems solid, but it can wash away or settle in spots. For a hot tub holding over 3,000 pounds of water and people, that uneven support is a recipe for disaster, which is why proper soil testing and compaction are crucial before installation.
- Grass: Poor weight distribution. The root mat creates a false sense of stability that quickly fails, leading to tilting. Traps moisture against the tub’s base, promoting rot and rust.
- Dirt: Susceptible to erosion from splash-out or rain, causing sinking. Can become as hard as concrete in some spots and powdery soft in others, ensuring an unlevel install.
The key reality is simple. Untreated, natural ground will always shift and sink under the immense load, leading to a cracked shell, busted pipes, and repairs that cost more than the proper base would have. You’re fighting gravity and geology, and you need a plan to win.
Why Skipping Ground Prep is a Costly Mistake
Ignoring a solid foundation is the fastest way to turn your relaxation investment into a money pit. The consequences aren’t just possible; they are practically guaranteed over time. I once rolled up to a service call for a “heater error” only to find the entire tub tilted like a ship taking on water.
The owner had set it on a grassy slope, and after a rainy season, one corner had sunk four inches. The strain had cracked a pressure fitting inside the cabinet, causing a slow leak that tripped the system. The fix cost him nearly $800 in parts and labor-all preventable.
Here’s what happens when you cut this corner:
- Cracked Shells: An uneven base places torsion stress on the acrylic and fiberglass, creating hairline fractures that grow with every use.
- Stressed Plumbing: Pipes and seals are designed for a level plane. When the tub shifts, joints are pulled apart, leading to leaks behind the panels.
- Voided Warranties: Nearly all manufacturers require a “solid, level, and continuous” support base. Installing on dirt or grass nullifies your coverage instantly.
- Uneven Water Chemistry: A sloped tub creates deep and shallow ends. Chemicals pool incorrectly, leading to a sting of chlorine in one spot and cloudy, unsafe water in another.
- Foundation Failure: The ground literally gives way. This can bend the structural frame, misalign the jets, and create a permanent, unsafe tilt.
Investing a weekend in proper ground prep saves you thousands in emergency repairs and keeps your water balanced and safe for years. Don’t let a shortcut sink your spa dreams.
Step-by-Step: Prepping a Grass Site for Installation
Tools and Materials You’ll Need
Gathering your gear first avoids frustration. I’ve wasted a sunny afternoon fetching a sod cutter I forgot. Investing in or renting the right tools transforms this job from a struggle into a straightforward project.
- Tools: A sharp shovel, a sod cutter (for areas larger than 10×10 feet), a plate compactor, a 4-foot carpenter’s level, and a 25-foot tape measure.
- Materials: Heavy-duty landscape fabric, ¾-inch crushed gravel (about a cubic yard for a standard tub), coarse masonry sand, and your choice of a solid surface-concrete pavers or a rigid EPS foam pad.
The Preparation Process
Follow this sequence like a recipe. Skipping compaction is like building on mashed potatoes. The goal is to create an immovable, perfectly level plate for your tub to sit on, preventing stress on the shell and plumbing.
- Mark and clear the area. Use stakes and string to outline a space 12 inches wider than your tub’s footprint. Clear all surface debris-leaves, twigs, and toys.
- Remove sod and topsoil. Cut out the grass and dig down 4 to 6 inches to eliminate soft, organic soil. You’ll hit denser, darker subsoil.
- Compact the exposed subsoil. Run the plate compactor over the entire area multiple times. The machine’s steady hum and the solid thump underfoot signal a good base.
- Lay down a weed barrier. Unroll the landscape fabric over the compacted earth, overlapping seams by 6 inches. This fabric stops roots and aids drainage.
- Add a 4-inch gravel base, compact in layers. Spread 2 inches of gravel, compact it thoroughly, then add the final 2 inches and compact again. Properly compacted gravel won’t shift when you walk on it.
- Level and place your chosen pad or pavers. Use sand to fine-tune the levelness of the gravel bed. Set your pavers or foam pad, checking with the level in a star pattern.
Step-by-Step: Prepping a Dirt Site for Installation
Assessing Your Soil
Your dirt isn’t just dirt-it’s the character of your land. I’ve fixed tubs that sank in sandy coastal soil and others that heaved from expansive clay. Understanding your soil type is the first, most critical step in building a foundation that won’t fail.
Perform a simple squeeze test with damp soil. Clay forms a smooth, sticky ribbon; sand feels gritty and falls apart; loam is crumbly and dark. Signs of unstable soil include water pooling for days, large cracks when dry, or a soft, spongy texture that yields under your weight. You must dig down to undisturbed, compact soil, even if that means going deeper than you planned.
- Clay Soil: Expands when wet, shrinks when dry. Demands aggressive drainage solutions.
- Sandy Soil: Drains quickly but lacks cohesion. Requires meticulous, layered compaction.
- Loamy Soil: A good balance, but still needs to be excavated and compacted to bear the load.
Building a Stable Foundation
This is where you build from the ground up, literally. I compare it to setting a stone patio—every layer matters for stability. Excavating to stable subsoil is the single most important action you can take to ensure your hot tub doesn’t settle or tilt. For balcony installations, these stability checks translate to confirming the structure’s load limits and using a balcony weight safety guide. Always verify the balcony can support the full hot tub weight before installation.
- Excavate to a depth of 6-8 inches. Remove all loose material until you reach soil that’s hard to dig with a shovel. This is your load-bearing stratum.
- Compact the native soil. Use the plate compactor on this virgin earth. A well-compacted base should feel rock-hard and show no footprints.
- Install a perimeter for drainage if needed. In clay-heavy sites, dig a shallow trench around the excavated area and fill it with gravel to channel water away.
- Add and compact a 4-6 inch layer of crushed stone. Spread the stone in 3-inch layers, compacting each one until the aggregate locks together and no longer crunches under the compactor.
- Use a laser level to ensure a perfectly flat surface for the pad. Even a 1-degree slope can cause water to channel under the tub, promoting mildew and uneven settling. Verify the flatness across the entire gravel bed.
Choosing Your Hot Tub Base: Materials Compared
Think of your hot tub’s base as its foundation—get it wrong, and everything else becomes a wobbly, leaking headache. I’ve leveled tubs on everything from a pristine concrete pour to a hastily assembled gravel patch, and the right choice saves you countless hours of correction later, especially when dealing with sloped ground.
Concrete Slabs and Poured Pads
A poured concrete pad is the gold standard, the permanent solution you install once and (mostly) forget. I recommend a minimum 4-inch thickness with rebar or fiber mesh reinforcement to prevent hairline cracks from becoming canyons under thousands of pounds of water and people. The main drawback isn’t just the upfront cost; it’s the absolute permanence-relocating your tub later means dealing with a massive, useless slab in your yard.
- Pros: Ultimate stability, perfectly level surface, permanent, low maintenance.
- Cons: Highest initial cost and labor, requires professional pouring for best results, permanent placement, can be hard on bare feet.
Concrete Pavers and Gravel Beds
For a more flexible and DIY-friendly solid base, a compacted gravel bed topped with interlocking concrete pavers is my go-to. The key is the base: start with 4-6 inches of compacted crushed stone (like 3/4″ minus gravel), not round pea gravel which shifts too easily. Always lay a high-quality, non-woven landscape fabric (look for a 100+ micron rating) underneath the gravel to block weeds and prevent the stone from sinking into the soil.
- Interlocking Pavers: Provide a clean, solid walking surface. Install them on a 1-inch bed of coarse sand over your compacted gravel base, checking for level as you go.
- Compacted Gravel Alone: A fully gravel bed is cost-effective and drains exceptionally well. Use a plate compactor to get it rock-solid, creating a stable, if slightly less foot-friendly, platform.
Specialized Plastic Pads and Decking
These are the modern problem-solvers. EPS (expanded polystyrene) foam pads, like the popular EZPad, sit directly on leveled ground and distribute the hot tub’s weight evenly. Plastic grid systems, filled with gravel or grass, are fantastic for drainage and preventing ruts. Whichever system you use, ensure there is at least 1-2 inches of clearance around the entire perimeter of the tub skirt for proper ventilation and access—cramming it flush against a wall is an invitation for moisture damage and critter homes. It’s not just about the pads; where you place the hot tub plays a crucial role in its longevity.
- Pros: Excellent thermal insulation (saves energy), lightweight, often modular and easy to install, great for drainage.
- Cons: Can be chewed by rodents if exposed, may degrade in direct UV sunlight over many years, must be on perfectly leveled ground.
Red Flag Sites: When to Avoid Grass and Dirt Altogether
Some spots in your yard are just doomed for hot tub installation, no matter how tempting the view. Trust me, fighting the land is a battle you will lose, usually in the middle of a relaxing soak that turns into a list. In the ultimate landscaping guide for hot tub owners, you’ll learn how to use plants for privacy, create practical pathways, and harmonize the space with the rest of your yard. We’ll help you turn troublesome spots into private, inviting spa zones.
Problematic Slopes and Erosion Risks
If your chosen spot has a visible slope-anything over about 2 degrees-walk away. Water follows gravity, and runoff will constantly erode the soil beneath one side of your tub, leading to a dangerous and costly lean. You might hear the pump strain as water levels shift, a sure sign your tub is becoming a modern-day Leaning Tower of Pisa. Building a retaining wall is an option, but it’s often more complex and expensive than simply choosing a flatter location from the start.
Unstable Soils and High Moisture Areas
Soil type is everything. Pure sand lacks cohesion and will shift. Expansive clay swells when wet and shrinks when dry, creating a seasonal teeter-totter. The worst offender is any low-lying or perpetually waterlogged area. Installing a hot tub in a sponge-like patch, or just downhill from a roof downspout, guarantees a muddy, unstable mess and dramatically accelerates corrosion on the underside of your cabinet. In these cases, your only real options are to bring in a pro for serious soil stabilization or to build an elevated, reinforced deck that completely bypasses the problem ground. Consider different deck types—wood, composite, or PVC—when planning the install. Each option has implications for drainage, weight support, and maintenance under a hot tub.
FAQs
Is it ever safe to place a hot tub directly on grass?
No, it is not safe to place a hot tub on grass directly on untreated grass. The root mat and soil beneath compress unevenly under the immense weight, leading to tilting and moisture buildup. This can void warranties and cause costly damage to the shell and plumbing. If you’re considering putting a hot tub on grass, here’s what you need to know. A solid, level base is essential to prevent damage to the tub and lawn.
Can I install a hot tub on bare dirt if it seems solid?
Even solid-appearing dirt is unreliable for direct installation. Untreated dirt is prone to erosion and uneven settling, which compromises stability. Proper preparation with excavation and compacted gravel is necessary to create a level, load-bearing foundation.
What are the critical steps in preparing the ground for a hot tub?
The essential steps include excavating to stable subsoil, thoroughly compacting each layer, and adding a crushed gravel base. Ensuring perfect levelness with tools like a carpenter’s level is crucial to prevent stress on the tub’s structure and components. These steps lay the groundwork for a ground hot tub installation, a core topic in a complete guide to jacuzzis. Following a full installation guide helps ensure the base remains level and the tub is securely supported for years to come.
What are the best materials to use for a hot tub base on grass or dirt?
Opt for compacted gravel beds topped with concrete pavers or rigid foam pads. These materials provide even weight distribution, excellent drainage, and DIY-friendly installation. When choosing a foundation compare concrete pads, gravel bases, and spa pads to find the best fit for your setup. Avoid soft materials like pea gravel or untreated wood that can shift over time.
When should I completely avoid placing a hot tub on grass or dirt?
Avoid sites with significant slopes, unstable soils like expansive clay, or areas with high moisture or poor drainage. These conditions heighten risks of erosion, sinking, and structural failure, making a stable foundation nearly impossible without professional intervention.
The Final Verdict: Soil vs. Sound Footing
Before you light the candles and grab your towel, there’s one last pre-flight check. After the first full heat cycle, walk around the tub. Look for new dips or tilts. Run the jets on high and feel for any unusual vibration. This final walk-around is your last chance to catch a subtle settling issue before you and your friends climb in.
From my years of service calls, the single biggest mistake is forgetting the ground after the tub is full. The prep work sets the stage, but ongoing vigilance keeps it level. Does it need to be perfectly level? Not perfectly, but near-level is best to minimize stress and potential leaks. Mark your calendar to check the tub’s level with a simple carpenter’s level every six months, especially after heavy rains or a deep freeze—this one habit prevents 90% of future stress cracks, pump strain, and plumbing leaks.
You’ve done the hard work. The gravel is packed, the pad is solid, and the tub is humming quietly. Now, go turn on the bubbles. You’ve earned a soak on a foundation that won’t quit on you.
Further Reading & Sources
- The Best Hot Tub Foundation – 6 Ways to Support Your Spa – Koval Building Supply
- Hot Tub Sinking Advice | Hot Tub Suppliers | Sunken Hot Tub Tips
- 6 Best Base Materials For Your Hot Tub Foundation
- Hot Tub Foundation Guide – 5 Ways To Ensure Spa Stability
- What Is The Best Base for a Hot Tub? How To Get Your Site Ready
- Best Hot Tub Foundations – 6 Top Options For Your Spa
Charlie is a hot tub enthusiast with a passion for keeping your jets running smooth and your bubbles bursting with joy. With years of experience in hot tub and jacuzzi maintenance, Charlie knows that a happy tub means a happy you. Whether it’s dealing with stubborn filters or giving your spa a little TLC, Charlie’s here to share expert tips, tricks, and plenty of laughs to help you keep your bubbly retreat in tip-top shape. So, kick back, relax, and let Charlie handle the rest — because no one likes a cranky jacuzzi!
Outdoor Setup