How to Fix Your Hot Tub Maintenance Dilemma: DIY Tasks vs. Pro Repairs Simplified
Published on: January 15, 2026 | Last Updated: January 15, 2026
Written By: Charlie Bubbles
If you’re staring at cloudy water or hearing an odd hum from the equipment pad, you’re facing a classic maintenance crossroad. A hazy spa and unusual pump noise often signal a simple chemical imbalance or a dirty filter, not a catastrophic failure. This is generally a nuisance that drains your wallet and joy, but left unchecked, it can escalate into a repair bill that stings.
-
What You Need:
- A fresh set of test strips for pH and sanitizer levels
- A filter cleaning solution or wand
- A multimeter for safe voltage checks
- Thirty minutes of your time
This guide will equip you to confidently handle the routine upkeep and troubleshoot the common hiccups, so you save the pro call for when it truly counts.
Your Maintenance Mindset: Smart Ownership Saves Time and Money
Think of your hot tub like a high-performance car parked in your backyard. You wouldn’t ignore its oil changes or never check the tire pressure. That same proactive mindset turns a chore into a simple habit. I’ve seen too many owners wait for the water to turn green or the pump to squeal before they pay attention. The most successful owners I know spend 15 minutes a week on testing and visual checks, preventing 90% of the problems that lead to costly service calls. This isn’t about being a chemist or a plumber; it’s about being an observant owner who catches small issues before they become big, wet, expensive disasters.
The Weekly & Monthly DIY Rituals: Your Home Maintenance Foundation
This is where your hands-on effort pays the biggest dividends. These tasks require no special tools beyond what’s in your kitchen or laundry room, and they directly control your water quality, energy bill, and equipment lifespan.
Water Testing and Chemical Balancing
This is your non-negotiable weekly conversation with your water. I keep my test kit right by the back door. Dip the strip, wait, and compare. That thirty-second ritual tells you everything. Your goal is stability, not perfection. Always adjust Total Alkalinity (TA) first, aiming for 80-120 ppm, as it acts like a shock absorber for your pH, preventing it from bouncing wildly every time you use the tub. Get TA right, and pH (7.2-7.8) becomes easy to manage. I once fought cloudy water for a week, only to realize my alkalinity was a measly 50 ppm; the pH was swinging like a pendulum, rendering my sanitizer useless.
For sanitizer, whether you use chlorine or bromine, consistency beats heavy dosing. Think of it like salting your dinner-a little each day is better than dumping the whole shaker on once a week.
- Test Frequency: Use test strips or a liquid kit at least twice a week. Test daily when first filling or after heavy use.
- The Correct Order: 1. Balance Total Alkalinity. 2. Adjust pH. 3. Add your primary Sanitizer (Chlorine/Bromine). 4. Check Calcium Hardness (150-250 ppm is ideal to prevent scale or foaming).
- Shock Treatment: A weekly oxidizer shock is a DIY must. It burns off the invisible waste that makes water dull and smells funky. Do it after sunset for maximum effectiveness.
Filter Cleaning and Care
Your filter cartridge is the tub’s liver, working silently to trap oils, lotions, and debris. A clogged filter makes your pump strain, your heater work overtime, and your chemicals ineffective. A clean filter is the single biggest factor in achieving that sparkling, inviting water clarity we all want. Common hot tub filter problems—like clogs, reduced flow, or leaks—are usually fixable with a quick rinse, replacement, or seal check. I’ll walk you through easy fixes so you can keep your water crystal clear. I recommend a two-filter system: one in the tub, one clean and dry on your shelf, so you can swap them in 60 seconds.
- Weekly Rinse: Every time you test water, pull the filter and spray it down with a garden hose. Use a strong jet of water from the top pleats down to flush out surface gunk.
- Monthly Deep Clean: Once a month, soak the filter overnight in a dedicated filter cleaner solution. This dissolves the invisible body oils and calcium that a hose can’t touch. Never use dish soap-it clogs the pores!
- Annual Replacement: Even with perfect care, filters wear out. Plan to replace pleated cartridges every 12-18 months. A worn-out 50-micron filter might as well be a 100-micron filter, letting too much slip through to the heater.
Shell and Surface Cleaning
A quick wipe-down prevents scum lines and surface stains. Hard water can leave stubborn mineral deposits on the shell, so regular cleaning helps prevent hard water stains from becoming permanent. When you drain the tub for a refill (every 3-4 months), that’s your chance for a deep clean. Always use cleaners formulated for acrylic surfaces; household sprays or abrasive pads will permanently dull the glossy finish. I use a soft rag and a paste of baking soda and water for tough waterline rings—it’s gentle but effective. Rinse the shell thoroughly before refilling to avoid any chemical residue mixing with your fresh water.
- Post-Soak Habit: After you get out, give the waterline a quick swipe with your hand. This simple act pushes oils and debris away from the shell, making your weekly cleaning far easier.
- Drain & Refill Protocol: This is a full-afternoon DIY project. Drain, scrub the empty shell, clean the filter(s), refill, and then rebalance all chemicals from scratch. It’s a reset button for your water chemistry.
Spa Cover and Cabinet Care
Your cover is your primary defense against heat loss, evaporation, and debris. A heavy, waterlogged cover can strain your cover lifter and waste massive amounts of electricity. Every month, gently lift each corner of your cover to check for water saturation-a good cover should feel light and firm, not heavy and soggy. Use a dedicated vinyl protectant (303 Aerospace Protectant is my field-tested favorite) to keep the vinyl pliable and UV-resistant, preventing cracks and fading.
For the cabinet, just keep it clean and ensure the vents are unobstructed for proper airflow to the equipment. A quick vacuum of the interior compartment every few months prevents dust bunnies from insulating your electronics and causing overheating.
Hands-On Repairs You Can Tackle: Basic Tools and Grit
I’ve saved hundreds over the years by not calling a pro for every little gurgle or drip. With a socket set, some PVC primer, and a healthy respect for turning off the power, you can handle more than you think.
Unclogging and Servicing Jets
A weak, sputtering jet is usually just clogged with scale or debris. Start by turning off the power and isolating the pump. Unscrew the jet face by hand-most are threaded on. You’ll often find a little rock or a wad of biofilm stuck in the orifice.
For scale buildup, soak the jet body and face in a 50/50 solution of white vinegar and water overnight. The fizzing action dissolves calcium without harsh chemicals. This simple soak restores flow for pennies and lets you inspect the jet gasket for hardening or tears, which are common culprits for leaks behind the shell.
If a jet is cracked or the internal diverter is broken, replacement is straightforward. Just note the brand (like Waterway or Pentair) and order an identical model. The hum of restored, powerful massage is a DIY win you can feel immediately.
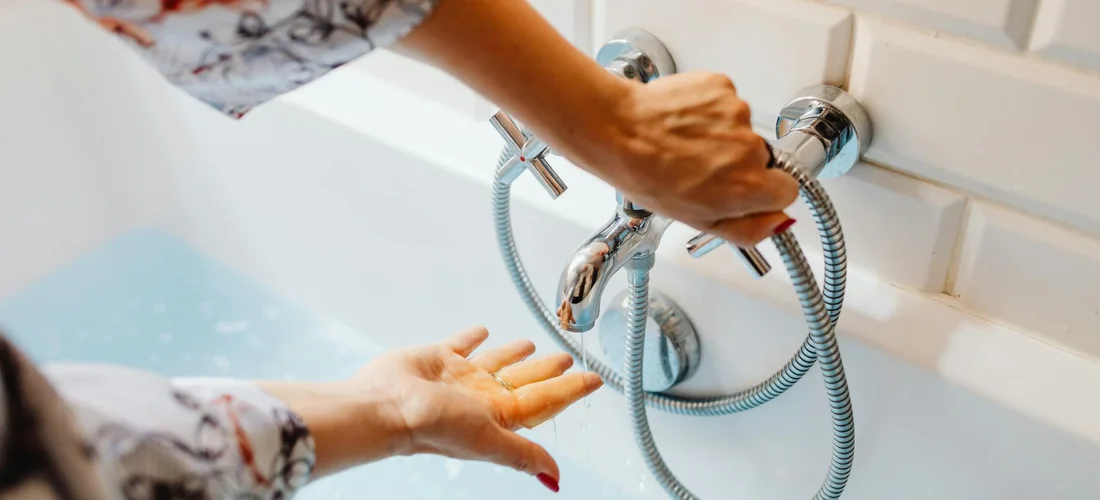
Fixing Minor Leaks in Accessible Plumbing
Not all leaks mean disaster. If you find a drip inside the equipment cabinet, you’re in luck. Dry everything thoroughly, then run the pumps and trace the moisture back to its source. Often, it’s a loose union fitting-the large plastic nut connecting pipes to the pump or heater.
Hand-tighten it first; over-torquing with a wrench can crack the collar. If the leak persists at a threaded joint, drain the tub below that point, disassemble, and apply fresh Teflon tape. Wrap the male threads clockwise three times, snugging the tape into the threads with your thumb. For slip-fit PVC joints, a proper repair requires cutting out the damaged section and using new couplings and solvent cement, which demands a dry, clean pipe for a permanent seal.
Replacing a Heating Element
When your tub fails to heat, the element is the usual suspect. After shutting off power at the main panel and verifying it’s dead with a multimeter, you can tackle this. Drain the spa below the heater tube. The element unscrews from the heater housing, often with a large socket or wrench. If the element tests fine, check the thermostat and high-limit switch as common causes of heating problems.
You’ll see the telltale signs of failure: cracks, burns, or a completely severed coil. Before installing the new one, clean any scale out of the tube with a long brush. Always use a thin coating of food-grade silicone lubricant on the new element’s threads and rubber gasket to prevent galvanic corrosion and ensure a watertight seal for seasons to come. This is a 30-minute job that costs about $60 versus a $250 service call.
Replacing Wear Items: Pumps, GFCI Breakers, and Covers
These are simple swap-outs if you match the specifications. For a circulation pump, note the voltage, horsepower, and plumbing size. Remember the difference between a main pump and a circulation pump. A circulation pump moves water within a loop to maintain flow, not the primary supply. Disconnect power, unplug the electrical connections, and unscrew the unions. The new pump drops right in.
Swapping a tripped GFCI breaker in your sub-panel is similar to home electrical work but demands extreme caution. You must confirm the main power feed from the house is off before removing the panel face; test the terminals to be absolutely certain there is no current present. Photograph the wiring before disconnecting, and transfer each wire exactly to the new breaker.
A weathered cover loses R-value and becomes heavy. Measuring your tub’s dimensions and ordering a direct replacement is a two-person lift that instantly improves efficiency and safety. To ensure a snug fit, measure the tub’s length, width, and any corners or curved edges, and double-check the measurements before ordering a replacement cover. Accurate measurements help you get a perfect fit that seals well and preserves energy savings.
When to Wave the White Flag: Tasks That Demand a Professional
Knowing your limits saves money, prevents injury, and avoids turning a small problem into a catastrophic one. Some jobs require specialized tools, certification, and the liability insurance a licensed tech carries.
Any Internal Plumbing Leak or Major Jet Replacement
If a leak is under the skirting or you suspect a pipe beneath the foam insulation is cracked, stop. Finding it requires excavation, and the repair often needs pressurized foam removal and a custom pipe sleeve. A pro has the endoscopic cameras and leak-sealing clamps designed for the tight, foamed-in spaces you cannot see or reach without causing major structural damage to the spa’s support system.
Control Pack and Circuit Board Diagnostics
When your top-side control panel goes blank or displays an erratic “FLO” error, the issue could be a sensor, the board, or a short in the wiring harness. Pros use factory software for real-time diagnostics. Guessing with a multimeter on a $500 circuit board can fry its delicate microprocessors, turning a repairable fault into a complete, costly replacement.
Major Electrical Work Beyond a Simple Swap
Running a new dedicated service line from your main panel, upgrading amperage, or repairing conduit requires a licensed electrician. This work must meet National Electrical Code (NEC) standards and usually requires a permit and inspection. The lethal risk of 240-volt mains power and the potential for creating a fire hazard or voiding your home insurance make this non-negotiable; hire a certified pro.
Spa Shell Structural Repair and Refinishing
A deep crack or large gouge in the acrylic shell isn’t a job for hobbyist epoxy. Professionals assess the substrate for flex, use specialized primers for adhesion, and color-match with UV-stable resins. A proper structural repair involves reinforcing the backside of the shell with fiberglass mat and resin, a toxic, tricky process that demands a controlled environment and professional respirator equipment to be done safely and last for years. DIY patches often fail within a season, looking worse than the original damage.
Your Decision Guide: Assessing Risk, Cost, and Urgency

That moment when your hot tub groans or the water turns cloudy can spark a DIY fire in your belly. Before you dive into the tools, take a breath and assess three things: the risk of getting hurt, the real cost of parts and time, and how long you can live without the jets humming. Sometimes the problem runs deeper—a professional diagnosis of complex hot tub heater and pump issues may be the wisest next step. A qualified tech can track down faults in the heater, thermostat, or pump so you don’t waste time chasing symptoms. I’ve saved thousands over the years by fixing my own pumps, but I’ve also paid the price for misjudging a job and making a simple leak much worse.
Questions to Ask Before You Start a Repair
Grab a notepad and honestly answer these questions. This five-minute chat with yourself can prevent a weekend disaster and keep your wallet fat. My rule from the field: if you hesitate on more than one, call a pro.
- Is it wet or is it wired? Plumbing leaks away from the pump and heater are often DIY. Anything involving the circuit board, heater terminals, or slicing into main power lines is a hard stop. That buzz isn’t friendly.
- Do I have the specific tools and parts? A tub’s union fitting isn’t the same as a sink’s. Using the wrong PVC cement (like a fast-set for a slow-turn pipe) will guarantee a redo.
- What’s the true cost of failure? A cracked diverter valve might flood your equipment pad. A miswired heater can fry a $500 control system. Weigh a $150 service call against a $700 mistake.
- Can I follow the diagnostic path? Pros use flowcharts: no heat? Check pressure switch, then thermostat, then element. If an error code like FLO or OH doesn’t point you to a clear manual, you’re guessing.
- How urgent is this? A loose top-side control panel can wait. A pump seal spraying water onto the GFCI breaker demands immediate, professional attention for safety.
Preventive Inspections: The Best Job You’ll Never Have to Do
Think of this as brushing your teeth for your tub. Ten minutes of proactive snooping each month stops 90% of the repairs I get called for, and it’s the ultimate energy-saving hack. I do this on the first Sunday with my coffee in hand.
Here’s my monthly walk-around. You’ll learn the sounds and smells of a healthy spa.
- Listen to the Hum: Start with the equipment bay open. The circulation pump should have a steady, quiet whir. Any new grinding or screeching from the main pump bearings means wear is starting.
- Sniff for Trouble: A sharp, acidic smell near the electronics can indicate a failing component or moisture where it shouldn’t be. That clean chlorine scent should come from the water, not the cabinet.
- Eye-Ball the Plumbing: With the pumps off, look for minute drips, subtle bulges in hoses, or white, crusty scale buildup on fittings-a sign of a slow leak and unbalanced water.
- Feel for Heat and Vibration: Place your hand on the pump motor. It should be warm, not hot. Excessive heat kills motors fast. Feel for unusual vibration in the pipes that could signal an air lock or failing pump.
- Test Before You Trust: Don’t just glance at test strips. Verify alkalinity (80-120 ppm) and calcium hardness (150-250 ppm) with a drop test kit quarterly. Balanced water is silent protection; it prevents scale that strangles heaters and corrosion that eats through plumbing.
Stick to this list and you’ll spot a failing O-ring before it becomes a flooded pad, and catch a drifting pH before it etches your shell. This routine turns you from a frustrated owner into a confident caretaker, saving you from the jobs you’d rather never do.
Common Questions
Is DIY tub refinishing a good idea for my hot tub shell?
No, for a hot tub’s acrylic shell, DIY refinishing or repairing deep scratches and cracks is not recommended. The process requires specialized primers, color-matched UV-stable resins, and often fiberglass backing for structural integrity. A professional has the tools and expertise to create a durable, waterproof, and aesthetically pleasing repair that will last. You can learn more about the methods and materials used in repairs before deciding to tackle it yourself.
Can I install a DIY security system for my hot tub area?
Yes, you can install DIY security measures like motion-sensor lights, wireless cameras, or a lockable hard cover to deter unauthorized use. However, for complex systems like integrating flood sensors with your home’s main security panel or running wired power in a wet environment, hiring a professional electrician or security installer is safer and ensures proper, code-compliant operation.
Should I handle pest control around my hot tub myself?
For general prevention, DIY is fine: keep the area clean, seal cabinet vents with fine mesh, and use outdoor repellents. If you encounter a serious infestation (e.g., rodents nesting in the insulation, wasps inside the equipment cabinet, or persistent ants), call a pro. They can safely remove pests and identify entry points without risking damage to sensitive spa wiring or plumbing.
Is maintaining the small “irrigation” system of my hot tub a DIY task?
Absolutely. The small-scale water management of a hot tub—draining, refilling, and balancing chemicals—is a core DIY owner’s task. Additionally, knowing when to drain and refill is key to staying on top of water quality. A common guideline is to plan a full drain-and-refill every 3-4 months, adjusted for usage. However, if you need to install a permanent drain line or automatic fill system tied into your home’s plumbing, that is a job for a licensed plumber to ensure proper backflow prevention and avoid costly water damage.
Can I use DIY window tint film on my hot tub’s enclosure or cover?
Applying UV-protective film to nearby windows or a gazebo to protect your hot tub cover from sun damage is a feasible DIY project. For applying any film directly onto a hot tub’s acrylic cover or shell, do not attempt it. The wrong adhesive or improper application can damage the vinyl or acrylic, and a professional can recommend and install materials specifically designed for these surfaces. Protecting your hot tub shell and cover requires careful consideration of materials and methods used.
The Sunday Evening Checkup
Before you slide into that warm, inviting water, do one last thing for me. Run the jets for a full five minutes. Watch the flow from the returns. Listen for the steady hum of the pump. Take a look at the water’s clarity under the lights. This quick systems check is your final safeguard, catching a loose connection or a lingering cloudiness before you commit to a soak. It’s the difference between a relaxing evening and an unexpected cold shower.
Make a weekly filter rinse your non-negotiable habit, and you will prevent the vast majority of flow errors, heater failures, and chemical imbalances before they ever start. It takes three minutes. I do mine every Sunday evening while the jets run for that final check. That simple act clears the path for everything else to work as it should, saving you hours of troubleshooting and hundreds on service calls.
You’ve done the work. The water is balanced, the pressure is strong, and the heat is holding. Now, go turn on the bubbles, step in, and let all that maintenance melt away. You’ve earned it. Happy soaking.
Further Reading & Sources
- Hot Tub Care – DIY vs. Professional Hot Tub Maintenance
- Hot Tub Woes: DIY or Pro Repair Solutions? – Ajax Pool & Spa Inc.
- How Much Does a Saltwater Hot Tub Cost? [2025 Data] | Angi
- How to Move a Hot Tub: DIY or Hire a Pro? (Pros, Cons, + Tips)
- r/hottub on Reddit: DIY Hot Tub
- DIY vs Professional Hot Tub Repairs: What You Need to Know for Effective Maintenance
Charlie is a hot tub enthusiast with a passion for keeping your jets running smooth and your bubbles bursting with joy. With years of experience in hot tub and jacuzzi maintenance, Charlie knows that a happy tub means a happy you. Whether it’s dealing with stubborn filters or giving your spa a little TLC, Charlie’s here to share expert tips, tricks, and plenty of laughs to help you keep your bubbly retreat in tip-top shape. So, kick back, relax, and let Charlie handle the rest — because no one likes a cranky jacuzzi!
Equipment Checks