Winterizing Your Hot Tub: The Drain vs. Maintain Decision Made Simple
Published on: March 9, 2026 | Last Updated: March 9, 2026
Written By: Charlie Bubbles
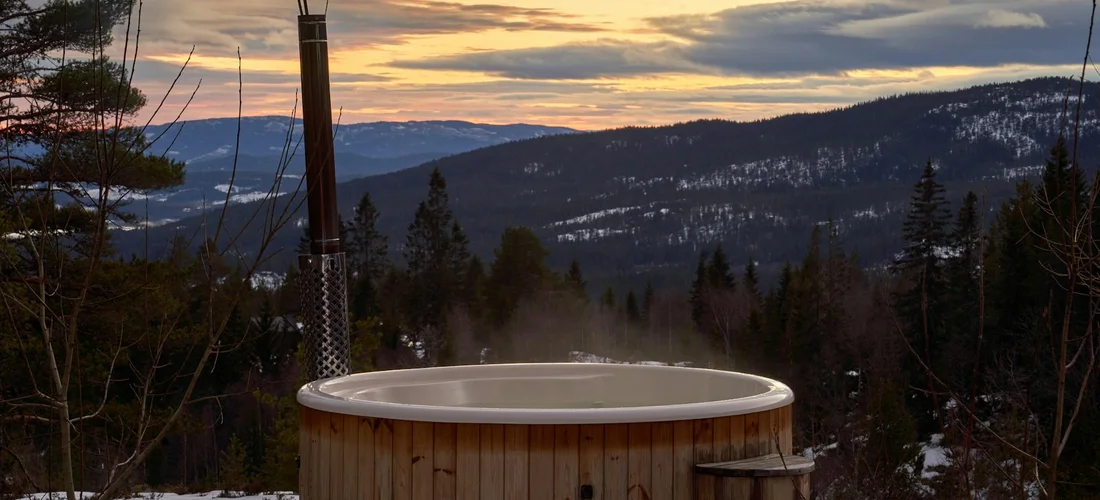
You’re staring at your silent hot tub as the frost creeps in, wondering if an empty shell is safer than a frozen one. Leaving water in an unprepared tub over winter is a recipe for cracked pipes, a ruined pump, and a repair bill that stings worse than chlorine in the eye. This isn’t just a nuisance-it’s a genuine threat to your tub’s lifespan that demands a plan before you leave.
-
What You Need:
- A submersible utility pump or a long garden hose
- Specialized hot tub antifreeze (never the automotive kind)
- Adjustable wrench for drain plugs
- About 45 minutes of focused time
Having thawed and repaired more frozen spa lines than I care to count, I’ll show you how to secure your tub for the season yourself, saving you the cost and wait for a professional.
The Great Winter Debate: To Drain or to Leave Full?
This is the question that keeps spa owners up at night as the first frost approaches. I’ve been on both sides of this argument, and I’ll tell you-there’s no one-size-fits-all answer. Your decision hinges on your climate, your tub, and your willingness to do a little prep work. Let’s weigh the options.
Why Draining Can Be a Safe Bet
For many owners, a completely drained system feels like the ultimate peace of mind. You’re removing the very element that causes damage when it freezes. In a dry, empty tub, there’s nothing to expand and crack your pipes. If you live in a region with a consistently deep freeze and reliable power, a proper drain-down is a perfectly valid and often safest strategy.
Here’s my checklist for a successful drain-and-abandon:
- Use a submersible pump to pull every last gallon from the footwell and the plumbing lines. Tilting the tub can help.
- Blow out the jets and all lines with a wet/dry shop vac. That low hum of the vac is the sound of preventing a $500 plumbing bill.
- Remove and clean the filter cartridges. Store them dry in the garage, not outside where they can freeze and crack.
- Prop open the equipment compartment door to allow air circulation and prevent musty odors.
- Secure the cover tightly. A sunken, snow-loaded cover over an empty shell is a recipe for structural disaster.
The Case for Leaving Water In
Now, hear me out. Leaving the tub full but treated with plumbing antifreeze is the method most pros I know (myself included) recommend for harsh climates. Why? An empty acrylic shell can become brittle in extreme cold and is vulnerable to ground shifts. A properly winterized full tub maintains its structural integrity and weight, acting as its own anchor against freezing soil heave.
The magic is in the antifreeze, not the water. You’re not leaving “water” in; you’re leaving a non-toxic, freeze-protected fluid. Here’s the pro approach:
- Balance and drain the old water to remove mineral buildup.
- Refill just enough to prime the pump (about a foot above the lowest jet).
- Add RV/marine-grade plumbing antifreeze directly into the suction lines via the skimmer or a hose bib. You must see the pink fluid pour from every jet.
- Pour antifreeze into the filter compartment and any drains. The goal is to displace all pure water.
Freeze Damage: The Cold, Hard Risks You Must Understand
Let’s get graphic for a moment. I’ve pulled apart pump housings shattered like peanut brittle and seen heater tubes split open like overripe fruit. This is the brutal reality of unchecked expansion. Water expands by nearly 10% when it turns to ice, and that force is absolute.
How Ice Wrecks Pumps and Plumbing
The damage starts in the most constrained spaces. The small-diameter tubing in your heater is often the first to go. Next, the sealed volute of your circulation pump becomes a tiny ice bomb. Once a single component cracks, you’re facing a cascade of failures and a repair bill that can easily surpass a thousand dollars.
It’s not just the big parts. Here’s the domino effect:
- The Pressure Switch: A tiny, water-filled bladder that tells the heater when to fire. Freezes and fails silently.
- Jet Inserts: Ice forms behind the plastic face, cracking the housing or causing leaks into the cabinet.
- Check Valves: Ice locks the flapper open or shut, destroying the mechanism and ruining water flow.
The most insidious scenario is a partial freeze during a brief power outage. A chunk of ice forms, creating a blockage. When power returns, the pump strains against this solid obstruction, overheating and burning out its motor in minutes. I’ve replaced more pumps from this than from years of normal wear.
The Step-by-Step Guide to Draining and Sealing Your Spa
Choosing to drain is your best defense against winter’s wrath. I’ve seen too many cracked pipes and ruined pumps from half-measures. Let’s do this right, one careful step at a time.
Step 1: Power Down and Chemical Balance
Never start with the drain. Your first move is a complete electrical shutdown at the breaker panel. This is non-negotiable for safety. Once it’s dead, you have one last chemistry job. Add a plumbing line flush product and run the jets for 20 minutes; this dissolves hidden scale and biofilm that would otherwise harden into a concrete-like sludge in dry pipes over the winter. Think of it like running vinegar through a coffee maker before storing it. After the flush, it’s time to balance. Your pH and alkalinity should be in the perfect 7.4-7.6 and 80-120 ppm range, respectively, to prevent corrosion or scaling in any residual moisture.
Step 2: Empty the Tub and Blow Out the Lines
Attach a garden hose to the drain spigot and let gravity do its work. But here’s where most folks stop, and that’s the mistake. Every jet, every foot of pipe, and the equipment pad still holds water. You must evict it.
- Get a wet/dry shop vac. Set it to blow.
- Starting with the jets furthest from the equipment, press the vac hose tightly against each jet opening and blast air through for 10-15 seconds. You’ll hear water gurgling out.
- Don’t forget the suction lines (the skimmer and bottom drain). Blow air back through these.
- Open the drain plug on your pump’s housing and the heater union to let trapped water escape.
- I keep a short length of 1.5″ PVC that fits my vac hose to make a perfect seal on the jet bodies.
Your goal is to hear nothing but a clean, dry hiss of air from every orifice-that’s the sound of a safe, water-free plumbing system.
Step 3: Dry, Protect, and Cover
With the shell empty, wipe every surface bone-dry with old towels. Any leftover droplets can freeze, expand, and cause micro-fractures in the acrylic. Now, protect your equipment.
- Remove the filter cartridge. Clean it, let it dry completely, and store it indoors.
- Spray a light, silicone-based lubricant on the pump shaft seal and the cover gaskets to keep them from drying out and cracking.
- Place a small, breathable moisture absorber (like a sealed container of DampRid or even a sock filled with cat litter) in the footwell to combat condensation.
Finally, lock down a weatherproof, secured cover; a wind-whipped cover letting in snow is a recipe for an ice-filled tub come spring. During strong winds and storms, ensure the cover is firmly anchored. Attach sturdy straps or clips to the spa frame to prevent wind uplift. Consider a tarp over the top for an extra layer of defense.
Winterizing Without Draining: The “Wet” Method for Cold Temps
For regions with unpredictable thaws or if you simply can’t blow the lines, a “wet” winterization works. The principle is simple: keep the water moving or treat it so it can’t freeze. I used this method on a rental property where I couldn’t visit monthly, and it worked flawlessly.
Balancing and Shocking the Water
Start with impeccably balanced water. This is more critical than during the season. Adjust your pH, Alkalinity, and Calcium Hardness to their ideal mid-ranges. Then, give the water a massive, final shock with a non-chlorine oxidizer. This “burnout” shock annihilizes organic contaminants, providing a sterile environment that slows bacterial regrowth to a crawl for months. Run the jets for a full cycle to distribute it everywhere. A sanitizer level slowly drifting to zero in clean, balanced water is far safer than fighting active growth in the spring.
Lowering the Water Level and Adding Antifreeze
You don’t want the water level at the normal fill line. Using a submersible pump or your drain, lower the water about 4-6 inches below the lowest jet. This gives ice room to expand upward without stressing the plumbing. Now, the key step: add recreational vehicle (RV) antifreeze.
- Use only propylene glycol-based, non-toxic RV/Marine antifreeze. The pink stuff. Never use automotive antifreeze.
- Bypass your filter if possible, or remove it entirely.
- Pour at least 2-3 gallons directly into the suction line (like the skimmer) with the pump running on low to pull it deep into the system.
- You should eventually see the pink fluid coming out of the jets. This guarantees protection.
Finally, leave the power on but set the thermostat to its lowest possible setting (often around 50°F); this tiny bit of heat, combined with the antifreeze, is usually enough to keep the critical equipment bay from freezing during a cold snap. Check on it monthly if you can.
Making Your Decision: Key Factors to Weigh
This isn’t a one-size-fits-all call. Your choice hinges on a couple of critical details specific to your situation and your spa.
Climate and Length of Absence
Will your winter be a gentle chill or a deep freeze? The colder it gets, and the longer you’re gone, the stronger the case for a full drain. A single, brutal cold snap while you’re unreachable can freeze solid water in the plumbing, leading to cracks and repairs that cost thousands. If you’re in a milder zone and only gone for a month or two, a maintained and running tub might be okay. But ask yourself: can you afford a surprise power outage during that time? I’ve seen mild winters turn nasty overnight—even winterized systems can fail.
Your Hot Tub’s Age and Insulation
Newer, fully-foamed spas are champions at holding heat, acting like a thermos for your water. An older tub with less insulation loses heat faster, forcing the heater to cycle on more often. That constant cycling to fight the cold burns significant electricity, turning your vacant tub into a money pit. A drained and winterized spa uses zero energy. Also, older plumbing is more vulnerable to freeze damage. If your tub is a seasoned veteran, I usually lean toward winterizing it for peace of mind.
Checking Your Spa’s Winterization Valve
This little-known feature is a game-changer. Look for a labeled or unlabeled ball valve near your equipment pack, often on the bottom plumbing line. Turning this valve to the “winterize” position isolates the heater and critical plumbing, allowing antifreeze to protect the low spots without filling your entire equipment box. Not all models have it, but if yours does, it simplifies the process immensely. Consult your manual-finding it now saves confusion later.
Essential Winterization Kit: Tools and Supplies
Gathering the right gear before you start is 90% of the battle. Here’s what you need lined up in your garage.
- Submersible pump or siphon hose: A small utility pump gets the water out fast. A siphon hose works but requires more effort and a lower destination point.
- Wet/dry vacuum or air compressor (for blowing lines): This is non-negotiable for a proper drain. You must blast residual water from the jets and plumbing. A shop vac on ‘blow’ mode can work, but a small compressor is best.
- RV/Marine antifreeze (propylene glycol, 2-3 gallons): Never use automotive antifreeze-it’s toxic. You need the pink, non-toxic propylene glycol type. It protects the water left in the low spots of your pipes.
- Pipe plugs or winterization caps (various sizes): These go into the jet faces and suction fittings to prevent antifreeze from draining back into the tub cavity.
- Water test strips and a final dose of sanitizer: Before you drain, balance and shock the water. It prevents scaling in the heater and leaves things clean for spring.
- Filter cleaner and storage bag: Soak your filter in a proper cleaner, rinse it thoroughly, and let it dry before storing it in a bag. A dirty filter left in a cold, damp skimmer basket can be ruined.
- A quality cover with working locks: Your last line of defense. A tight, sealed cover keeps out snow, debris, and curious animals. Ensure the latches are secure against winter winds.
Common Winterization Blunders and How to Sidestep Them
Getting your spa ready for winter is straightforward, but a few missed steps can lead to expensive springtime surprises. I’ve seen these mistakes turn a simple shut-down into a major repair bill. Let’s walk through the big ones.
Forgetting the Equipment Bay
Everyone remembers to drain the main tub, but the compartment below? It’s an afterthought. This sealed bay houses your pumps, heater, and control box, and it can trap several gallons of water. If that water freezes, it will expand with incredible force.
You must open the equipment bay door and use a wet-dry vacuum or towels to remove every drop of water from the basin, especially the small pockets beneath the pump and heater. I once responded to a service call where a frozen puddle cracked the wet end of a circulation pump. It was a $300 lesson that started with one forgotten cup of water.
Skipping the Plumbing Blow-Out
Draining the tub doesn’t empty the pipes. Water sits in the jet lines, the footwell, and the suction lines. This stagnant water is a ticking time bomb in a hard freeze. It’s not the only mistake people make when dealing with hot tub water.
Use a shop vac to blow air through each jet line, suction line, and air channel, forcing the hidden water out through the main drain. You’ll hear a satisfying gurgle and sputter as the lines clear. Simply adding antifreeze to a full pipe is useless; the product gets diluted and can’t protect what it doesn’t touch. This step is non-negotiable for a truly dry system.
Using the Wrong Antifreeze
Not all antifreeze is created equal. The bright pink “RV & Marine” antifreeze you need is non-toxic and propylene glycol-based. The green or orange automotive stuff is ethylene glycol-it’s deadly poisonous and will ruin your spa’s plumbing seals.
Always purchase plumbing-safe, propylene glycol antifreeze from a pool and spa or RV store, and pour at least two gallons through your plumbing after the blow-out. It fills the low spots and provides a final insurance policy against any residual moisture. Think of it as the safety net for your entire winterization process.
When to Call a Professional for Winterization
DIY is great for saving money, but some situations warrant an expert’s touch. Calling a pro can be the cheaper option if it prevents catastrophic damage.
- You have a complex, multi-pump system you don’t understand. High-end spas with multiple zones, waterfalls, and separate circulation pumps have intricate plumbing. A technician knows the specific blow-out sequence.
- Your spa is still under warranty and requires certified service. Some manufacturers will void coverage if winterization isn’t documented by an authorized service provider. Check your paperwork first.
- You lack the tools or confidence to blow out the plumbing lines thoroughly. A powerful shop vac and the right technique are critical. If you’re unsure, a pro with a high-volume air compressor will do it in minutes.
- You discover existing leaks or electrical issues during prep. If you see dripping unions or hear odd clicks from the control box, stop. Winterizing a faulty spa seals in problems and guarantees a bigger headache later.
FAQs
How can I find a reliable professional to winterize my hot tub in my area?
Start by asking for recommendations from local pool and spa stores or neighbors who own hot tubs. Check online reviews on platforms like Yelp or Google, and verify that the technician is certified by organizations such as the Association of Pool & Spa Professionals for quality assurance. These steps will help you pinpoint a qualified, reliable hot tub repair technician. In the next steps, you’ll be guided to trusted resources to find a qualified technician and compare options near you.
What is the typical cost for a professional hot tub winterization service?
Costs typically range from $150 to $300, depending on your location and the tub’s complexity. This service often includes draining, blowing out plumbing lines, adding antifreeze, and a basic inspection. Additional fees may apply for repairs or if your tub has special features like multiple pumps.
Does my hot tub’s installation type (in-ground vs. portable) affect the winterization process?
Yes, in-ground hot tubs usually have more intricate, buried plumbing that may require specialized tools to blow out lines thoroughly. Portable tubs are generally simpler, but always refer to your manufacturer’s manual for model-specific steps, as improper winterization can void warranties. Indoor vs outdoor placement carries different pros and cons and affects installation needs. This helps you plan the best setup for your home.
What are some key winterization tips frequently shared on Reddit by hot tub owners?
Reddit communities like r/hottub often highlight using only RV/marine antifreeze and avoiding automotive types. They also recommend using a shop vac to blow out every jet line, documenting your process with photos for spring, and seeking advice from experienced users for DIY troubleshooting.
Are there extra steps for winterizing a hot tub in extremely cold climates like Calgary?
In harsh climates like Calgary, ensure all water is removed from pipes and equipment bays, as residual moisture can freeze quickly. Consider using extra RV antifreeze and hiring a professional service familiar with local conditions to prevent costly freeze damage from sudden temperature drops.
Your Winter-Ready Tub: The Final Check-In
Before you zip that cover on for the season, give your spa one last moment of attention. Run the jets for a good five minutes, listening for any odd sounds and watching how the water moves. Always test the water with your fingertips and a test strip before climbing in next spring, ensuring it feels balanced and smells clean, not chemical-laden. This final verification is your insurance policy against a nasty surprise months from now. Come spring, when you start the jacuzzi after a long winter break, this same routine will help you re-activate it safely. A quick re-check of water balance and heater status will get you back to a relaxing soak without surprises.
Your golden rule for preventing a repeat of this entire winterizing ordeal is simple but powerful. Mark one weekend each month on your calendar for a “spa check-in,” where you test the pH and sanitizer levels, even if the tub is cold and unused, to catch imbalances before they become problems. Consistency beats heroics every time in hot tub care, especially when it helps you avoid those costly winterization mistakes.
The hard work is done. You’ve protected your investment from the deep freeze, and your future self will thank you. Now, go enjoy the break. You’ve earned that first, silent soak under the stars when the warmth returns.
Further Reading & Sources
- r/hottub on Reddit: Winterizing a hot tub DURING the winter?
- What is the best way to winterize a hot tub?
- 10 Steps to Winterize Your Hot Tub
- Best way to Winterize – Portable Hot Tubs & Spas – Pool and Spa Forum
- How to safely close your hot tub or swim spa for winter | Buds Pools
- Hot tub long-term closing / shut down (winterizing) | Trouble Free Pool
Charlie is a hot tub enthusiast with a passion for keeping your jets running smooth and your bubbles bursting with joy. With years of experience in hot tub and jacuzzi maintenance, Charlie knows that a happy tub means a happy you. Whether it’s dealing with stubborn filters or giving your spa a little TLC, Charlie’s here to share expert tips, tricks, and plenty of laughs to help you keep your bubbly retreat in tip-top shape. So, kick back, relax, and let Charlie handle the rest — because no one likes a cranky jacuzzi!
Winterizing Your Hot Tub