Indoor vs. Outdoor: How to Choose the Perfect Jacuzzi Location Without Wasting Another Dollar
Published on: February 1, 2026 | Last Updated: December 8, 2025
Written By: Charlie Bubbles
If you’re staring at a steamy window covered in condensation or shivering in your outdoor tub while neighbors look on, your Jacuzzi is in the wrong place, and it’s costing you comfort and cash. This isn’t an electrical emergency, but it is a persistent nuisance that drains your enjoyment and inflates your utility bills.
What You Need:
- A tape measure
- Your last three utility bills
- 20 minutes for a honest walk-around
- A notepad to weigh pros and cons
I’ll show you how to diagnose your space and make the right call, saving you from pricey professional consultations and future regret.
The Great Debate: Indoor Spa vs Outdoor Hot Tub
This choice shapes your entire soaking experience. I’ve helped install tubs in sunrooms, garages, and on decks overlooking canyons. Your ideal spot isn’t just about convenience; it’s about creating a sustainable retreat that fits your life and your willingness to maintain it. Let’s weigh the realities of bringing the spa inside, especially when considering the investment.
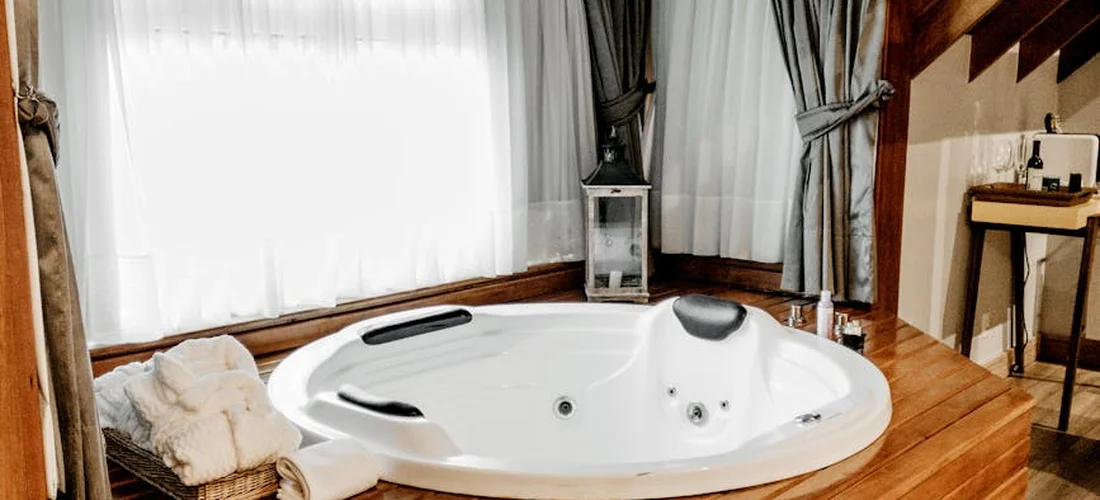
Choosing an Indoor Jacuzzi: Enclosed Relaxation
Imagine stepping from your bedroom into warm, swirling water while snow falls silently outside the window. An indoor tub offers a profound level of privacy and instant access. But that seamless fantasy requires serious planning to avoid a moldy, chemical-filled nightmare. I’ve seen beautiful indoor installations and absolute disasters—the difference always comes down to preparation. Whether you’re installing a hot tub in your living room or garage space, proper planning is key.
The Pros of an Indoor Installation
- Ultimate Privacy and Convenience: Your soak is just a few steps away, any time of day or night, in any weather. No trudging through rain or snow.
- Year-Round, Climate-Controlled Use: The ambient temperature is always comfortable. You’re not battling freezing pipes or scorching sun, which simplifies some maintenance.
- Enhanced Cleanliness: Less windblown debris, leaves, and bugs mean your filters work less hard and you might use slightly fewer chemicals.
- Increased Home Value & Aesthetics: A well-executed indoor spa can become a stunning focal point, like a live-in wellness room.
The Critical Cons and Challenges
- Humidity is Your #1 Enemy: A hot tub evaporates gallons of water daily. Without mitigation, you’ll get condensation on windows, peeling paint, and structural rot. I once saw warped hardwood floors in a room adjacent to an uncorrected indoor tub.
- Ventilation is Non-Negotiable: You must move that moist air outside. A standard bathroom fan won’t cut it. You need a dedicated, powerful exhaust system rated for the cubic footage of your space, or you’re building a swimming pool in your walls.
- Chemical Odors Become Indoor Air: The faint scent of chlorine or bromine will be in the room. For some, it’s a clean smell; for others, it’s a headache. You need excellent air exchange.
- Structural and Access Considerations: Can your floor support over 5,000 pounds when filled? How wide are your doors? Getting the tub in place often requires professional riggers and planning during construction or renovation.
- Potential for Higher Energy Bills: While the tub itself may run less hard without outdoor temperature swings, your home’s HVAC system will now work overtime to manage the extra heat and humidity.
Essential Indoor Preparations: A Checklist
If you’re committed to an indoor spa, treat this list like your bible. Missing one item can lead to costly repairs.
- Professional Floor Assessment: Have a structural engineer confirm your floor’s load capacity. Reinforce if necessary.
- Install a Vapor Barrier: Seal the walls and ceiling behind the finish materials with a proper vapor barrier to protect the building envelope.
- Dedicated Exhaust System: Install an inline exhaust fan ducted directly to the exterior. Size it for at least 6-8 air changes per hour in the spa room.
- Waterproof Flooring: Use tile, sealed concrete, or commercial-grade vinyl. Assume water will splash out. Have a floor drain installed if possible.
- GFCI Electrical Outlet: The electrician must place the required GFCI disconnect within sight of the tub, but at least 5 feet away, following all local codes.
- Plan for Drainage and Overflow: How will you drain and refill the tub? A floor drain or a long, dedicated hose run to a drain is essential. An automatic overflow drain is a smart safety addition.
- Access for Service: Ensure technicians can reach all equipment panel sides. This often means leaving an 18-24 inch service gap.
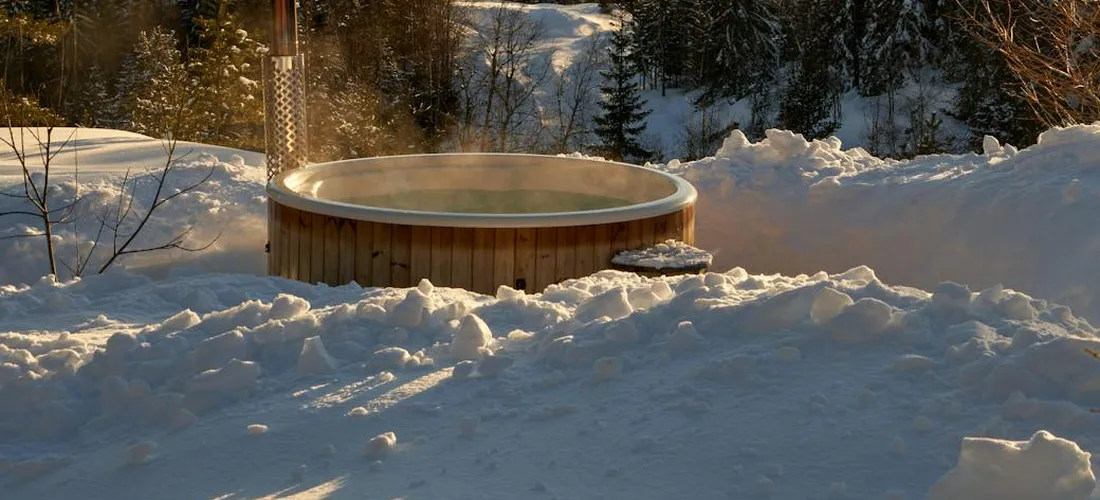
Choosing an Outdoor Hot Tub: Under the Open Sky
The Pros of an Outdoor Installation
Nothing beats slipping into warm water under a blanket of stars, with the evening breeze on your face. An outdoor tub connects you to nature in a way indoor spaces simply can’t match. From a practical standpoint, outdoor placement often means more flexible sizing and no worries about venting chemical fumes from an enclosed room, especially when you know where to place and what to put under a hot tub. You gain a dedicated retreat in your yard, a visual centerpiece for gatherings.
Ventilation is a huge plus. The open air naturally dissipates the sharp scent of chlorine or bromine, making the soak more pleasant. I’ve always found that outdoor tubs encourage more frequent use because they feel like a mini-vacation right in your backyard. You also avoid the construction headaches and cost of reinforcing floors or modifying doorframes.
- Natural Ambiance: Stargazing, fresh air, and the sounds of nature enhance relaxation.
- Space Freedom: No interior walls to limit the size or shape of the spa you choose.
- Built-in Ventilation: Eliminates the need for complex air exchange systems to handle sanitizer odors.
- Often Simpler Installation: Bypasses structural home modifications, focusing on exterior site prep.
The Real-World Cons and Exposures
That open sky comes with real challenges. Your tub battles the elements every single day. The winter cold steals heat, forcing the heater and pump to work overtime-I’ve seen energy bills jump 30% in January. Summer sun isn’t just hot; its UV rays aggressively break down your sanitizer, leaving water vulnerable to bacteria.
Debris is a constant enemy. Fall leaves, spring pollen, and summer insects all aim for your water. I’ve pulled more than one pump motor apart to find a jammed impeller from a pine needle that slipped past the filter. Privacy can also be a concern, requiring strategic landscaping or fencing.
- Weather Warfare: Rain dilutes chemicals, wind blows in dirt, and extreme temperatures stress equipment.
- Debris Influx: Organic matter from trees and plants raises chlorine demand and clogs filters fast.
- Increased Energy Use: Heat loss in cold climates is significant, requiring a well-insulated cover and possibly a thermal blanket.
- Material Fatigue: Constant UV exposure can fade and degrade your acrylic shell and cover vinyl over time.
Must-Do Outdoor Site Work
Don’t just plop your tub on the grass. Proper site prep saves countless headaches later. Every ounce of water weighs about 8.3 pounds, so a filled spa needs absolutely solid support. I always pour a 4-inch reinforced concrete pad that extends at least 6 inches beyond the tub’s footprint-it’s the gold standard for preventing settling and cracks.
Electrical work is non-negotiable. You must have a dedicated, GFCI-protected circuit installed by a licensed electrician. Failing to do this isn’t just a code violation; it’s a serious safety hazard for everyone using the tub. Plan for drainage, too. Slope the pad slightly away from your house to channel splash-out and rain.
- Build a Rock-Solid Base: Concrete pad, reinforced deck, or compacted gravel crusher dust. It must be perfectly level.
- Run Professional Electricity: A 240V GFCI circuit, typically 50 amps, is standard for most full-size tubs. No extensions cords!
- Plan for Access: Leave clear space on at least one side for future service on the equipment panel.
- Consider Drainage and Shelter: Ensure water runs away from the tub. Think about a pergola or partial cover for sun and rain protection.
Side-by-Side: Maintenance and Care by Location
Humidity Control vs. Leaf Debris
Indoor and outdoor tubs fight different battles. Inside, the steam from a 102°F tub creates a rainforest-like environment. Without a dedicated dehumidifier or exhaust fan, you’re inviting mold on walls and ceiling, which I’ve had to remediate for clients more than once. You’ll be cleaning surfaces constantly to combat dampness, especially when using inflatable tubs indoors.
Outside, your war is with nature’s litter. Every gust of wind deposits something into your water. A single oak leaf can consume 10 ppm of chlorine as it decomposes, throwing your balance into chaos overnight. You’ll become best friends with your skimmer net, fishing out debris daily. Filter cleaning becomes a weekly chore during peak pollen or leaf drop seasons-I recommend a spare filter cartridge so you can swap in a clean one instantly.
- Indoor Priority: Moisture Management
- Use a ventilation fan rated for wet environments.
- Monitor humidity with a hygrometer; keep it below 60%.
- Wipe down walls and windows regularly to prevent mildew.
- Outdoor Priority: Debris Defense
- Skim the water surface daily.
- Invest in a tight-fitting, locking cover.
- Clean filters every 1-2 weeks with a hose, and deep-clean with filter cleaner monthly.
Sunlight and Water Chemistry
Sunlight is a powerful, silent player in water chemistry. Ultraviolet rays can destroy unprotected chlorine in a matter of hours. If your outdoor tub gets direct sun, you must use a stabilizer like cyanuric acid, aiming for 30-50 ppm, to shield your sanitizer. Without it, you’ll be adding chlorine constantly and still fighting cloudy water.
Indoor tubs avoid UV breakdown, but stagnant air can lead to chloramine buildup-that’s what causes the strong “chemical” smell and eye sting. Shocking the water weekly to 10 ppm of chlorine breaks apart those chloramines, a step indoor owners often forget until the smell hits them. For both locations, test alkalinity first (80-120 ppm), as it’s the foundation for stable pH and sanitizer efficiency.
| Factor | Outdoor Tub Impact | Indoor Tub Impact |
|---|---|---|
| Sanitizer Loss | High from UV radiation. Requires cyanuric acid stabilizer. | Low from UV, but higher from chloramine formation. Requires regular oxidation. |
| Water Temperature | Fluctuates with ambient air. Cover is critical for heat retention. | Stable. Less energy needed to maintain heat, but room temp affects it. |
| Testing Frequency | Test chlorine/bromine and pH 2-3 times per week. | Test chlorine/bromine and pH at least 2 times per week. |
| Common Additive | Sunscreen for sanitizer (stabilizer) and algaecide. | Air purifiers or dehumidifiers to manage atmosphere. |
The Foundation: Structural Support and Load Bearing
Picture your filled tub, the water still and heavy, holding the weight of relaxation. Now, imagine that entire mass-water, shell, and people-pressing down on a weak spot. A failed foundation isn’t just a repair; it’s a catastrophic shift that can crack your shell and drain your wallet faster than a loose drain plug. I’ve crawled under more decks than I can count, and the worst sagging I’ve seen always traces back to someone guessing on the support.
Why “Level and Solid” is Your Mantra
A slight slope might not seem like a big deal, but it forces your pumps to work unevenly, leading to premature wear. Your tub’s frame and plumbing are designed for perfect level; ignore this, and you’re inviting leaks and weird vibrations into your soak. I once helped a friend correct a two-inch slope on his new patio pad-fixing it before the tub arrived saved him from a noisy, inefficient pump within the first year.
Calculating the Real Load
Don’t just think about the tub’s weight. You must add the water and the bathers. A common 400-gallon tub holds over 3,300 pounds of water alone. Always calculate for the worst-case scenario: a full tub with the maximum number of people, which can easily surpass 5,000 total pounds. Use this simple checklist to assess your base.
- Concrete Pad: Minimum 4 inches thick, reinforced with rebar, and poured over compacted soil.
- Reinforced Deck: Footings must be below the frost line, and joists should be engineered for the concentrated load, not just standard living space weight.
- Pavers or Crushed Stone: A great DIY option, but it must be perfectly level, compacted in layers, and contained with a solid retaining edge.
Indoor installations demand even more scrutiny. Most home floors aren’t built to handle a small swimming room, so consulting a structural engineer is non-negotiable for any indoor location above a crawl space or basement slab. The cost of that consultation is tiny compared to fixing a cracked floor joist.
Utilities and Access: Plumbing and Electrical Safety
You’ve got the spot picked and the base built. Now, we need to bring the lifeblood-power and water-to it safely. This is where DIY spirit must meet cold, hard code requirements; playing fast and loose with electricity or plumbing here can have shocking consequences. I’ve smelled the acrid tang of a burned-out pump from a bad connection, and it’s a smell that tells a story of avoidable expense.
The Electrical Connection: Respect the Code
Your tub needs a dedicated, GFCI-protected circuit, installed by a licensed electrician. This isn’t an upsell; it’s a lifesaving requirement that protects you from electrocution if a fault occurs. For outdoor tubs, the conduit must be rated for burial and weather. Indoors, ensure the panel has capacity and the wiring path is clear of insulation that could overheat.
- Convenience vs. Safety: Place the service panel (the disconnect box) within sight of the tub, but at least 5 feet away to prevent accidental contact with water.
- Future-Proofing: Even if you get a 110v “plug-and-play” model, having a 220v line run to the area gives you more powerful heater options and faster recovery.
Water Source and Drainage Planning
Filling with a garden hose is simple, but draining 400 gallons needs a plan. Always direct drain water away from your home’s foundation and consider your local watershed rules for chemically treated water. I use a sump pump and a long hose to send old water to a storm drain or a gravel patch in my yard, never onto my neighbor’s prize roses.
- Fill Line Access: Ensure your outdoor hose bib or indoor water line is within reach. For indoor tubs, a dedicated fill line with a vacuum breaker prevents backflow.
- Drainage Path: Map where the water will go. A slight grade in your patio or a floor drain in a basement mechanical room is ideal.
- Chemical Safety Storage: Store chlorine, bromine, and acid in a locked, ventilated area away from the electrical panel and any heat source.
Indoor Air and Vapor Management
An indoor tub transforms the room’s environment. The steam from a hot tub carries chlorine and raises humidity dramatically. Without a powerful, dedicated ventilation fan and a dehumidifier, you’re courting mold, peeling paint, and a corrosive atmosphere for your electronics. I helped retrofit a bathroom with a tub, and we installed a fan rated for twice the room’s cubic feet per minute-the walls are still dry years later.
Think about access for future repairs. Can a technician easily reach the equipment panel behind the tub’s skirt, or is it wedged against a wall? Leave at least 2 feet of clearance on the panel side. That simple foresight saved me hours of struggle when I needed to replace a circulation pump last winter, making a cold job just a bit warmer.
Cost Comparison: Upfront Price vs. Long-Term Spend
Let’s talk money. The initial price tag on the tub itself is just the opening bid. The real financial story unfolds in the installation and the relentless drip-drip-drip of monthly ownership costs, which swing wildly based on your chosen spot. I’ve helped clients budget for both scenarios, and the difference can make your eyes water.
Upfront Installation Costs
Think of this as your project’s foundation. An outdoor install is typically the more straightforward path, while bringing the spa inside is like a home renovation project.
| Cost Factor | Outdoor Location | Indoor Location |
|---|---|---|
| Foundation & Prep | Concrete pad, reinforced deck, or crushed stone base. Cost varies with materials. | Existing bathroom floor may need reinforcement. Must be absolutely level. Often requires costly structural assessment. |
| Plumbing & Electrical | Running conduit and wire from main panel. Requires outdoor-rated GFCI breaker and disconnect. | Running new dedicated circuit, often through walls. Must meet strict indoor electrical code. Ventilation fan circuits may be needed. |
| Ventilation | Mother Nature handles it! No cost. | Mandatory. Requires a high-quality bathroom-grade exhaust fan (100+ CFM) ducted to the outside. Adds hundreds to the install. |
| Water Source & Drain | Garden hose fill and drain to yard is standard. | May require dedicated water line and drain tie-in to home plumbing, involving a plumber. |
| Access & Delivery | Clear, wide path to the site. May require a crane for tricky yards. | Doorways, hallways, and stairs must be measured. Sometimes, a wall or window must be removed for access. |
My rule of thumb: an indoor installation will typically cost 1.5 to 3 times more upfront than a comparable outdoor setup, once you factor in the tradespeople. That elegant sunroom spa might require a carpenter, an electrician, and a plumber all on the same day.
Long-Term Operational Costs
This is where your monthly budget feels the impact. The hum of the pump and the glow of the heater look the same on your electric bill, but the supporting actors change the total.
| Ongoing Cost | Outdoor Location | Indoor Location |
|---|---|---|
| Heating Energy | Highly subject to ambient temperature. Expect higher costs in winter as the heater fights the cold. | More stable. The insulated home environment reduces heat loss, potentially saving money in cold climates. |
| Water Chemistry | Heavy bather load, rain dilution, and UV degradation mean you’ll use more sanitizer (chlorine/bromine) and shock. | Controlled environment protects water. You’ll use fewer chemicals overall, but must manage humidity’s pH effect. |
| Water Replacement | Evaporation and splash-out are high. You’ll top off the tub more often and do full drain-and-refills quarterly. | Minimal evaporation. You can often stretch water changes to every 4-6 months, saving on water and refill chemicals. |
| Maintenance & Wear | Cover and cabinet face sun damage and weathering. Components may corrode faster in humid climates. | No UV damage to cover or shell. Risk of moisture damage to surrounding walls or flooring if ventilation fails. |
| Miscellaneous | Possible increased filter cleaning from wind-blown debris. | Cost of running a dehumidifier or exhaust fan regularly to protect your home’s structure. |
Indoor tubs often win on long-term chemical and water savings, but that victory can be erased in a heartbeat by a single mold remediation bill if you skimp on ventilation. I’ve seen the sticky, damp aftermath in a poorly vented basement; it’s not pretty.
Quick-Reference Checklist: The Hidden Costs
- For Outdoor: Windbreak landscaping, privacy screens, higher-wattage cover lifter for snow, a long thermal cover for harsh winters.
- For Indoor: Durable, waterproof flooring (think tile, not laminate), moisture-resistant drywall (green board), a humidity gauge, and a premium sealant for all trim.
Common Questions
How does a harsh climate, like in the Poconos, affect the indoor vs. outdoor decision?
In regions with severe winters and significant snowfall, the challenges for outdoor tubs are amplified. You must account for extreme heat loss, potential snow load on the cover, and ensuring safe access on icy paths. For an indoor installation in such a climate, the primary benefit is year-round usability, but the risk of condensation and moisture damage to your home’s structure is even greater if ventilation is inadequate. When deciding between indoor and outdoor tubs, it’s essential to weigh these factors in relation to your specific climate.
What are the best ways to control chemical odors in an indoor Jacuzzi room?
Beyond mandatory mechanical ventilation, using alternative sanitizers like ozone or UV systems can significantly reduce the reliance on chlorine or bromine and their associated smells. Incorporating an air purifier with a carbon filter can help scrub the air, and ensuring you “shock” or oxidize the water weekly prevents the buildup of foul-smelling chloramines that get trapped indoors.
Does an indoor or outdoor Jacuzzi add more resale value to a home?
An outdoor hot tub is generally seen as a desirable backyard amenity that can appeal to a wider range of buyers. A professionally installed, well-integrated indoor spa can be a high-value luxury feature, but it may also be viewed as a potential maintenance or humidity issue by some buyers, making it a more niche selling point.
Are there specific safety considerations for families with children or pets?
Yes, location impacts safety planning. An outdoor tub requires a locking, hard cover and potentially a physical barrier or fence to prevent unsupervised access (especially for outdoor installations). An indoor installation removes the risk of outdoor drowning hazards but introduces concerns about slippery floors and increased indoor humidity affecting air quality; secure storage for chemicals is critical in both locations.
Which location typically has a faster and simpler installation timeline?
An outdoor installation is almost always faster and less complex. It primarily involves site preparation (like pouring a pad) and electrical work. An indoor installation becomes a construction project, often requiring coordination between multiple trades (electricians, carpenters, HVAC for ventilation), which can extend the timeline by weeks or even months.
The 30-Day Location Litmus Test
Before the first bubble even rises, give your chosen spot a real-world trial. Visit it with a coffee at sunrise and a drink at sunset. Feel for wind tunnels, listen for noise, and watch how light plays across the water’s surface. This simple week-long habit confirms your choice with lived experience, catching issues like poor drainage or annoying glare that a quick glance would miss.
Once your tub is settled, mark your calendar to walk its perimeter with the changing seasons, proactively clearing debris and ensuring drainage slopes away from the foundation. This single, five-minute routine prevents the vast majority of water damage and structural headaches, saving you from future relocations. Pair this habit with seasonal maintenance routine to cover the essential hot tub maintenance tasks every season. It keeps equipment running smoothly and helps catch issues early.
You’ve navigated the big choices. Now, lower the lights, start the pumps, and claim your well-earned soak.
Further Reading & Sources
- INDOOR VS OUTDOOR HOT TUBS: THE DIFFERENCE | Jacuzzi®
- Hot Tubs and Spas | Indoor & Outdoor Hot Tubs | Jacuzzi.com | Jacuzzi®
- Indoor vs. Outdoor Hot Tubs (Pros, Cons, and More) | Jacuzzi®
- Jacuzzi Swim Spa | Indoor & Outdoor Swim Spas | Jacuzzi.com | Jacuzzi®
- Can You Put An Outdoor Hot Tub Indoors? – Love’s Hot Tubs
- Outdoor vs Indoor Hot Tubs: Which is Best?
Charlie is a hot tub enthusiast with a passion for keeping your jets running smooth and your bubbles bursting with joy. With years of experience in hot tub and jacuzzi maintenance, Charlie knows that a happy tub means a happy you. Whether it’s dealing with stubborn filters or giving your spa a little TLC, Charlie’s here to share expert tips, tricks, and plenty of laughs to help you keep your bubbly retreat in tip-top shape. So, kick back, relax, and let Charlie handle the rest — because no one likes a cranky jacuzzi!
Outdoor Setup