The Real Dirt on Gravel Hot Tub Bases: What Works, What Sinks
Symptom Check: If your hot tub site is a loose pile of pea stone or the ground feels soft underfoot, you’re risking a catastrophic and expensive failure-a shifting, leaking, or even collapsing spa that voids your warranty in an instant.
What You Need:
- A 4-Foot Level
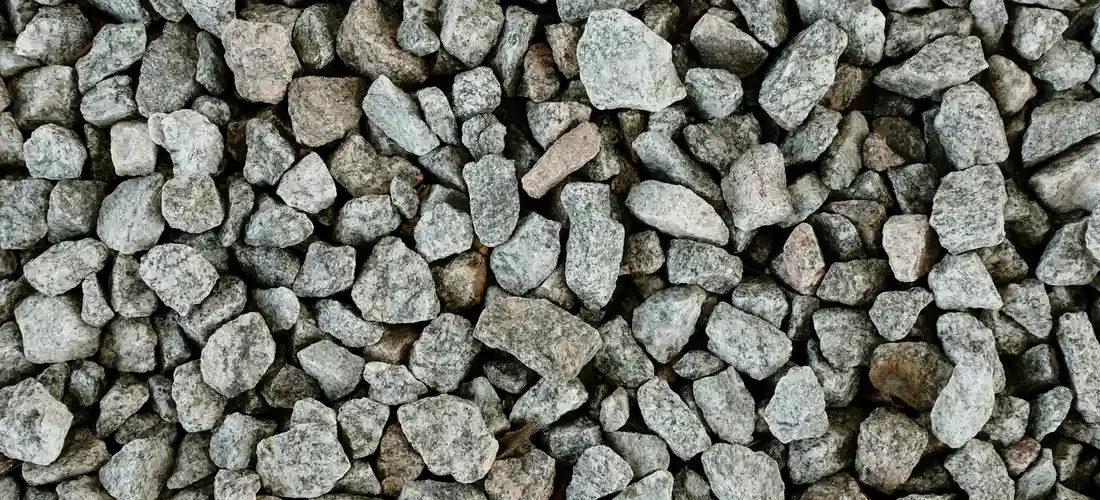
- 3/4″ Crushed Stone (NOT Rounded Gravel)
- Heavy-Duty Weed Barrier Fabric
- Plate Compactor or Hand Tamper
- One Solid Afternoon
I’ve leveled dozens of tubs on everything from concrete to pavers, and the right gravel base isn’t just okay-it’s a professional-grade, drainage-friendly choice when done with precision. This guide will show you exactly how to build it right the first time.
Is a Gravel Base Right for Your Hot Tub?
Before you order that dump truck load of stone, let’s figure out if your backyard and your hot tub are a good match for a gravel pad. I’ve shown up to too many jobs where a homeowner picked the easiest base, only to fight a sinking, unlevel tub later.
You need to play detective with your installation site. Start by thinking about your local dirt. Is it heavy clay that holds water like a sponge, or sandy soil that drains almost too fast? Clay soil needs excellent drainage beneath your gravel, or you’ll create a permanent bathtub for your hot tub’s foundation, leading to heaving and sinking when it freezes. This is one of those common hot tub problems to avoid.
Assess Your Site in 4 Steps
- Check Drainage: Dig a small hole about a foot deep where the tub will go. Fill it with water. If it’s still full after 12 hours, your drainage is poor and you’ll need to dig deeper and add a thicker gravel base.
- Evaluate the Slope: A perfectly flat spot is rare. A gentle slope (less than 2 inches over 8 feet) is manageable with careful leveling. Anything steeper means you’re likely better off with a reinforced concrete pad.
- Consider Tub Size & Weight: A compact 3-person plug-and-play model is far more forgiving on gravel than a massive 8-person spa loaded with people and water. More weight demands a more robust, compacted base.
- Know Your Climate: If you live where the ground freezes, the freeze-thaw cycle is your enemy. Without a properly prepared and deep enough gravel base, your tub will tilt and pipes can stress.
The Pros and Cons of a Gravel Hot Tub Pad
Let’s weigh the good against the challenging. I’ve installed on all sorts of bases, and gravel is a fantastic choice-but only when you go into it with eyes wide open.
The Advantages: Why Gravel Shines
- Superior Drainage: This is gravel’s champion feature. Water from rain, splashes, or minor leaks filters straight down, away from the tub shell. This helps prevent wood rot on the underside and deters mildew.
- Cost-Effective Foundation: Compared to a poured concrete slab, the material cost for gravel is significantly lower. For a handy DIYer, it can mean the difference between a weekend project and hiring a concrete crew.
- Flexibility & Forgiveness: A well-compacted gravel base can accommodate minor ground shifts better than a rigid concrete slab, which can crack. It’s also easier to correct minor leveling issues after the fact.
- Simplified DIY Installation: You don’t need advanced masonry skills. With a shovel, a tamper, a long level, and some sweat equity, you can create a professional-grade pad.
The Drawbacks: The Real-World Challenges
- Potential for Settling and Shifting: This is the biggest risk. If the ground underneath isn’t properly compacted, or the gravel layer is too thin, heavy loads will cause low spots. Your hot tub must be perfectly level, within 1/4-inch, or you’ll strain the pump and heater, leading to costly repairs.
- Weed and Grass Invasion: Wind-blown seeds love to settle in the nooks between stones. Without a solid barrier underneath, weeds can push up through the gravel, creating an unkempt look and making access annoying.
- Footing Feel and Debris: Walking on gravel barefoot to service your tub isn’t as pleasant as a smooth surface. Small stones can also get kicked into the water or lodge in filter cartridges.
- Long-Term Stability Questions: While great initially, a gravel base requires more frequent checks for level compared to concrete. Over many years, even the best-packed gravel can compress and move.
I learned the hard way about settling on an early job. We placed a large tub on what seemed like solid, compacted gravel. After a rainy season, one corner sank a full inch. The fix meant draining the tub, lifting it with jacks, and releveling the base-a full day of extra work. That experience taught me to never skimp on the base preparation.
Step-by-Step: Building a Proper Gravel Hot Tub Base
Step 1: Site Selection and Clearance
Pick a spot that’s not just flat, but also practical for the long haul. You want easy access to the equipment panel for those inevitable pump checks or heater replacements. Avoid placing your tub under trees unless you enjoy fishing pine needles out of your filter basket every weekend. I learned this the hard way at a cabin install where deciduous leaves turned the water into a soupy mess each fall. Clear all vegetation, roots, and debris from an area at least 12 inches wider than your tub’s footprint on all sides. Still, there are real pros and cons to putting a hot tub under a tree, mainly around debris management. In the next steps, we’ll weigh these trade-offs and share practical tips.
Think about your water source and electrical run, too. Choosing a site with straightforward utility access will save you hundreds in extra conduit and hose later. Grab a shovel and a rake to remove sod and topsoil until you hit firm, undisturbed earth.
Step 2: Excavation and Ground Compaction
Now, dig down. For most soils, a depth of 6 to 8 inches is your sweet spot. If you’re dealing with soft clay or sandy loam, go deeper-up to 12 inches. This excavated pit is where you’ll build a stable platform that won’t shift when your 500-gallon tub is full of water and people. I use a rented plate compactor for this job; the steady hum of that machine ensures every inch of soil is dense and ready.
Don’t just tamp by foot. Proper compaction prevents differential settling, which is the main culprit behind cracked plumbing lines and frustrating leaks. Spend time here. The goal is a surface so firm that your heels don’t sink in when you walk across it.
Step 3: Laying Fabric and Adding Gravel
Roll out a high-quality landscape fabric over the entire compacted area. This barrier stops weeds and, more importantly, keeps soil from migrating up into your gravel base. That fabric is a silent guardian against muddy, unstable ground after a heavy rain. Overlap seams by at least 6 inches and secure the edges with landscape staples.
Now for the gravel. Dump in your aggregate. You need 3/4-inch crushed angular stone, often called “crusher run,” because its jagged edges lock together like a puzzle. Smooth, round pea gravel will roll and shift under weight, leading to a wobbly tub. Spread a 4-inch layer evenly across the fabric. This material promotes excellent drainage, a lesson I took from fixing wet spots under circulation pumps for years.
Step 4: Final Leveling and Pad Height
This is where precision matters. Drag a long, straight 2×4 board across the gravel in a screeding motion to create a perfectly level surface. Use a 4-foot carpenter’s level in multiple directions to check your work; even a slight slope will make your hot tub feel like a ship listing at sea. I once rushed this step and spent months shimming a tub that rocked with every entry.
Your finished gravel pad should sit about 1 to 2 inches above the surrounding grade. Building up the pad ensures surface water runs away from the tub, not under it, protecting your investment from frost heave and moisture damage. Walk across it. The gravel should feel solid and unyielding, with no loose rock shifting underfoot.
Gravel vs. Concrete Slab: Choosing Your Base Material
This choice shapes your installation’s cost, durability, and future maintenance. Let’s break it down.
| Feature | Gravel Base | Concrete Slab |
|---|---|---|
| Cost & DIY Friendliness | Highly affordable. You can do this yourself in a weekend with basic tools and a load of crushed stone. | Expensive. Requires professional pouring or advanced DIY skills, plus forms and ready-mix concrete. |
| Drainage & Stability | Superior drainage. Water percolates down, preventing freeze-thaw damage. Properly compacted gravel offers excellent stability for most residential tubs. | Impermeable. Requires a slight slope for runoff. Ultimate stability, but can crack over time if the sub-base isn’t prepared correctly. |
| Permanence & Access | Semi-permanent. The huge advantage here is easy access to underground plumbing for repairs without a jackhammer. I’ve saved clients thousands by being able to quickly dig to a leak when the base was gravel. | Permanent. Once it’s poured, accessing pipes for repairs means concrete cutting and major disruption. |
| Installation Time | Fast. Site prep and laying gravel can be done in 1-2 days. | Slow. Requires curing time (often 7+ days) before you can place the tub, extending the project timeline. |
| Best For | Budget-conscious owners, DIYers, areas with good drainage, and those who want future repair access. | High-end installations, very heavy commercial tubs, or locations where a perfectly flat, polished look is desired. |
From my experience balancing water chemistry and fixing equipment, I usually recommend a gravel base. It provides a forgiving, drainable foundation that works in harmony with the wet environment of a hot tub, much like how balanced alkalinity protects your heater from scale. A concrete pad is a monolithic commitment—great if you’re certain, but gravel offers flexibility that pays off down the road.
Critical Installation Requirements: Safety and Setup
Let’s get one thing straight from my years on service calls: gravel by itself is a recipe for trouble. Think of it as the foundation for your foundation. Your hot tub’s ultimate stability depends on what’s under that gravel, not just the stones you can see. A soggy, unprepared spot will swallow a gravel base whole, leaving your spa leaning like a sinking ship. That idea ties into a bigger picture I’ll cover next: 11 common hot tub myths debunked by spa professionals. It will help separate myths from what actually matters for a stable, long-lasting setup.
Ground Prep is Everything
I’ve seen too many rushed installations fail. The ground must be compacted and level. Here’s your battle plan:
- Excavate the area at least 6 inches wider than your tub’s footprint on all sides.
- Remove all organic material-grass, roots, soft topsoil. This stuff decomposes and settles.
- Use a hand tamper or, for larger areas, rent a plate compactor. You want the earth as hard as a sidewalk.
Building a Stable Base Pad
Now, create your load-bearing pad. Gravel is your friend, but you must choose the right type and install it correctly.
- Gravel Type: Use 3/4-inch crushed, angular stone (often called “crushed stone” or “quarter-down”). The jagged edges lock together. Avoid smooth, round river rock-it shifts under weight.
- Depth: Pour a minimum 4-inch layer of crushed stone over your compacted earth.
- Leveling & Compaction: Rake it level and soak it with a garden hose. This helps the stones settle. Then, compact it thoroughly with the tamper. Repeat until the surface is firm and unyielding underfoot.
For ultimate peace of mind, I always pour a simple concrete pad right on top of this compacted gravel. A 4-inch thick reinforced concrete pad creates a monolithic, level, and permanent base that laughs at frost heave and ground moisture. It’s the gold standard I used for my own tub after fixing a leak caused by a shifting base.
Electrical and Access Safety
Water and electricity demand respect. Your electrical conduit must be buried at code depth and routed safely to the spa panel. Never run a cord under or near the gravel base where abrasion or hidden moisture can compromise the insulation. Also, ensure you have clear service access to the equipment bay; don’t bury that side against a wall or fence. You will need to get in there.
Long-Term Care for a Hot Tub on Gravel
Choosing a gravel base isn’t a “set it and forget it” deal. It introduces unique maintenance rhythms you must follow to protect your investment. That crunchy sound underfoot is a constant reminder to stay vigilant.
Monitoring for Settling and Drainage
Gravel and the ground beneath it can still move over time. Every season, place a long, straight level on the spa’s frame in multiple directions. A single bubble out of center means it’s time to investigate and potentially relevel the tub by shimming the base, a task best left to a pro. After heavy rain, check for washouts or pooling water near the base, which can undermine stability. The drainage away from the pad should be positive and clear.
The Underside Environment
That open gravel area under the tub is a magnet for moisture, leaves, and curious critters. This microclimate demands attention.
- Moisture & Mold: Ventilation is key. Ensure side panels (skirts) are not sealed airtight. I use vented panels to allow airflow, which discourages mold and mildew on the underside of the acrylic shell.
- Debris & Pests: Regularly clear leaves and twigs from the gravel. Consider laying a permeable landscape fabric *under* the gravel during installation to help suppress weeds and make sweeping easier. Watch for signs of insects or rodents nesting.
Chemical and Water Management
Splash-out and rain will carry chemicals and water into your gravel. Routinely flush the gravel around the tub with fresh water to prevent chemical salt buildup, which can stain the bottom of your shell or attract moisture. Be extra cautious when adding dry chemicals to avoid spilling concentrated granules directly onto the base material, as they can discolour stones or concrete.
Your filter cleaning routine gets an extra step, too. Always rinse filter cartridges away from the hot tub pad to prevent dirty, debris-filled water from flowing back into your gravel foundation. That gunk will just settle and create a mess under your feet. I keep a dedicated drain area for this task on the other side of my yard.
Common Questions
Is a gravel base actually a good option for a hot tub?
Yes, a properly built gravel base is a professional-grade, drainage-friendly foundation. It is cost-effective and DIY-friendly, but its success hinges entirely on using the correct crushed stone and achieving a perfectly level, compacted base. It is not simply dumping a pile of loose gravel.
What are the critical steps to DIY a gravel hot tub pad?
The process is methodical: excavate and compact the soil, install weed barrier fabric, and add a minimum 4-inch layer of 3/4″ crushed angular stone. The final and most crucial step is thorough wetting and compaction of the gravel to create a solid, unyielding, and perfectly level surface that won’t shift.
When should I hire a professional contractor for installation?
Hire a professional if your site has significant slope, very poor soil drainage, or if you are installing a very large, heavy spa. A contractor, like an expert in Denver familiar with local soil and frost conditions, ensures proper excavation, compaction, and base construction to prevent costly settling and warranty issues.
How much does a gravel hot tub pad cost compared to concrete?
A DIY gravel pad is significantly less expensive, costing primarily for materials like crushed stone and fabric. A professional gravel installation costs less than a poured concrete slab but more than DIY. Concrete has a much higher initial cost due to materials and labor but offers ultimate permanence. These cost dynamics matter when weighing a DIY hot tub build against buying a pre-made unit, where time and effort also play a crucial role. A quick cost-time-effort analysis can help determine which approach best fits your schedule and budget.
Can I buy a pre-made gravel pad for my hot tub?
Pre-fabricated plastic grid systems filled with gravel are sometimes sold for this purpose. They can help with stability and drainage. However, their success still depends on proper site preparation-excavating and compacting a level sub-base-which remains the most critical part of the installation.
The Post-Installation Shakedown
Before you even think about that first celebratory soak, fire up the tub and let it run for a full cycle. Listen for any new vibrations or groans from the pump that might hint at a shifting base. This final operational test is your best insurance policy against discovering a leak or a loose connection only after you’ve filled it with hundreds of gallons of heated water. It’s also a good chance to familiarize yourself with the sounds your hot tub should make to help identify any potential issues early on.
The single most important habit for a gravel-based tub? Twice a year, get down on your hands and knees and scrutinize the perimeter of your hot tub’s base, looking for any signs of gravel washout, settling, or invasive weeds that could compromise your perfectly level foundation. A quick five-minute visual inspection in spring and fall prevents ninety percent of the “why is my tub leaning?” headaches. During summer, add a quick mid-season check after storms or heat spikes to maintain your hot tub through the warmer months. A little extra summer maintenance helps keep the base level and the experience carefree.
You’ve done the hard work of building a solid foundation-literally. Now, the only thing left to do is lower yourself into that perfectly balanced, soothing water and let the jets melt the effort away. You’ve earned it.
Further Reading & Sources
- Gravel Bases for Hot Tubs: The Easiest Hot Tub Pad
- Best Hot Tub Foundations – 6 Top Options For Your Spa
- r/hottub on Reddit: Gravel pad for hot tub
- Gravel Pad for Hot Tub
- How to build a gravel pad? | Trouble Free Pool
- Can A Hot Tub Sit on Gravel? – Zorra Hot Tubs and Swim Spas
Charlie is a hot tub enthusiast with a passion for keeping your jets running smooth and your bubbles bursting with joy. With years of experience in hot tub and jacuzzi maintenance, Charlie knows that a happy tub means a happy you. Whether it’s dealing with stubborn filters or giving your spa a little TLC, Charlie’s here to share expert tips, tricks, and plenty of laughs to help you keep your bubbly retreat in tip-top shape. So, kick back, relax, and let Charlie handle the rest — because no one likes a cranky jacuzzi!
Outdoor Setup