How to Salvage Your Hot Tub After a Storm: The First Critical Hour
Published on: March 12, 2026 | Last Updated: March 12, 2026
Written By: Charlie Bubbles
You walk out to a patio littered with branches, your hot tub lid askew, and the water inside a murky, leaf-choked soup. Your hot tub has suffered a direct hit from storm debris and power disruption, creating an immediate hazard for both the plumbing and your health. This isn’t just a nuisance; standing water with organic matter can breed bacteria in hours, and wet electrical components are a real danger. Your first move is always to shut off the power at the breaker.
- What You Need:
- Sturdy work gloves
- A garden hose with a spray attachment
- Chlorine shock (granular is fastest)
- A submersible pump or wet/dry vacuum
- Your smartphone for a flashlight
I’ve waded through enough post-hurricane tubs to promise you can handle this cleanup and get back to soaking without a technician’s invoice.
Safety First: Shutting Down Power and Initial Assessment
Before you even think about touching that hot tub, let’s talk safety. A storm can turn your backyard oasis into a hazard zone with hidden electrical risks and chemical spills. Your first move is always to shut off all power at the home’s main circuit breaker-don’t just rely on the tub’s control panel. I’ve waded through enough storm-wrecked yards to know that water and live electricity are a deadly mix.
Once the power is confirmed off, put on some sturdy shoes and gloves for your initial walk-around. Look for downed power lines nearby, standing water around the tub’s base, or any obvious cracks in the shell. If you smell the sharp, unpleasant odor of chlorine or bromine, approach with caution; scattered dry chemicals can be irritating to skin and lungs. I keep a box of baking soda in my garage just for neutralizing accidental spills-it’s a cheap and effective first response. It’s one of those tricks I learned from routine hot tub maintenance.
Here’s my simple checklist for that first, cautious assessment:
- Verify the GFCI breaker for the tub is tripped or off at the main panel.
- Scan for broken glass, sharp branches, or other debris littering the area.
- Check if the cover is missing, displaced, or visibly shredded.
- Look for signs of flooding that might have submerged the equipment compartment.
Only after you’ve confirmed this basic safety perimeter should you move on to a closer inspection. Rushing in without this step is how small problems become expensive, or even dangerous, repairs. I learned this the hard way years ago when a client’s pump shorted out from wind-driven rain-a $50 fix turned into a $400 motor replacement because the power was left on.
The Post-Storm Inspection: Hunting for Wind Damage and Debris
Now, with the power safely off, you can play detective. High winds are sneaky; they force dirt into places it shouldn’t be and stress every seam and joint. Start your hunt from the outside in, methodically checking each component for the storm’s signature. Listen for the slosh of water where it shouldn’t be and feel for grit on every surface.
Your inspection should cover these key areas:
- The Shell and Cabinet: Run your hand along the acrylic shell and wooden or synthetic cabinet. Feel for new cracks, dents, or loose panels. Wind can hurl objects with surprising force.
- Plumbing and Jets: Look closely at the jet faces and the pipe unions you can see behind the access panel. A telltale drip or a jet that feels loose could point to a cracked fitting behind the scenes.
- Interior Debris: Peer into the water. You’ll likely see a layer of leaves, silt, or even small twigs. This isn’t just dirty; it’s an acid test for your filtration system.
I remember a tub after a Texas thunderstorm where the water looked clear, but the faint hum of the circulation pump was strained. The culprit was a paste of fine sand and oak pollen, completely clogging a 50-micron filter cartridge in less than a day. This is why your post-storm ritual must include checking the filter basket and the pump intake for blockages before you even consider restoring power.
How to Inspect and Fix a Storm-Damaged Hot Tub Cover
Your cover is the first line of defense and often takes the brunt of the abuse. A damaged cover kills energy efficiency and lets contaminants pour in. Lift the cover carefully-if it’s waterlogged, it’s far heavier than you expect and can injure your back. Lay it flat on a clean tarp for a proper evaluation.
Follow this inspection sequence:
- Examine the Vinyl: Look for tears, especially along the seams and where the straps attach. Even a one-inch split can let in gallons of rain and debris.
- Check the Core: Press down on various sections. If you feel squishy, saturated foam, the insulation is compromised. A dry cover should feel firm and uniformly buoyant.
- Inspect the Hardware: Test the locking mechanisms, hinges, and straps. Bent metal or cracked plastic won’t secure properly.
For repairs, a DIY approach can save hundreds. For vinyl tears, I swear by a clear, waterproof vinyl repair kit and a strong adhesive like HH-66 PVC cement. Clean the area with rubbing alcohol, apply the patch from the inside if possible, and weight it down for 24 hours for a permanent, flexible seal. If the foam is wet, you can drill a few small drainage holes in the bottom side, let it dry for days in the sun, and then seal the holes with silicone.
But know your limits. If the cover’s structural spine is broken or if mold has taken hold inside the foam, replacement is the only safe and cost-effective option. I’ve patched many covers, but I also advise owners when a fix is just throwing good money after bad. Balancing the cost of a new cover against the energy wasted heating through a damaged one is simple math.
Dealing with the Deluge: Draining and Cleaning the Tub

After the wind dies down and the rain stops, you’re left with a tub that’s more swamp than spa. Your first move is always a complete drain; leaving storm water mixed with your sanitizer creates a corrosive soup that can damage pipes and the shell. I learned this the hard way after a tropical storm in Florida left my tub looking like a pond. Once the tub is drained and cleaned, refill promptly to restore balance. Waiting too long can let debris and lingering contaminants complicate rebalancing. Connect your garden hose to the drain spigot, run it to a safe runoff area, and let gravity do its work. If your pump is operational, use it to speed up the process, but never force a pump that’s grinding or making noise.
Before you start scrubbing, suit up with rubber gloves and eye protection. Storm debris can hide sharp objects, and residual chemicals in the water might still irritate your skin. Once empty, you’ll likely face a layer of silt, leaves, and maybe even small twigs plastered to the acrylic. Don’t reach for a pressure washer-its forceful stream can damage the shell’s glossy finish and force water into light fixtures or controls.
Step-by-Step Mud and Debris Removal
Here’s my field-tested method for getting rid of the gritty mess without causing new problems. I keep a dedicated wet-dry shop vac for this exact job.
- Dry Scoop: Use a plastic dustpan or your gloved hands to remove large debris like leaves and sticks. Toss it all into a heavy-duty trash bag.
- Vacuum the Grit: With your wet-dry vacuum on “dry” setting, suck up all the loose dirt and fine silt. Go slowly to get it all. Missing this fine silt is a common mistake; it will immediately cloud your fresh water and clog your filter.
- The Soak and Swirl: Mix a cleaning solution of warm water and a few ounces of mild, non-foaming dishwasher detergent. Avoid bleach or all-purpose cleaners. Pour it in and use a soft, white cloth or a microfiber mop to gently swirl the solution across the entire shell, focusing on stained or dirty areas.
- Final Rinse: Use a garden hose with a gentle spray nozzle to thoroughly rinse every inch of the shell. I often do this twice to ensure no soap film remains, as it will cause foaming later. Let the tub air dry completely in the sun if possible.
While the tub dries, clean your filters. Soak cartridge filters overnight in a solution of one part white vinegar to four parts water to dissolve mineral scale and organic gunk without harsh chemicals. For a deep clean, I use a filter cleaner designed for a 50-micron rating to ensure it traps the smallest particles when you restart. If a clog persists, a chemical soak can help clear it. We’ll cover how to do that as a quick next step.
Restarting Your System: Plumbing and Pump Checks
Now for the moment of truth-bringing the system back to life. Before you even think about adding water, do a visual inspection of all the visible plumbing and the equipment bay for cracks, loose fittings, or animal nests. After a big storm, I’ve found everything from chewed wires to frogs taking refuge next to the pump.
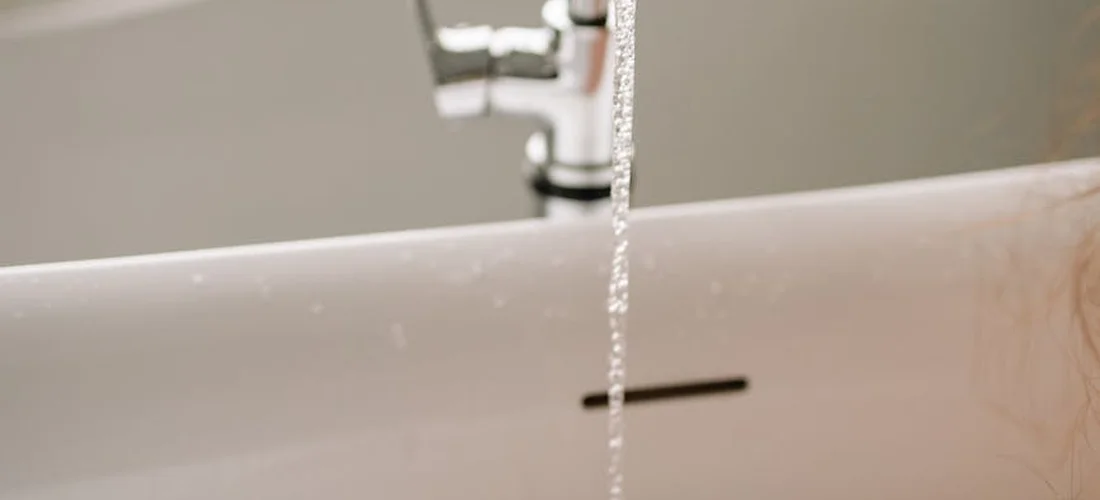
Once the visual check is clear, refill the tub using a hose filter to remove metals and sediments. As it fills, listen closely for the sound of water dripping inside the cabinet. A silent fill is what you want; any dripping or trickling sound means you have a leak that needs immediate attention with PVC cement rated for wet conditions.
With the water level above the filter intake, it’s time to address the pump. Here’s my restart sequence:
- Power on the system at the breaker, but keep the topside control panel off.
- Open the equipment panel and locate the circulation pump. Listen for its characteristic low hum. If it’s silent, it may have seized from debris or moisture.
- Manually rotate the pump impeller with a screwdriver (power off!) to check for free movement. A stuck impeller often means a pump replacement is needed.
If the pump hums but doesn’t move water, it’s likely air-locked. Loosen the union fitting on the pump’s output side slightly with a wrench until a steady stream of water weeps out, then tighten it back up-this bleeds the air pocket and often saves a service call. Once water is flowing, let the system run for a full 30-minute cycle, checking for unusual vibrations or hot spots on the pump motor that signal bearing wear.
Finally, balance your water. For a fresh fill after a storm, I always start by adjusting Total Alkalinity to 80-120 ppm, then pH to 7.4-7.6, before adding any sanitizer. This stable base prevents the chlorine from becoming too harsh or ineffective, saving you money on chemicals down the line. A well-tuned pump and balanced water are your best bets for energy efficiency and a trouble-free soak.
Rebalancing Your Water: Post-Storm Chemistry Recovery
After the wind dies down and you’ve scooped out the leaves, your real work begins. That rainwater and debris threw your water chemistry into chaos, diluting sanitizer and skewing pH. Ignoring this for even a day lets bacteria throw a party in your warm, inviting water. I’ve seen perfectly clean-looking tubs test with zero chlorine after a downpour. Your first move is always to test, not guess.
Grab your test strips or liquid kit. You’re looking for three core levels: total alkalinity, pH, and sanitizer. Rain is often acidic, so expect low pH and alkalinity. Here is your recovery sequence, the same one I use after every Texas thunderstorm.
- Balance Alkalinity First. Aim for 80-120 ppm. Think of alkalinity as the foundation for your pH; if it’s shaky, pH will bounce around. Use sodium bicarbonate (plain baking soda) to raise it. Add 1 tablespoon per 100 gallons, wait an hour, then retest.
- Correct the pH. Now target a pH of 7.2 to 7.6. Use pH increaser (soda ash) or decreaser (sodium bisulfate) as needed. Always add chemicals to water, never water to chemicals, and wear gloves-I learned that lesson with a minor skin burn years ago.
- Shock the System. This is non-negotiable. Use a chlorinating shock at double the normal dose, or a non-chlorine shock if it’s evening. This burns up organic contaminants and reactivates your bromine if you use it. You should smell that clean, sharp chlorine scent afterwards.
- Restore Your Sanitizer. Once shock has circulated for 30 minutes, test and add your primary sanitizer (chlorine or bromine) to bring it to 3-5 ppm. Your water should start to regain its jewel-like clarity.
This process isn’t just about comfort; it protects your equipment from corrosion or scale. Balanced water is energy-efficient water, letting your heater work smoothly without fighting mineral buildup.
My Field Trick for Storm-Affected Water
When test strips get soaked or you’re in a pinch, I use a simple field assessment from my toolbox. It won’t replace precise testing, but it gives you a fighting chance to start corrections. This trick saved me when a client’s shed flooded and ruined their test kit right after a storm.
You’ll need a white plastic bucket, fresh from the package if possible. Fill it with hot tub water.
- The Vinegar Fizz Test for Low Alkalinity: Drop a teaspoon of white vinegar into the bucket. If you see immediate, vigorous fizzing, your alkalinity is likely very high from windblown dust and soil. No fizz at all? Your alkalinity is probably too low, confirming the rain’s acidic effect.
- The Scent and Swirl Check: Swirl the bucket and take a cautious sniff. If you get no chlorine sting at all, your sanitizer is absolutely gone. If the water smells musty or like wet dirt, you have a serious organic load and need to shock immediately.
- The Clarity Hold: Hold the bucket up to the sky. If you see fine, suspended particles even after the big debris is out, your filter is overwhelmed and needs a cleaning cycle pronto.
This method uses your senses to triage the problem. It directs your first chemical investments wisely, so you don’t waste money throwing random solutions into 400 gallons of water.
The Final Operational and Safety Verification
Chemistry is balanced, but you’re not done. Before you sink into that soothing heat, you must ensure the storm didn’t harm the tub’s guts. I always perform this “power-on” check in this order for safety’s sake. Start with the power OFF at the breaker. Then follow the proper shutdown steps to ensure the hot tub is fully turned off. A complete shut-down protects the system and makes the next soak safer.
- Visual Inspection: Look for new cracks in the shell, especially near the water line. Check all jet faces and the suction cover (the skimmer) for tightness. A loose fitting can create a dangerous suction hazard.
- Plumbing and Leaks: Open the equipment compartment. Use a flashlight to look for water spray, drips, or damp insulation. Follow the pipes from the pump to the heater. After a big storm, I once found a small leak where a tree branch had knocked a pipe joint.
- Electrical Safety: Look for moisture in the control box, corrosion on connections, or any frayed wires. If anything looks amiss, call a pro. Water and electricity are a deadly mix; never take risks here.
Now, close the panel and restore power at the breaker. Turn on the tub.
- Listen to the Pump: That familiar hum should be smooth, not grinding or screeching. A strained sound could mean debris entered the impeller.
- Feel for Heat: Place your hand near the heating element outlet (usually a pipe near the equipment). You should feel warmth within a few minutes of the pump running. No heat could signal a tripped high-limit switch or a storm-related power surge that affected the heater.
- Verify Jet Pressure: Turn on each pump speed. Weak flow might indicate a clogged filter even after cleaning. Remember, a clean filter is your best friend for energy efficiency and clean water.
- Check the Cover: Ensure the storm didn’t compromise its seal or warp it. A soggy, heavy cover loses all its insulating value, making your heater work overtime.
Once everything runs smoothly, wait 24 hours and test your water chemistry again. This final verification loop confirms your recovery was a success and your sanctuary is truly safe and ready for relaxation.
Proactive Defense: Weatherproofing for Future Storms
Once you’ve dealt with the immediate aftermath, your next job is to make your spa more resilient. I’ve seen too many repeat damage claims from folks who figured “one bad storm was enough.” Building a good defense now saves you from frantic cleanup and costly repairs later.
Fortify Your First Line of Defense: The Cover
A flapping cover isn’t just noisy; it’s a seal breaking down. The vinyl gets stretched, the foam core absorbs moisture, and your thermal blanket is gone. Here’s how to lock it down.
- Invest in a Cover Locking System: Don’t rely on flimsy straps. A ratcheting aftermarket strap kit or a built-in lock system anchors the cover directly to the cabinet. It’s the single most effective upgrade for high-wind areas.
- Check and Condition the Seal: Run your hand along the underside lip of the cover. If it’s brittle or cracked, it’s leaking heat and letting in debris. Use a quality vinyl conditioner every season to keep it pliable. A good seal should hiss softly when you close it.
- Use a Cover Cap: This fitted, secondary tarp goes over your main cover. It shields the vinyl from UV degradation and provides an extra layer of wind deflection, taking the brunt of the abuse so your primary cover doesn’t have to.
Protect the Guts: Electrical and Mechanical Shielding
Your equipment bay is home to sensitive electronics. Driving rain and wind-blown debris are its enemies.
- Install a Dedicated GFCI Weatherproof Cover: That outdoor outlet your tub plugs into? The one with the little flip-lid? Swap it for a “while-in-use” cover. This heavy-duty box has a seal that closes snugly around the cord, keeping water out even when the tub is plugged in.
- Consider a Whole-Home or Portable Surge Protector: Lightning-induced power surges travel through lines and fry circuit boards. I had a client lose a pump and heater in one zap. A hardwired spa surge protector installed in the sub-panel, or a heavy-duty portable one for your outlet, is cheap insurance for your tub’s brain.
- Create a Windbreak for the Equipment Bay: If your tub’s panel faces the prevailing wind, a simple lattice screen or dense shrubbery planted a few feet away can drastically reduce wind pressure and deflect flying projectiles like acorns or pinecones.
Prepare the Water for a Power Loss
You can’t always stop the power from going out, but you can prepare your water so it doesn’t turn into a swamp while it’s off.
Before a forecasted storm, shock your water with a non-chlorine oxidizer or a slightly higher dose of your regular sanitizer. This creates a “chemical buffer” that fights off contaminants longer. Balance your pH and alkalinity to the perfect midpoint-this keeps the sanitizer working at peak efficiency. A balanced, shocked tub can often go 48-72 hours without power before water quality starts to slide, buying you crucial time.
Secure the Surrounding Area
Your tub’s biggest threats often come from its surroundings. Walk your patio and do a quick audit.
- Anchor lightweight furniture, umbrellas, and decor. Bring in potted plants.
- Trim back any tree limbs that are hanging directly over the spa. A fallen branch can puncture a cover or even crack the shell.
- Ensure deck drains or the grading around your tub is clear. You want water to flow away from the equipment bay, not into it.
This isn’t about building a bunker. It’s about smart, simple habits that become second nature. The few minutes you spend locking down and tuning up before the clouds roll in are hours of labor and worry you gift your future self. Trust me on that-I’ve been that future self, wet and frustrated, more times than I’d like to admit.
Common Questions
How do I drain the hot tub water properly after a major storm?
Use the built-in drain spigot connected to a garden hose, directing water to an appropriate runoff area away from your home’s foundation. If you use a submersible pump, place it in the deepest part of the tub and ensure the power source is GFCI-protected and away from standing water. Never force the tub’s own pump to drain if it’s making unusual noises, as this can cause further damage.
What are the key areas to inspect for hidden debris and damage?
Beyond visible leaves, you must check inside the skimmer and pump baskets, behind removable filter cartridges, and inside all jet openings. Carefully inspect under any built-in steps or seating ledges where silt and small debris collect. Don’t forget to check the underside of the cover and the sealing gaskets for embedded grit that can compromise the seal.
How should I check the electrical components and connections safely?
With the power OFF at the breaker, visually inspect the control box, heater connections, and pump terminals for moisture, corrosion, or fraying. Look for signs of water intrusion in the equipment compartment. If you see any concerning damage, do not restore power; contact a qualified electrician or hot tub technician. Your safety is paramount, especially when dealing with electrical components in hot tubs.
What is the best way to clean and sanitize the hot tub surfaces post-storm?
After removing all debris and silt, disinfect the entire shell with a solution specifically designed for acrylic spas or a diluted bleach mixture (follow manufacturer ratios carefully). Rinse thoroughly multiple times to prevent chemical residue. This step is critical to eliminate bacteria and mold spores introduced by storm water before you refill.
What is the correct sequence for testing and balancing water chemistry after refilling?
Always test and balance in this order: first adjust Total Alkalinity, then pH, and finally add your primary sanitizer. For a fresh fill, use a sequestering agent to bind metals from the water supply. Shock the water after balancing to oxidize any remaining organic contaminants. This sequence creates a stable foundation for clear, safe water, especially when setting up a hot tub for the first time.
Preventing a Relapse
Before you sink into that soothing warmth, give your tub a final safety check. Run all the jets for at least fifteen minutes. Listen for the smooth hum of the circulation pump and watch for any last bits of debris. Test your water’s sanitizer and pH levels with a fresh strip right after the cycle ends; safe, balanced water is the only kind you should be soaking in. If you’re new to this, a beginner’s guide to maintaining proper hot tub water chemistry can help you keep pH and sanitizer balanced. It’s a quick reference you’ll reach for before every soak.
My one golden rule, forged from years of repairing windblown tubs, is simple but powerful. After every soak, latch your cover securely and perform a quick five-minute perimeter check for loose branches or debris; this weekly habit is your cheapest insurance against storm chaos.
The hard work is done. Now, turn off the lights, slide into that crystal water, and let the jets melt the stress away. You’ve earned this soak.
Further Reading & Sources
- How to safeguard your hot tub before a big storm or hurricane – Hot Tub Sales
- How to Prepare Your Hot Tub for a Storm – Rising Sun Pools & Spas – Raleigh, NC
- Repairing a Hot Tub After a Storm in 6 Steps | Hot Tub Warehouse
- r/hottub on Reddit: should I turn off my hot tub during the storm?
- Checking in on Your Hot Tub After a Storm | Texas Hot Tub Company
- r/hottub on Reddit: Abandon hot tub, rebuild if she’ll is good or just scrap it?
Charlie is a hot tub enthusiast with a passion for keeping your jets running smooth and your bubbles bursting with joy. With years of experience in hot tub and jacuzzi maintenance, Charlie knows that a happy tub means a happy you. Whether it’s dealing with stubborn filters or giving your spa a little TLC, Charlie’s here to share expert tips, tricks, and plenty of laughs to help you keep your bubbly retreat in tip-top shape. So, kick back, relax, and let Charlie handle the rest — because no one likes a cranky jacuzzi!
Equipment Checks