
Don’t Get Soaked: The Used Hot Tub Inspection Checklist That Finds Hidden Flaws
Published on: September 25, 2026 | Last Updated: September 25, 2026
Written By: Charlie Bubbles
If the seller hurries you or says “it ran fine last season,” you’re likely staring at a project tub, not a plug-and-play paradise. This isn’t a simple nuisance-it’s a red flag for deferred maintenance that can drain your wallet faster than a leaky pump.
-
What You Need:
- A bright flashlight for cabinet interiors
- Standard water test strips
- A non-contact voltage tester
- Your own eyes, ears, and nose
- 20 minutes of focused time
Follow this hands-on guide and you’ll uncover the truth about any used spa yourself, saving the cost of a professional inspection.
Start with the Right Mindset: Your Pre-Inspection Questions
Walk into this inspection like a seasoned technician, not just a hopeful buyer. Your first tool is a good conversation with the seller, which has saved me from disastrous purchases more times than I can count. Get the story behind the spa before you ever touch it.
- Age and Model: Ask for the exact model name and year. Find the serial number plate; a tub over 8-10 years old may have obsolete parts.
- Maintenance History: Probe for specifics. “I added chlorine weekly” is okay, but “I tested alkalinity every Tuesday and shocked after heavy use” shows real care.
- Reason for Selling: Listen carefully. Legitimate upgrades are common, but vague answers like “just don’t use it” can hide nagging mechanical issues.
Confirm the electrical setup immediately. You must know if the spa is a standard 120V plug-in or a 240V hardwired model, as rewiring your patio is a major, costly project. I helped a neighbor who learned this the hard way, adding $1,200 to his budget.
Never inspect a cold, dry tub. Insist on scheduling your visit when the spa is full, heated to at least 90°F, and circulating, so you can hear the pumps and feel the heater work. A static shell tells you nothing about its heart, so even if you know how to check for issues, nothing beats seeing it in action.
The Visual and Structural Spa Inspection
This is where your eyes and hands separate a gem from a junker. Take your time and be thorough.
Checking the Acrylic Shell for Damage
Get inside the empty tub if possible. Bring a bright flashlight and angle it across the surface. Look for the subtle signs: hairline cracks often radiate from jet housings or the filter well, where stress concentrates.
- Cracks and Crazing: Inspect for physical cracks you can catch a fingernail on. Crazing appears as a fine, cloudy web of cracks and permanently weakens the acrylic.
- Blisters and Discoloration: Check for raised bubbles or deep, rusty stains. Blisters mean delamination, and stains hint at long-term metal or algae problems.
- The Touch Test: Run your entire hand over every square inch. You’re feeling for soft, flexible spots that indicate a broken bond with the supporting frame.
Press firmly around the waterline and seats. In my years repairing shells, a spongy feel underfoot almost always meant hidden water damage and a repair bill exceeding the tub’s value.
Assessing the Cabinet and Skirt Condition
Don’t just admire the exterior finish. Get on your knees and look up close. Weather and pests attack the cabinet from the bottom up, so the lower third tells the real story of neglect.
- Material Integrity: For wood, probe for soft, rotting wood with a key. For synthetic or composite, look for large cracks, warping, or fading.
- Pest Evidence: Shine a light inside the equipment bay. Look for chewed wires, nesting debris, or insect casings-common issues I’ve had to remediate.
- Access Panels: Open every door. Missing or broken panels expose critical plumbing to freezing temps and debris.
Check the skirt’s attachment points. Loose or cracked mounting rails mean the entire cabinet structure is compromised, a red flag I’ve seen lead to costly full replacements.
Evaluating the Spa Cover
Judge the cover without mercy; it’s a $400-$600 replacement item. Lift it yourself-a quality cover should feel light and manageable, not like you’re deadlifting a waterlogged mattress.
- Weight and Waterlogging: Heft it. If it’s extremely heavy, the foam core is saturated, and it’s failing at its primary job of insulation.
- Vinyl Condition: Check for brittleness, tears, or moldy seams. Run your hand over it; cracked vinyl leaks heat and moisture.
- Mechanics: Test the locking mechanisms for a secure click. Work the hinges through their full motion; they should move smoothly without sagging.
Fold a corner of the vinyl. If it cracks or shows white stress lines, the material is UV-damaged and will likely tear completely within a season, as happened on my first used tub purchase.
Testing Electrical Systems and Control Panel
This is where your inspection gets serious. A faulty electrical system isn’t just inconvenient; it’s a genuine hazard. Trust me, the acrid smell of a shorted wire in a spa pack is one you never forget. Let’s get it right.
Verifying Electrical Safety and Wiring
First things first: locate the breaker. You must see a dedicated, properly installed GFCI (Ground Fault Circuit Interrupter) breaker protecting the tub’s power supply; this device saves lives by cutting power in a fraction of a second if it detects a fault. It’s non-negotiable. Next, with the power safely OFF at the breaker, open the equipment bay. Use a flashlight. You’re looking for the ghost of problems past: corrosion. Green or white crusty powder on wires, connectors, or the circuit board is a major red flag. I once looked at a tub where corrosion had crept from a slow pump seal leak all the way to the main terminals-a four-digit repair hiding in plain sight. Now, after corrosion checks, test your hot tub’s GFCI breaker to ensure it’s working. We’ll cover the quick test in the next steps.
- Critical check for a proper, visible GFCI breaker.
- Look for corrosion in the equipment bay and on wire connections.
Operating the Control Panel and Lights
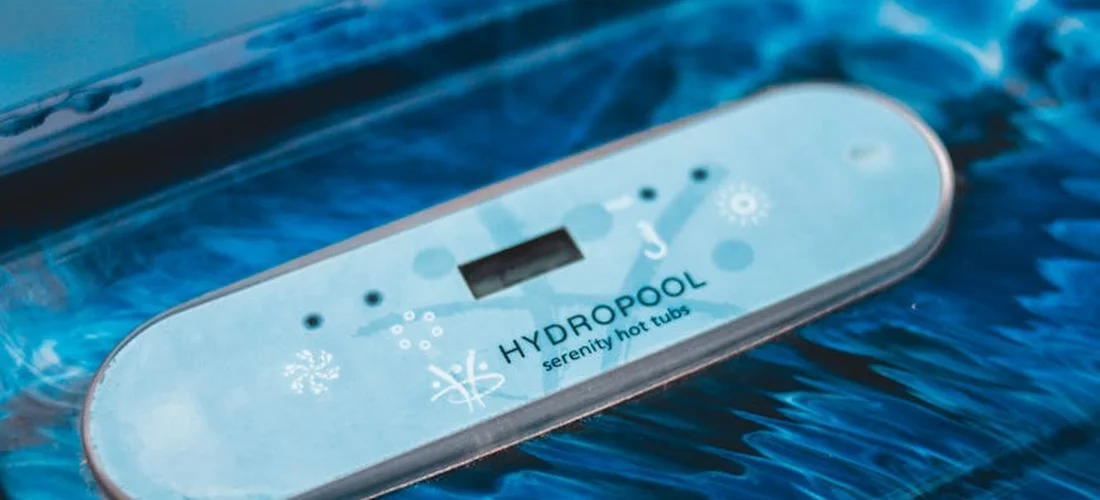
Power it back up. Now, be methodical. Don’t just press “jets.” Navigate through every menu on the top-side control. Check the temperature readout for accuracy. Test the pump speed settings, the light button, the lock feature. A sticky, unresponsive, or faded button often means moisture has invaded the membrane switch, and that whole top-side control unit will likely need replacement. Then, confirm every light works. Turn on the underwater lights and check for dead bulbs or dim spots. Don’t forget any exterior cabinet or step lights. Lighting is a small thing that becomes a big annoyance when it fails.
- Test all buttons, readouts, and settings for response.
- Confirm all underwater and exterior lights function.
Running the Plumbing and Mechanical Components
This is the symphony (or cacophony) of your spa. Close your eyes and listen as much as you look. A healthy tub should have a confident hum, not a death rattle.
Listening to Pump Performance and Noise Level
Start with the circulation pump-that’s the one that runs constantly. It should be almost whisper-quiet, a soft background purr. Any grinding, screeching, or rhythmic knocking means the bearings are shot. Now, fire up the main jet pump on high speed. A high-pitched whine or violent vibration signals an imbalanced wet end or failing motor; these pumps are workhorses, but they tell you clearly when they’re tired. Let it run for a few minutes. Feel the motor housing; it will be warm, but it shouldn’t be searing hot to the touch.
- Steps to listen for grinding, screeching, or excessive vibration from pumps.
- Test both circulation pump and jet pump modes.
Inspecting Jet Condition and Air Controls
Reach into the water. Manually rotate each jet face-they should spin freely to adjust flow direction. Push them in and out if they’re the diverter type. Note any that are stuck, broken, or missing entirely. Jet inserts are specific to the model and can be surprisingly costly to replace as a set. Then, engage the air blower (if equipped). You should hear a forceful rush of air and see bubbles erupting from the designated air channels. Test any diverter valves that shift power between jet banks; they should move smoothly and noticeably change the water pressure at your fingertips.
- Check that all jets rotate and adjust; note any missing or broken faces.
- Test air blower operation and diverter valves.
Looking for Plumbing Leaks
Keep the equipment bay open while the jets run on high. Get down on your knees and look for drips or sprays. Prime suspects are the pump union connections (the big plastic nuts), the seal on the pump wet end, and the plumbing connections at the heater. A single drip every few seconds can waste hundreds of gallons a month. Your most powerful negotiating tool is to politely insist the seller fill the tub completely for a final leak check; a wet shell leak hidden by an empty tub is the most expensive surprise of all.
- Guide for a visual leak test: check unions, pump seals, heater connections in the dry bay.
- Importance of asking the seller to fill the tub to check for wet shell leaks.
Verifying Heater Functioning and Filtration
These two components are the heart and kidneys of your spa. One creates comfort, the other preserves it. Neither is cheap to fix, so verify them thoroughly.
Confirming the Heater Works
You need a baseline. Note the current water temperature on the control panel. Ensure the heater is set to a higher temperature (like 102°F). Run the jet pump on high for 20-30 minutes to engage the heating cycle. Now check the readout again. You should see a clear temperature rise of at least 5-10 degrees; if the number is stagnant, the heater element, sensor, or relay is likely faulty. In the equipment bay, visually inspect the heater tube (usually a metal cylinder with pipes coming out). Heavy white scale crusting on it means poor water chemistry history and reduced efficiency.
- Steps to verify heat rise: note start temp, run jets on high for 20-30 mins, check for increase.
- Visual check of the heater element for scale or corrosion.
Inspecting the Filtration System
This is a two-minute task that speaks volumes. Ask the seller to show you how to remove the filter cartridge. Pull it out. Hold it up to the light. You’re looking for integrity. Are the pleats torn or collapsed? Is the fabric itself ripped? A filter with broken pleats is like a sieve with holes, allowing grit and algae to blow straight through into your plumbing and heater. Give it a sniff-a deeply foul, musty odor indicates severe bio-film contamination that soaking might not fix. Finally, peer into the empty filter standpipe in the tub for any visible cracks. If you’re unsure what a dirty, clogged filter looks like, compare it to pictures of dirty clogged hot tub filters. A quick visual reference can help you decide what steps to take next.
- Remove and inspect the filter cartridge for tears, broken pleats, or severe clogging.
- Check the filter housing and standpipe for cracks.
Considering Water Balance and Ozone Systems
If the seller has the tub filled and running, you’ve got a golden opportunity. The water tells a story the shell and jets can’t. I always carry a test kit in my truck for this exact moment. You’re not just testing; you’re reading the history of its care. Just make sure to look out for common pitfalls when buying used hot tubs.
Use a reliable test strip or liquid kit. Dip it in and check three things immediately: pH, total alkalinity, and sanitizer level (chlorine or bromine). Regular sanitizing and disinfecting your jacuzzi tub helps keep water clean and protects the equipment. A well-maintained tub will have balanced water, which is a huge green flag that the mechanical parts have likely been treated with similar respect. Aim for a pH of 7.4-7.6, alkalinity between 80-120 ppm, and a clear sanitizer reading.
Water that’s hazy, smells strongly of chemicals, or has scale buildup on the waterline hints at long-term neglect. That perfect pH balance protects the entire plumbing system from corrosion or scaling, so off-kilter water is a warning sign for your pump seals and heater element.
Inspecting the Ozone System
Peer into the equipment bay and look for a small, rectangular black box with tubing running into the plumbing. That’s an ozone generator. It’s a fantastic accessory that helps reduce chemical use, but it has a finite lifespan.
You need to ask two direct questions: How old is the ozone unit? And has the UV bulb or corona cell ever been replaced? Most ozone generators have a core component that burns out every 2-4 years, and replacing it costs about as much as a new unit. If the seller can’t answer, budget for a replacement.
A silent ozone generator isn’t a deal-breaker, but it’s a bargaining point. I’ve bought used tubs where the “included ozone” was just an empty shell. Knowing its true condition lets you calculate your final offer accurately.
Finalizing the Deal: Documentation and Cost Realities
Gathering Maintenance History and Warranty Transfer
Paperwork matters. Ask to see any service receipts, the original owner’s manual, or the sales invoice. A folder of records shows a conscientious owner. It’s also your roadmap to what’s been fixed before.
Get the model and serial number. Contact the manufacturer directly to ask two questions: Is there any remaining, transferable warranty on the shell or components? And are parts for this model still readily available? A five-minute phone call can reveal if you’re buying a supported system or an obsolete tub that will become a parts scavenger hunt. Some brands have generous transfer policies; others have none. Don’t rely on the seller’s word for this.
Calculating the True Cost of a Used Tub
The listed price is just the start. To avoid sticker shock, add these real costs to your budget before you say “yes.”
- Professional Moving: This isn’t a refrigerator. You need specialized spa movers with a cart. Cost: $300-$600.
- Electrician: Installing the proper 220V or 110V GFCI-protected circuit. Cost: $500-$1,500+.
- Missing Parts & Initial Repairs: A new cover ($400), filter ($70), or pump seal kit ($150) adds up fast.
- Initial Chemical Startup: You’ll need a full suite of balancers, sanitizer, and test supplies. Cost: $100-$150.
Now, add that total to the purchase price. Compare this all-in number to the cost of a new, entry-level tub from a reputable dealer that includes delivery, setup, and a full warranty. Also consider the hidden costs of hot tub ownership that aren’t obvious at checkout. Ongoing energy use, filter replacements, and routine chemical maintenance can add up. Sometimes, the “deal” on the used market vanishes when you do the real math. Your goal is an affordable soak, not a never-ending project that drains your wallet and patience.
## Common Questions
Should I hire a professional for a hot tub inspection, even with a checklist?
For most buyers, our detailed checklist is sufficient. However, hire a professional technician if you lack confidence, the tub is very high-end or antique, or you discover potential electrical or major plumbing issues during your inspection. A pro has tools like leak detectors and circuit analyzers to diagnose hidden problems that aren’t obvious during a visual check.
How much does a professional hot tub inspection cost?
Costs typically range from $100 to $300, depending on your location and the inspector’s expertise. For specific areas:
- General Average: $150 – $250 for a standard inspection and written report.
- Louisiana / New Orleans: Expect similar national averages, but always get a local quote.
This fee can save thousands by identifying a major fault before purchase.
What is the most important part of a hot tub inspection checklist?
While every step matters, verifying the **heater function and checking for plumbing leaks** are absolutely critical. A non-working heater is a costly repair, and undiscovered leaks can lead to water damage and mold. Our checklist ensures you test these systems under operating conditions (full, hot water) to see their true state.
Can I find a “hot tub inspection near me” online?
Yes. Search for “hot tub service” or “spa repair” companies in your area, as most offer pre-purchase inspections. For example, search “hot tub inspection near Oakland, CA” or “spa service Twin Cities.” Always read reviews, confirm they are insured, and ask exactly what their inspection includes before booking. To ensure you get the right help, look for a qualified, reliable hot tub repair technician. We’ll help you find one near you in the next steps.
Do inspectors use a standard hot tub inspection form?
Reputable inspectors use a detailed form or digital report that documents the condition of every major component: shell, cabinet, cover, pumps, heater, electrical, and controls. This report serves as your objective record and can be used for price negotiation. You can use our article’s sections as a model to create your own checklist if performing the inspection yourself.
The 7-Day Check
After you’ve navigated the checklist and are ready to make the purchase, give the system one final run. With the tub full, fire up every pump setting and let it run for a solid half-hour. This ‘heat soak’ test is your last chance to catch a slow leak or a heater that quits under real load before the deal is done. Listen for new rattles, feel for weak jets, and confirm that comforting warmth is building in the water.
Once it’s yours and running at home, your first line of defense is always the filter. Rinse your filters with a hose every single week, without fail, and you’ll prevent a staggering 80% of the flow, heating, and sanitizer problems that plague used spas. That simple five-minute habit keeps water moving freely, takes strain off the pump, and lets your chemicals work effectively.
You’ve done the hard work-the inspecting, the testing, the negotiating. Now, go fill it up, get that chemistry balanced, and finally take that well-earned, trouble-free soak. You’ve earned it.
Further Reading & Sources
- A Checklist of What to Expect During A Hot Tub Inspection
- Hot Tub, Spa, Whirlpool Bath Inspection Checklist
- The Ultimate Hot Tub Inspection Checklist | Toronto
- The Ultimate Hot Tub Inspection Checklist – Living Healthy, Living Happy
- Leslie’s Hot Tub Maintenance Checklist
- Used Hot Tub Evaluation Checklist – Hot Tub Insider
Charlie is a hot tub enthusiast with a passion for keeping your jets running smooth and your bubbles bursting with joy. With years of experience in hot tub and jacuzzi maintenance, Charlie knows that a happy tub means a happy you. Whether it’s dealing with stubborn filters or giving your spa a little TLC, Charlie’s here to share expert tips, tricks, and plenty of laughs to help you keep your bubbly retreat in tip-top shape. So, kick back, relax, and let Charlie handle the rest — because no one likes a cranky jacuzzi!
Equipment Checks