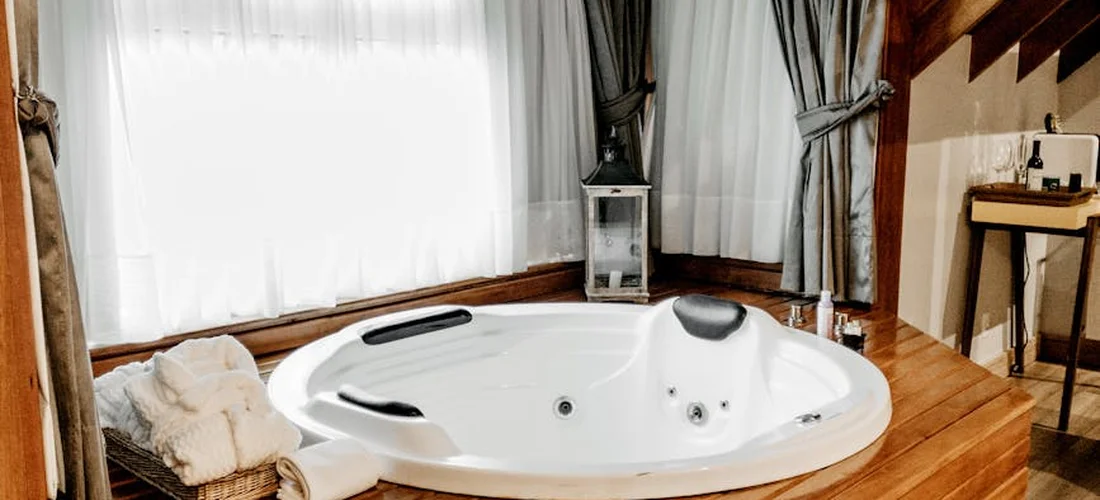
The First-Time Hot Tub Fill: Your Complete Water Setup to Prevent Murky Water and Costly Mistakes
In my years as a spa technician, I’ve seen the same rushed mistake dozens of times. If your brand-new hot tub water is already cloudy, has a sharp chemical odor, or the pump groans on startup, you probably added sanitizer before balancing the water. Starting with unbalanced water is a surefire way to burn through chemicals, strain your equipment, and never achieve that clean, inviting soak. This isn’t a dangerous electrical issue, but it’s a nuisance that will cost you time and money if not corrected immediately.
What You Need:
- A standard garden hose with an in-line filter to catch rust and sediment
- Fresh, dry test strips for total alkalinity, pH, and sanitizer levels
- pH increaser (sodium carbonate) and decreaser (sodium bisulfate)
- Your primary sanitizer-either chlorine granules or bromine tablets
- A metal sequestering agent to prevent stain-causing copper or iron
- Thirty focused minutes for testing and adjusting
By the end of this guide, you’ll have pristine, balanced water using simple tools, no professional required.
Gather Your Tools and Prep the Spa Site
Before you even think about turning on the hose, let’s get your spa pad ready. Rushing this step is the fastest way to waste a weekend, and I’ve learned that from showing up to fix leaks caused by uneven foundations. A little prep now saves you from massive headaches later.
Your Hot Tub Fill-Up Toolkit
You don’t need fancy gear, but having these items within arm’s reach makes the whole process smooth. I keep mine in a five-gallon bucket by my equipment.
- A garden hose dedicated solely to your hot tub. If you’ve ever used one for fertilizers or car washing, that residue can throw your water balance into chaos from the very first gallon.
- A in-line hose filter. This is non-negotiable for me. It catches metals and sediments, giving you a cleaner water canvas to work with before adding any chemicals.
- Clean microfiber cloths and a mild, non-abrasive spa surface cleaner. The shell must be spotless before it gets wet.
- Your trusty water test strips or a liquid test kit. Have them open and ready on a dry surface.
- A submersible pump or a wet/dry vacuum for suction. If this is a fresh start, you might not need it, but if you’re dealing with old water in the plumbing from testing, it’s a lifesaver.
Prepping the Spa Pad and Shell
Now, let’s get physical. The goal here is a stable base and a pristine interior.
- Clear the Area: Sweep away all debris, leaves, and dirt from the spa pad and the immediate surrounding area. You want a clean workspace.
- Inspect the Foundation: Get down on one knee and check for any shifting, cracking, or settling in your patio stones or concrete pad. An unlevel tub strains the frame and can lead to mysterious leaks that mimic pump seal failures.
- Deep Clean the Shell: With your dedicated cloths and cleaner, wipe down the entire interior. I once filled a tub only to see a greasy film rise to the top-traces of manufacturing protectant I’d missed. It took three rounds of shocking to clear.
- Verify Drain Valve is Closed: This sounds obvious, but after winterizing or a repair, it’s the most common mistake. Give the valve a firm hand-tight check to ensure it’s sealed.
The Step-by-Step Hose Fill Procedure
This is where the magic happens. That first hum of the circulation pump pulling in fresh water is a great sound. Fill slowly and methodically; your plumbing will thank you by avoiding air locks that can overheat your pump.
Connecting and Beginning the Fill
- Attach Your Filter: Screw the in-line hose filter onto your faucet spigot, then connect your clean garden hose to the filter’s other end.
- Place the Hose: Lay the hose end in the footwell of your hot tub, not directly over the filter compartment. We want to minimize air being driven into the suction lines.
- Turn on the Water: Open the spigot to a medium flow. A full-blast firehose stream can disturb the shell surface and isn’t any faster for the plumbing.
Monitoring and Managing the Water Level
Don’t just walk away. Stay close and watch the water rise.
- Your target water level is about one inch above the highest jet or to the midpoint of the skimmer opening. This is the sweet spot for proper filtration.
- As the tub fills, gently run your hand along the bottom to feel for any unseen debris the cleaning might have missed.
- Listen closely for the sound of water flowing smoothly; gurgling or spitting can indicate air in the lines, which we’ll address next.
Priming the System and Final Checks
Once the water hits the proper level, turn off the hose. Now, we wake the system up safely.
- Remove the Hose: Disconnect it and set it aside to drain.
- Open the Air Valves: Locate the air control valves on your topside-usually near the jets-and turn them all to the open position. This lets trapped air escape during priming.
- Power On: Turn on the hot tub at the breaker or control panel. You should hear the circulation pump start its soft hum.
- Bleed the Lines: Go to each jet face and briefly press on it to release any trapped air pockets. You’ll see bubbles rise. This simple act prevents pump cavitation.
- Check for Leaks: While the system runs, do a quick visual inspection of the equipment bay and all plumbing joints you can see. Look for drips or seepage. Catching a leak now is trivial compared to later.
Your tub is now full, but your work isn’t done-this is the critical moment to test and balance your water chemistry before you even think about heating it to soak. I always treat this fresh water like a delicate recipe, adding sanitizer and adjusters with care to avoid that harsh chemical sting later.
Balancing Your New Tub Water: The Chemistry Sequence
Now for the moment of truth-transforming that plain fill water into a safe, silky soak. Think of this like baking: you must add ingredients in the right order, or the recipe fails. Getting this sequence wrong is the single biggest mistake new owners make, and I’ve seen it turn water cloudy in minutes.
Step 1: The Foundation (Total Alkalinity)
Total Alkalinity (TA) is your water’s buffer, its ability to resist wild pH swings. Low TA makes pH unstable; high TA makes pH stubborn and can cause scaling. You’re aiming for 80-120 ppm.
- Test your fill water first. It’s often low.
- To raise TA, use sodium bicarbonate (plain baking soda, but buy the spa-grade stuff). Sprinkle it slowly over a running jet in the deep end.
- Wait 2 hours with the jets on, then retest. This patience is non-negotiable.
I learned this lesson hard: adjusting pH before TA is like building a house on sand-everything that follows just sinks.
Step 2: The Comfort Zone (pH Level)
With TA locked in, now adjust pH to the sweet spot of 7.4-7.6. This range feels best on your skin and lets your sanitizer work efficiently.
- pH too low (acidic)? Water becomes corrosive, stings your eyes, and eats at equipment. Use a pH Increaser (sodium carbonate).
- pH too high (basic)? Water gets scale-y, turns cloudy, and sanitizer gets lazy. Use a pH Decreaser (sodium bisulfate).
Always dissolve dry chemicals in a bucket of spa water first, then pour it slowly into the basin-dumping powder directly can stain or damage the shell.
Step 3: The Protector (Calcium Hardness)
Calcium Hardness prevents your water from becoming corrosive. Think of it as giving the water a bit of “structure.” Target 150-250 ppm. In the next steps, you’ll learn how to adjust water hardness in your hot tub. Properly adjusting hardness is essential for long-term equipment health and water comfort.
- Soft water (low calcium) will seek minerals anywhere it can, including your heater element and plumbing, slowly destroying them.
- Use a calcium hardness increaser (calcium chloride). Follow the label dosage based on your tub’s volume and test result.
Ignore this step and you’re inviting a costly, silent attack on your tub’s vital organs from the inside out.
Step 4: The Guardian (Sanitizer)
Finally, it’s time to establish your primary sanitizer. For most, this is chlorine (dichlor granules) or bromine.
- With your circulation pump running, add an initial “shock” dose per your product’s label for startup. This builds the sanitizer reserve.
- For chlorine, this is often about 3 tablespoons of dichlor for a 400-gallon tub, but always verify with your test strip afterward, aiming for 3-5 ppm.
That sharp, clean smell? That’s actually chloramines, used-up sanitizer. Properly balanced water has almost no chemical odor at all, unlike those sometimes musty or chemical smells that indicate problems.
Priming the System and Initial Startup
With chemistry balanced, it’s time to bring the machine to life. This is where you listen and look more than anything else.
Powering Up and Purging Air
Go to your control panel. Ensure the timer is set and the temperature setting is reasonable-start at 100°F.
- Turn the power on at the breaker. You’ll hear a click from the pack.
- Initiate a filter cycle. The circulation pump should hum to life. This small pump moves water 24/7.
- Open the air control valves on top of the tub (if equipped) all the way. You’ll hear a sucking sound and may see bubbles in the water. This pulls air out of the lines.
- After 30 seconds, close the air valves halfway. This prevents excessive air injection later.
That initial gurgle and sputter from the jets is normal as the system purges trapped air-let it run for a full minute until the stream is solid and steady.
The First Heat Cycle and Leak Check
Once water is flowing smoothly, the heater will engage. Your panel will show a “heating” icon.
- Do not put the cover on yet. Let the tub heat uncovered for this first cycle. This allows any lingering chemical gases to dissipate.
- This is your critical leak inspection window. Grab a flashlight and get on your hands and knees. Check every jet face, the pump union connections, the heater housing, and all plumbing you can see inside the cabinet. Look for drips, not torrents.
- A tiny bead of moisture at a connection might just be condensation. Mark it with a dab of tape and check if it grows in an hour.
A single drip per second can waste over 2000 gallons a year-catching a leak now saves your wallet and your floor.
Final Verification Before Your First Soak
Let the tub run for at least 2-3 hours before considering a test soak. For ongoing safety and enjoyment, keeping the water chemistry balanced is essential. A beginner’s guide to maintaining proper hot tub water chemistry will appear in the next steps.
- Re-test your sanitizer and pH levels. The heating process can alter them slightly.
- Ensure the water temperature is rising steadily on the display.
- Do a final visual: clear water, solid jet flow, no strange noises (like grinding or high-pitched screeching from the pumps).
- Now you can lower the cover. It will drastically improve heating efficiency.
Your first soak is the reward, but the real win is knowing you built a stable, safe foundation for thousands of soaks to come.
Critical First 24-Hour Maintenance Checks
That first hum of the jets is a victory, but your job isn’t done. The next day is all about verification. Think of it as a systems check before a long flight. I learned this the hard way after a new install years ago; I celebrated too soon and missed a slow leak at a union fitting that led to a much bigger headache a week later.
The first 24 hours are your grace period to catch installation or manufacturing flaws before they become your expensive problems.
Immediate Post-Fill Inspection (First Hour)
As the tub fills and the system first pressurizes, you need to be a detective. Grab a flashlight and a dry paper towel.
- Listen for the Unusual: Beyond the normal pump hum, listen for loud gargling, screeching, or grinding. These sounds can indicate trapped air (gurgling is normal for a minute) or a faulty pump seal.
- The Paper Towel Test for Leaks: Run the dry towel along every plumbing joint, the pump seal, the heater housing, and all around the equipment compartment. Even a pin-sized leak will leave a damp spot. Don’t forget the underside of the shell where jets and seats meet the acrylic.
- Verify Heater Engagement: Once the tub is at the proper fill level and the pump is running, your control panel should show a heat icon or a rising temperature. If it doesn’t, the pressure switch or flow sensor might not be detecting water movement.
The 12-Hour Chemistry & Clarity Check
By this point, the water has circulated and mixed with any initial chemicals you added. This is your baseline reading.
- Test All Three Pillars: Use fresh test strips or a liquid test kit. Your goals are:
- Alkalinity (80-120 ppm): The foundation. If this is off, your pH will bounce like a tennis ball.
- pH (7.4-7.6): The comfort zone. Too low, and your skin stings; too high, and your sanitizer naps on the job.
- Sanitizer Level (3-5 ppm for chlorine, 4-6 ppm for bromine): Your germ-fighting guard is now on duty.
- Look for Floating Debris or Foam: New water can sometimes develop a harmless, sparse foam from agitation. Persistent, sudsy foam indicates leftover manufacturing chemicals or contaminants that a purging agent should have removed.
- Feel the Water Flow: Put your hand over each jet. Are they all producing strong, consistent flow? A weak jet could mean an air lock or debris blockage.
Adjusting alkalinity first is non-negotiable; it’s the anchor that keeps everything else stable, saving you from a constant chemical tug-of-war.
The 24-Hour Final Systems Verification
One full day in, you’re looking for consistency and performance.
- Re-test and Balance: Test your water chemistry again. You’ll likely need small adjustments. This confirms your dosing calculations were correct.
- Check for Water Level Drop: Mark the water level on the shell with a piece of painter’s tape. Check it 24 hours later against the mark. A drop of more than 1/4 inch outside of normal splash-out likely indicates a leak you missed earlier.
- Monitor Temperature Gain: Your tub should have raised to your set temperature (typically 100°F-102°F). If it’s struggling to heat, it could be under-sized for a cold fill, or there might be a lingering air lock affecting the flow sensor.
Choosing Your Sanitizer and Establishing a Routine
Picking your sanitizer is like choosing a co-pilot. You need one you trust and understand for the long haul. I’ve used both chlorine and bromine for decades in different spas, and each has its own personality and care requirements.
Your sanitizer routine is the heartbeat of your spa care; skip a beat, and the whole system gets sick.
Chlorine vs. Bromine: The Practical Breakdown
| Sanitizer | Best For | How It Works | Maintenance Reality |
|---|---|---|---|
| Chlorine (Dichlor Granules) | Frequent use, warmer climates, faster sanitation. | Attacks contaminants directly and burns off quickly. You add it after each soak. | Daily testing is critical. It’s less stable in heat, so levels can drop fast. Can cause a sharper smell if combined ammonia (sweat, lotion) is present. |
| Bromine (Tablets in a Feeder) | Less frequent use, stable long-term sanitation, sensitive skin. | Creates a “reservoir” of active sanitizer. It regenerates as it works, leading to more stable levels. | Weekly feeder adjustment and testing. Generally milder odor. Bromamines (used-up bromine) are still active sanitizers, unlike nasty chloramines. |
Building Your Non-Negotiable Weekly Routine
Consistency is cheaper than repair bills. This is the 20-minute weekly ritual that keeps everything perfect.
- Test & Adjust (Twice Weekly Minimum): Dip that strip. Check alkalinity, pH, and sanitizer. Adjust alkalinity first, then pH, then top up sanitizer.
- Shock Therapy (Once Weekly): This is a non-negotiable reset. Use MPS (potassium monopersulfate) or your sanitizer’s shock. It burns off organic waste your daily sanitizer missed, restoring sparkle and potency. Do this on a night you won’t soak.
- Filter Rinse (Once Weekly): Pull the filter(s) and hose them down with a strong jet of water from your garden hose. This removes surface debris and keeps flow optimal. I do this on shock night.
Shocking isn’t optional; it’s the weekly reboot that prevents cloudy water and that lingering “used spa” smell by oxidizing what daily sanitizer can’t.
Monthly and Quarterly Deep Care
- Filter Deep Clean (Monthly): Once a month, soak your filter overnight in a dedicated filter cleaner solution. This dissolves invisible oils and calcium that hosing can’t touch. A clean filter is your best defense against poor flow and heater failures.
- Water Change (Every 3-4 Months): No matter how perfect your chemistry, total dissolved solids (TDS) build up. You can’t test for them easily, but they make your water dull and chemicals ineffective. Draining and refreshing is the ultimate reset.
- Shell & Cover Care (Monthly): Wipe down the shell waterline with a spa surface cleaner to prevent scum. Condition your vinyl cover with a UV protectant to keep it flexible and prevent cracking from the sun.
Common First-Time Fill Mistakes to Avoid

Filling a hot tub seems straightforward, but a few early missteps can haunt you for months. I’ve seen these mistakes cost folks time, money, and a lot of frustration. Let’s walk through them so your fresh start stays fresh. If you’re planning a drain-and-refill, there are seven common mistakes to avoid. Don’t make these 7 mistakes when draining and refilling your hot tub.
Neglecting the Pre-Fill Filter Soak
That crispy, new filter needs conditioning. Plopping it straight into the filter housing is a rookie error. Dry pleats can crack and won’t trap debris effectively, shortening the filter’s life from day one. Always soak a new filter in water mixed with a filter cleaner for 15 minutes before its first use; it softens the pleats and pre-cleans the media for optimal performance.
Adding Chemicals Directly to the Water
Dumping granules or liquid shock straight into the tub is a surefire way to stain or damage the acrylic shell. I’ve seen bleached-out spots where a chlorine puck settled on the bottom. Always dissolve dry chemicals in a bucket of warm tub water first, and pour liquids slowly into the middle of a deeply filled filter compartment with the pump running for instant, safe dilution.
Impatiently Cranking the Heat
Your instinct is to jump in, so you set the thermostat to 104°F right away. This forces the heater to work overtime on a massive, cold volume of water, straining the system. Set your initial temperature to around 80-85°F, let it run for 12-24 hours to evenly warm the entire mass of water and plumbing, then increase it in 5-degree increments. Your heater will thank you with a longer life.
Forgetting the Hose Filter
Tap water contains metals like copper and iron, and minerals like calcium. Filling without a pre-filter invites cloudiness, staining, and scaling. A $25 inline hose filter is non-negotiable; it captures contaminants before they enter your tub, making water balancing infinitely easier from the very first gallon. It’s the cheapest insurance you can buy.
Testing Water Too Soon
You fill the tub, add your starter chemicals, and test the water 30 minutes later. The readings will be wildly inaccurate because the water hasn’t fully mixed or stabilized. Let the circulation pump run for at least one full hour with the cover off before you take your first reliable sample for testing. Patience here gives you a true baseline.
When and How to Perform Your First Drain and Refill
Your sparkling new water won’t last forever. Knowing when and how to change it is the key to sustainable hot tub ownership. This isn’t just about swapping water; it’s a reset ritual.
When to Pull the Plug
Don’t just wait for the water to look bad. Schedule your first drain based on these clear signals:
- Age & Usage: Every 3-4 months is the standard. Heavy use or high bather loads shorten that.
- Chemical Impossibility: When you can’t maintain pH or sanitizer levels no matter how much you adjust.
- The “Feel” Test: Water feels slimy, smells persistently musty, or foams excessively even with balanced chemistry.
- TDS Creep: Total Dissolved Solids (measured with a test strip or meter) exceed 1500 ppm. This is dissolved sweat, oils, and chemicals that no filter can remove.
I mark my first drain on the calendar 90 days from the initial fill; it’s easier to stay ahead of water fatigue than to fight a losing battle against it.
The Step-by-Step Drain & Clean Process
1. Power Down & Drain
Turn off the power to the tub at the breaker. This is critical for safety. Attach a garden hose to the drain spigot and route it to a safe runoff area. Never drain onto your lawn or garden if you use chlorine or bromine-based sanitizers, as they will kill grass and plants. It’s important to properly manage water runoff when draining your hot tub. Let gravity do its work; a full tub can take an hour or more to drain completely.
2. The Critical Deep Clean
Once empty, this is your chance. Use a dedicated hot tub surface cleaner—not household sprays or abrasive pads. I mix a solution of water and white vinegar (4:1 ratio) for a natural clean on the shell. Scrub every nook: the waterline, headrests, and especially inside the filter compartment and jet faces. This biofilm removal between fills is what keeps your water genuinely clean, not just chemically treated.
3. Refresh Your Filters
Rinse your filters with a strong hose spray to dislodge debris. This is the time for a chemical cleaning. Soak them overnight in a filter cleaning solution to break down oils and deep-set grime. Rinse them thoroughly the next day. A clean filter is the heart of your circulation system; neglecting this step just puts dirty water into your fresh fill.
4. Refill & Restart
Close the drain, put your freshly cleaned filter back in, and use that hose filter! Fill the tub until the water level is about halfway up the skimmer opening. Restore power at the breaker. Before adding any chemicals, run the jets for 15-20 minutes with the air controls open to purge any air from the plumbing lines and ensure proper circulation. Now you’re ready to re-balance, starting with Alkalinity, then pH, then Sanitizer, just like the first time.
FAQs
Why is the hot tub fill line so important?
Hitting the correct fill line is crucial for your hot tub’s operation. It ensures your skimmer can pull in water effectively for filtration and prevents the pump from sucking in air, which can cause damage. Filling too low leads to poor filtration and pump strain, while overfilling wastes water and chemicals through spillage.
Do I need a special hose or adapter to fill my hot tub?
While not always mandatory, using a dedicated garden hose and an in-line filter is highly recommended to prevent introducing metals and sediment. A standard hose fits most spigots, but if your faucet has a non-standard thread, a simple universal hose adapter will solve the connection problem. The key is using a hose reserved only for filling the tub to avoid chemical or dirt contamination.
What is hot tub folliculitis and how can I prevent it?
Hot tub folliculitis, often called “hot tub rash,” is a skin infection caused by the bacteria *Pseudomonas aeruginosa* thriving in poorly maintained water. You prevent it by rigorously maintaining proper sanitizer levels and water balance. Ensure your filtration system is clean and shock the water weekly to destroy organic contaminants that harbor bacteria. If a rash appears, seek appropriate treatment to relieve symptoms and speed healing. Understanding hot tub rash treatment and prevention helps keep skin healthy and baths safe.
What are the main hot tub filter types and how do I choose?
The most common types are pleated cartridge filters and, less frequently, sand or diatomaceous earth (DE) filters for larger systems. If you’re weighing which type you need, understanding the basics of how each works helps you decide. For most residential tubs, you’ll use a pleated cartridge filter sized specifically for your model. Choosing the right one involves matching the filter’s nominal size (like 50 sq. ft.) and physical dimensions to your hot tub’s specifications for optimal water flow and cleaning.
How often should I replace my hot tub filter?
You should plan to replace your filter cartridge every 1-2 years with regular care. However, replace it immediately if you notice tears in the pleats, a permanently discolored or stiff media, or if it no longer cleans effectively after a deep soak. Even with weekly rinsing and monthly cleaning, filters wear out and lose efficiency, making replacement vital for clean water and equipment protection. To simplify staying on track, consider using a hot tub filter maintenance schedule printable checklist. It helps you record rinse, clean, and replacement dates so you don’t miss important steps.
The 7-Day Check
Before you finally sink into that first, well-earned soak, give your water and its systems a final inspection. Turn on all the jets to full power and watch for smooth operation. Feel the water temperature-it should be consistent and comfortable. Look for the perfect clarity you’ve worked for, free of any cloudiness or stray debris. This last check ensures your hard work has paid off and the environment is safe and inviting for relaxation.
The single most important habit you can build from day one is a simple filter rinse. Once a week, pull that filter out and spray it down with a garden hose until the pleats look brand new. I’ve seen countless water problems-from phantom sanitizer demand to heater failures-traced back to a single clogged, neglected filter. Make a weekly filter rinse your non-negotiable ritual, and you’ll prevent a huge majority of common hot tub headaches before they ever start. Beyond that, many want to know how to avoid the most common hot tub cleaning mistakes. Staying consistent with this routine is a big part of sidestepping those pitfalls.
The hard work is officially done. Your water is balanced, your system is humming, and your spa is ready. Go ahead-grab your towel, step in, and enjoy that first perfect soak. You’ve earned it.
Further Reading & Sources
- How to Set Up Your Inflatable Hot Tub | 5 Quick & Easy Steps
- r/hottub on Reddit: First time hot tub owner looking for advice on what to do upon setting up and general water quality maintenance.
- Hot Tub Setup Guide – Aqua Living Factory Outlets
- Beginners Guide to Hot Tub Maintenance: How to Set Up Your Spa | Expert Advice from Outdoor Living
- Your Hot Tub Startup Guide: 6 Easy Steps – FROG Products
- Setting Up Your Hot Tub – A guide for New Hot Tub Owners | Hot Tub Maintenance and more | Great Backyard Place The Great Backyard Place Blog blog
Charlie is a hot tub enthusiast with a passion for keeping your jets running smooth and your bubbles bursting with joy. With years of experience in hot tub and jacuzzi maintenance, Charlie knows that a happy tub means a happy you. Whether it’s dealing with stubborn filters or giving your spa a little TLC, Charlie’s here to share expert tips, tricks, and plenty of laughs to help you keep your bubbly retreat in tip-top shape. So, kick back, relax, and let Charlie handle the rest — because no one likes a cranky jacuzzi!
Outdoor Setup